 StainList
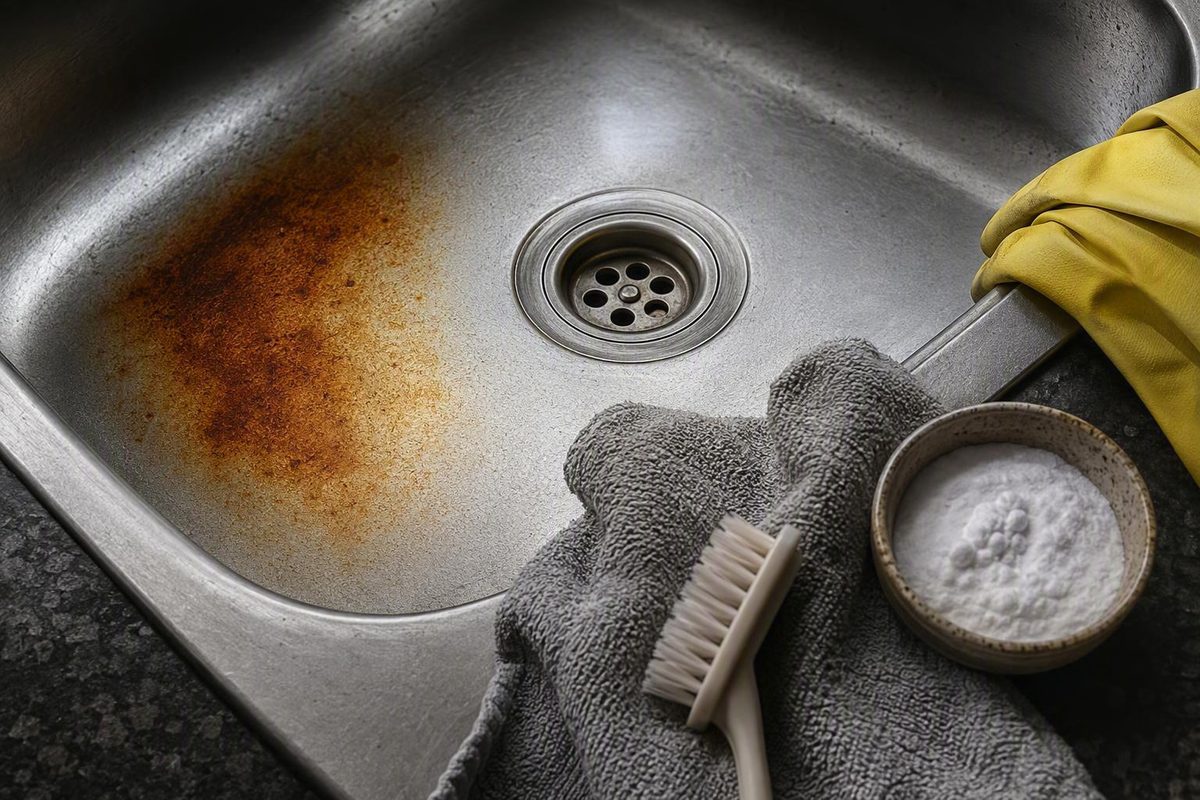
Quick answer: identify the sink before treating the stain
To remove rust stains from a sink without damaging its finish:
- Remove cookware, utensils, cans, sponges, and loose debris.
- Identify the sink material from reliable documentation.
- Check the sink manufacturer’s current care instructions.
- Patch-test the proposed cleaner in an inconspicuous area.
- Use a soft cloth or nonabrasive sponge.
- Rinse away the cleaner completely.
- Dry the surface with a soft towel and inspect it under good light.
Stop immediately if the test area becomes dull, scratched, discolored, or different in texture. If a compatible cleaner makes little difference, do not assume that more pressure or a rougher pad will solve the problem. Long-standing discoloration can become permanently etched or stained, particularly on porcelain, according to Mr. Handyman’s sink and tub guidance.
This guide provides conservative procedures for two categories:
- Ordinary, uncoated stainless steel
- A surface explicitly identified as porcelain in the sink manufacturer’s documentation
“Confirmed porcelain” does not mean a sink that merely looks like porcelain. If the manufacturer describes the surface as porcelain enamel, enamel, vitreous china, fireclay, refinished, reglazed, or another material, use this procedure only when both the sink manufacturer and the cleaner label approve that exact surface.
This guide does not establish safe cleaning methods for acrylic, fiberglass, enamel, composite, natural stone, copper, refinished surfaces, or specialty coatings. Colored, matte, polished, PVD-coated, or otherwise treated stainless steel also falls outside the ordinary stainless-steel procedure unless its manufacturer approves the treatment.
Do not identify an uncertain sink solely by color or appearance. Check the purchase record, model number, label beneath the basin, manufacturer’s documentation, or information from the installer. If those sources do not resolve the question, ask the manufacturer before applying a rust remover or abrasive paste.
The governing principle is simple: use the least aggressive treatment confirmed to be compatible with the material. Cleaning harder is not the same as cleaning more effectively.
Choose the procedure by sink material
Use this table as a routing guide, not as a substitute for the sink’s care instructions or the cleaner’s current label.
| Sink material | Compatible candidates | Application approach | Avoid or defer |
|---|---|---|---|
| Ordinary, uncoated stainless steel | Soft cloth or nonabrasive sponge; manufacturer-approved mild cleaner; optional baking-soda-and-water paste if permitted; rust remover explicitly labeled for stainless-steel sinks | Patch-test, work with the brushed grain, rinse completely, and dry | Steel wool, metal brushes, bleach, chloride-based cleaners, oven cleaner, and harsh abrasives unless the sink manufacturer expressly permits a particular product. These restrictions are consistent with stainless-steel care guidance from Ruvati. |
| Confirmed porcelain | Nonabrasive sponge; dedicated rust remover whose current label explicitly lists porcelain | Patch-test, follow the label’s application and contact time, work gently, rinse thoroughly, and inspect | Steel wool and aggressive pads. A single plumbing Q&A recommends a porcelain-labeled remover and nonabrasive sponge while warning against abrasive tools (JustAnswer’s porcelain-sink guidance). |
| Unknown, coated, acrylic, fiberglass, porcelain enamel, enamel, composite, stone, copper, refinished, or specialty finish | Only treatments approved in the manufacturer’s care instructions and on the cleaner label | Confirm the precise material and finish before cleaning | Do not adapt the stainless-steel procedure or assume that a product labeled for porcelain is safe for another glazed or coated surface |
A cleaner’s compatibility label matters more than the broad term “rust remover.” Formulas and permitted surfaces vary. A product intended for masonry, fabric, toilet bowls, or automotive metal should not be transferred to a sink merely because it removes rust elsewhere.
Contact time cannot be standardized from general online advice. Published recommendations for homemade and commercial treatments range from very brief contact to extended soaking, but they concern different formulas, surfaces, and stain conditions. Use the product label and sink manufacturer’s instructions rather than adopting a universal dwell time.
How to remove light rust spots from an ordinary stainless-steel sink
A small orange or brown spot on ordinary stainless steel usually calls for controlled surface cleaning, not forceful scouring.
1. Clear the basin
Remove:
- Cast-iron cookware
- Baking sheets
- Flatware and utensils
- Metal cans
- Wet sponges and cloths
- Unapproved racks or strainers
- Anything that has trapped moisture against the surface
Wet cookware, utensils, cans, and other metal objects can leave iron-bearing residue on the basin. Trapped moisture and iron in the water supply are also plausible sources of rust-colored deposits.
2. Remove loose residue and find the grain
Wash or rinse the affected area so loose grit does not add abrasion. Dry the surface enough to see the brushed grain—the fine lines running across the steel.
Rub in the direction of those lines rather than across them. Baking soda is abrasive enough to make scratches more noticeable if it is worked across a brushed finish. A kitchen-remodeling company’s demonstration likewise advises rubbing with the grain and limiting repeated treatment to one or two additional attempts (Duncan’s Creative Kitchens).
If the steel is mirror-polished, coated, colored, or has no identifiable grain, pause and consult the manufacturer instead of guessing at the appropriate rubbing direction.
3. Consider a mild baking-soda-and-water paste
If the sink manufacturer permits baking soda, combine it with a small amount of water to make a thick paste. Treat this as an optional mild abrasive, not as a guaranteed rust solvent or a universally safe remedy.
Patch-test before treating the visible spot:
- Put a small amount of paste on an inconspicuous area.
- Rub very lightly with a soft cloth or nonabrasive sponge.
- Rinse completely.
- Dry and compare the test area with the surrounding finish.
If the finish remains unchanged, apply a small amount of fresh paste directly to the stain. Rub gently with the grain and keep the treatment localized.
Do not adopt an overnight dwell time simply because one appears in general cleaning advice. Available recommendations differ substantially and do not establish one safe duration across stainless-steel grades and finishes. Unless the sink manufacturer directs otherwise, favor brief contact and gentle work over a prolonged soak.
4. Rinse, dry, and reassess
Rinse away all paste and dry the sink with a soft towel. Inspect the area under bright, angled light.
If the mark is lighter and the finish is unchanged, another gentle attempt may be reasonable. If one or two careful attempts make no meaningful difference, stop increasing the pressure. Move to a properly labeled rust remover or investigate whether the mark is pitting, permanent discoloration, or a recurring deposit rather than removable surface residue.
A rust-colored spot does not automatically prove that the stainless steel itself is corroding. Wet cast iron, baking sheets, utensils, cans, and iron-bearing water can deposit colored material on the basin. Corrosion remains possible, especially where the surface is damaged, so appearance alone cannot establish the cause.
How to treat a stubborn stain on stainless steel
If a mild, manufacturer-approved method does not remove the mark, use a dedicated cleaner only when:
- Its current label explicitly permits use on stainless-steel sinks
- The label identifies rust as an intended target
- The sink manufacturer does not prohibit the cleaner or its active ingredient
Some sink and cleaner manufacturers recommend oxalic-acid cleaners for stubborn rust on stainless steel. These are commercial care recommendations, not independent comparative evidence that one ingredient or brand is best for every sink.
Follow a label-directed sequence:
- Read the entire label before opening the product. Confirm the permitted surface, application method, contact time, ventilation, protective equipment, and rinsing requirements.
- Ventilate as directed.
- Wear the protection specified on the label.
- Patch-test in a hidden area. Rinse and dry the test area before judging it.
- Apply with a nonabrasive tool. Follow the grain unless the sink manufacturer directs otherwise.
- Observe the exact contact time. A generic time from a blog must not override the product label.
- Rinse thoroughly and dry. Inspect the finish before considering another application.
Rinse one cleaner away completely before using anything else. That includes homemade products: do not apply a commercial rust remover over residual baking soda, vinegar, bleach, or another cleaner.
Avoid steel wool, metal brushes, bleach, chloride-based cleaners, oven cleaner, and harsh abrasive powders unless the sink manufacturer expressly approves the specific product and method. Stainless-steel manufacturer guidance warns that steel wool and bleach can damage the surface (Ruvati’s stainless-steel care guide).
Stop if the finish dulls, scratches, changes color, or develops a different texture. Also stop if careful, label-compliant treatment produces no meaningful improvement. Continued abrasion may alter the surrounding finish without removing pitting or permanent discoloration.
How to remove a rust stain from a porcelain sink
Keep the porcelain procedure separate from the stainless-steel method. Porcelain has no metal grain to follow, and a cleaner labeled for stainless steel is not automatically approved for porcelain.
Use this procedure only when manufacturer documentation identifies the exposed surface as porcelain. A sink described as porcelain enamel or simply enamel remains outside this procedure unless both the sink manufacturer and cleaner label approve that exact surface.
Be especially cautious with an old, cracked, chipped, repaired, refinished, or reglazed sink. If its present surface cannot be confirmed, consult the manufacturer or a restoration professional rather than testing general cleaning recipes.
For confirmed porcelain:
- Read the sink’s care instructions.
- Choose a dedicated rust remover whose current label explicitly lists porcelain.
- Patch-test it in a hidden area.
- Apply it exactly as the label directs.
- Observe the stated contact time.
- If agitation is allowed, use a soft cloth or nonabrasive sponge.
- Rinse thoroughly.
- Dry and inspect the finish in good light.
This sequence is consistent with a single expert assessment involving older porcelain sinks with drain-area stains. That assessment recommended a porcelain-labeled rust remover, label-controlled contact time, gentle work with a nonabrasive sponge, and avoidance of steel wool and abrasive pads. It also cautioned that old stains might be permanently etched or stained if a suitable remover made no difference (JustAnswer’s expert Q&A).
Do not use steel wool or an aggressive scouring pad. Although some general cleaning articles recommend pumice on porcelain, the supplied guidance is inconsistent about abrasive tools and does not establish pumice as safe for every porcelain surface. It should not be treated as a general-purpose solution.
If discoloration circles the drain or overflow and returns soon after cleaning, stop treating it solely as a cleaning problem. Check for:
- A loose or visibly corroded drain flange
- Moisture or leakage beneath the fixture
- Rust-colored water coming from the drain or overflow opening
- Deteriorated accessible hardware
- Staining that appears as standing water evaporates
Concealed hardware corrosion is possible, but the pattern does not prove it. Iron-bearing water or deposits around continuously wet fittings can produce similar discoloration.
Why the baking-soda-and-vinegar remedy needs limits
Baking soda and vinegar are frequently presented as a universal rust remedy, but the evidence for sinks is narrow and anecdotal.
One personal demonstration used three parts baking soda to one part vinegar on three small stainless-steel spots and reported leaving the paste on stubborn areas for 10–15 minutes (Handmade Weekly’s demonstration).
A separate commercial demonstration added vinegar only until the baking soda formed a paste and suggested one to 10 minutes of contact. It also advised rubbing with the stainless-steel grain (Duncan’s Creative Kitchens).
These materially different recipes and contact times do not establish a universal formula. Other general instructions extend treatment much longer, but the available sources do not show which ratio or duration is safest or most effective across different steel grades, finishes, coatings, stain ages, and contamination sources.
Baking soda and vinegar visibly fizz when mixed. That observation is not proof that the mixture removes rust better than either ingredient alone or than a labeled cleaner. The cited demonstrations are not controlled comparisons, so the mixture should not be described as uniquely powerful, scientifically proven, universally safe, or suitable for every sink.
For ordinary stainless steel whose manufacturer permits baking soda, a baking-soda-and-water paste is the simpler optional first treatment. It provides mild mechanical cleaning without adding an acidic ingredient. It still requires a patch test, gentle work with the grain, complete rinsing, and inspection afterward.
If you nevertheless use a baking-soda-and-vinegar mixture on manufacturer-approved ordinary stainless steel:
- Test a small hidden area first.
- Keep the treatment localized.
- Work gently with the grain.
- Do not substitute an unsupported prolonged soak for the manufacturer’s instructions.
- Rinse completely.
- Dry the surface.
- Stop immediately if the finish dulls, scratches, discolors, or changes texture.
Do not transfer this remedy to porcelain, porcelain enamel, enamel, acrylic, fiberglass, composite, stone, copper, or a coated finish without explicit manufacturer approval. For a stubborn stain, a surface-compatible labeled remover is the more controlled escalation because its directions identify permitted surfaces and contact time.
Find out why the rust keeps returning
Cleaning removes the visible mark, but not necessarily its source. Diagnose recurrence by considering where the staining appears, how quickly it returns, and whether other fixtures are affected.
Isolated spots where objects were resting
If a stain follows the outline or contact point of cookware, a baking sheet, flatware, a can, or another wet metal object, transferred iron contamination is plausible. Remove the object and inspect its underside for corrosion.
A wet sponge or cloth can also trap moisture and residue against the basin. Even if it is not the source of iron, the damp contact area can allow deposits to remain.
Stains across multiple fixtures
If rust-colored marks appear on several sinks, tubs, or toilets—or the water itself looks rusty—the source may extend beyond one fixture. Possibilities identified in commercial home-maintenance guidance include:
- Iron in the water supply
- Corroded pipes
- A deteriorating water heater
- Corroded fixture components
- Sediment or deposits left as water evaporates
These causes warrant investigation rather than diagnosis from stain color alone (Mr. Handyman’s recurrence guidance).
When several fixtures are affected, arrange suitable water-quality testing or professional assessment before selecting treatment equipment.
Staining around the drain or overflow
A ring around a drain flange or overflow opening warrants closer inspection. Check whether:
- The flange is loose
- Visible metal is corroded
- Water leaks below the basin
- Rust-colored water emerges from the opening
- The area remains continuously wet
- The stain returns within days of cleaning
The pattern may be consistent with corroded hardware, but it can also result from iron-bearing water collecting and evaporating around the fitting. Do not replace concealed parts solely because a stain is orange.
Rapid recurrence
A stain that reappears shortly after removal points to an unresolved source. Repeated cosmetic cleaning will not correct leaking hardware, iron-bearing water, a deteriorating heater, or continued contact with rusting objects.
Consider water-quality testing or a plumbing assessment when:
- Several fixtures are affected
- The stain returns within days
- The water appears rusty
- A drain flange or other component is visibly corroded
- A leak is present
- The problem began after plumbing or water-heater work
- Cleaning removes the stain but it repeatedly reforms in the same place
Treat stain location and recurrence as clues, not proof.
Prevent new stains and know when to stop
Prevention and source correction are generally safer than repeatedly abrading the sink.
Remove cast iron, metal utensils, baking sheets, cans, wet sponges, and other moisture-trapping objects promptly. Rinse away food residue and cleaning products after use, then dry the sink with a soft towel—especially around the drain, edges, and areas where water pools.
Repair dripping faucets and leaks. A continuously wet area gives deposits more opportunity to accumulate and can conceal deterioration around fittings.
Use only racks, grids, mats, and protectors approved for the specific sink. Do not assume that every liner protects the finish: one stainless-steel cleaning-product manufacturer warns against rubber mats because they can trap moisture against the surface (Bar Keepers Friend’s sink-care precautions).
If iron-bearing water is suspected, seek suitable testing or professional assessment. The correct response depends on whether the source is the water supply, pipes, water heater, or fixture hardware—not merely on the color of the stain.
Stop cleaning when any of the following occurs:
- The surface becomes dull
- New scratches appear
- The color changes
- The texture changes
- Pitting is visible
- Gentle, compatible treatment makes no meaningful improvement
- The stain returns almost immediately
Contact the sink manufacturer when the material or finish is uncertain. Consult a plumber when recurrence is associated with leaks, drain hardware, corroded pipes, a water heater, or rust-colored water. A valuable, refinished, antique, or visibly damaged sink is better assessed by a surface-restoration professional than subjected to repeated experimental cleaning.
Frequently asked questions
Can I use bleach to remove rust stains from a stainless-steel sink?
Not as a default treatment. Stainless-steel care guidance warns against bleach and chloride-based cleaners because they can damage the surface. Use them only if the sink manufacturer expressly approves the specific product and method (Bar Keepers Friend’s stainless-steel guidance).
Choose a mild cleaner approved by the sink manufacturer or a rust remover explicitly labeled for stainless-steel sinks. Do not apply another treatment over bleach residue; rinse the previous product away completely first.
Does rust on a stainless-steel sink mean the sink itself is corroding?
Not necessarily. Wet cast iron, baking sheets, flatware, cans, and iron-bearing water can deposit rust-colored material on stainless steel. A spot where a wet object rested may therefore be transferred contamination rather than deterioration of the basin.
Stainless steel can still corrode or become pitted. If a mark has a rough or indented texture, does not respond to a compatible cleaner, or repeatedly develops without an obvious external source, stop scrubbing and seek manufacturer or professional guidance.
How long should a rust cleaner stay on the sink?
Use the contact time on the cleaner’s current label, provided the sink manufacturer permits that product. Online recommendations differ substantially, so there is no defensible universal dwell time.
Longer contact is not automatically better. For an approved homemade treatment, use a patch test and conservative contact instead of adopting an extended soak written for another formula or surface.
Why do rust stains keep appearing around the drain or on multiple sinks?
Staining around one drain may be associated with standing water, deposits from the water, a loose or corroded flange, or leakage.
Neither pattern proves a single cause. Inspect accessible hardware and leaks, note whether rust-colored water is present, and consider water-quality or plumbing assessment if the stains return quickly.
Can an old rust stain become permanent?
Yes. A long-standing mark may represent permanent staining, etched porcelain, or pitted stainless steel rather than removable residue. Stronger abrasion may damage the surrounding finish without eliminating the discoloration.
Stop if the surface changes or an approved cleaner produces no meaningful improvement. For a valuable, refinished, antique, or visibly damaged sink, consult a restoration professional before attempting a more aggressive process.
The material-first takeaway
Match the treatment to the documented surface: use gentle, grain-following cleaning on ordinary uncoated stainless steel, a porcelain-labeled rust remover on confirmed porcelain, and manufacturer guidance for every uncertain or specialty finish. If a compatible cleaner does not work after careful treatment—or the stain quickly returns—stop scrubbing and investigate the water, drain hardware, plumbing, pitting, or permanent surface damage.