 StainList
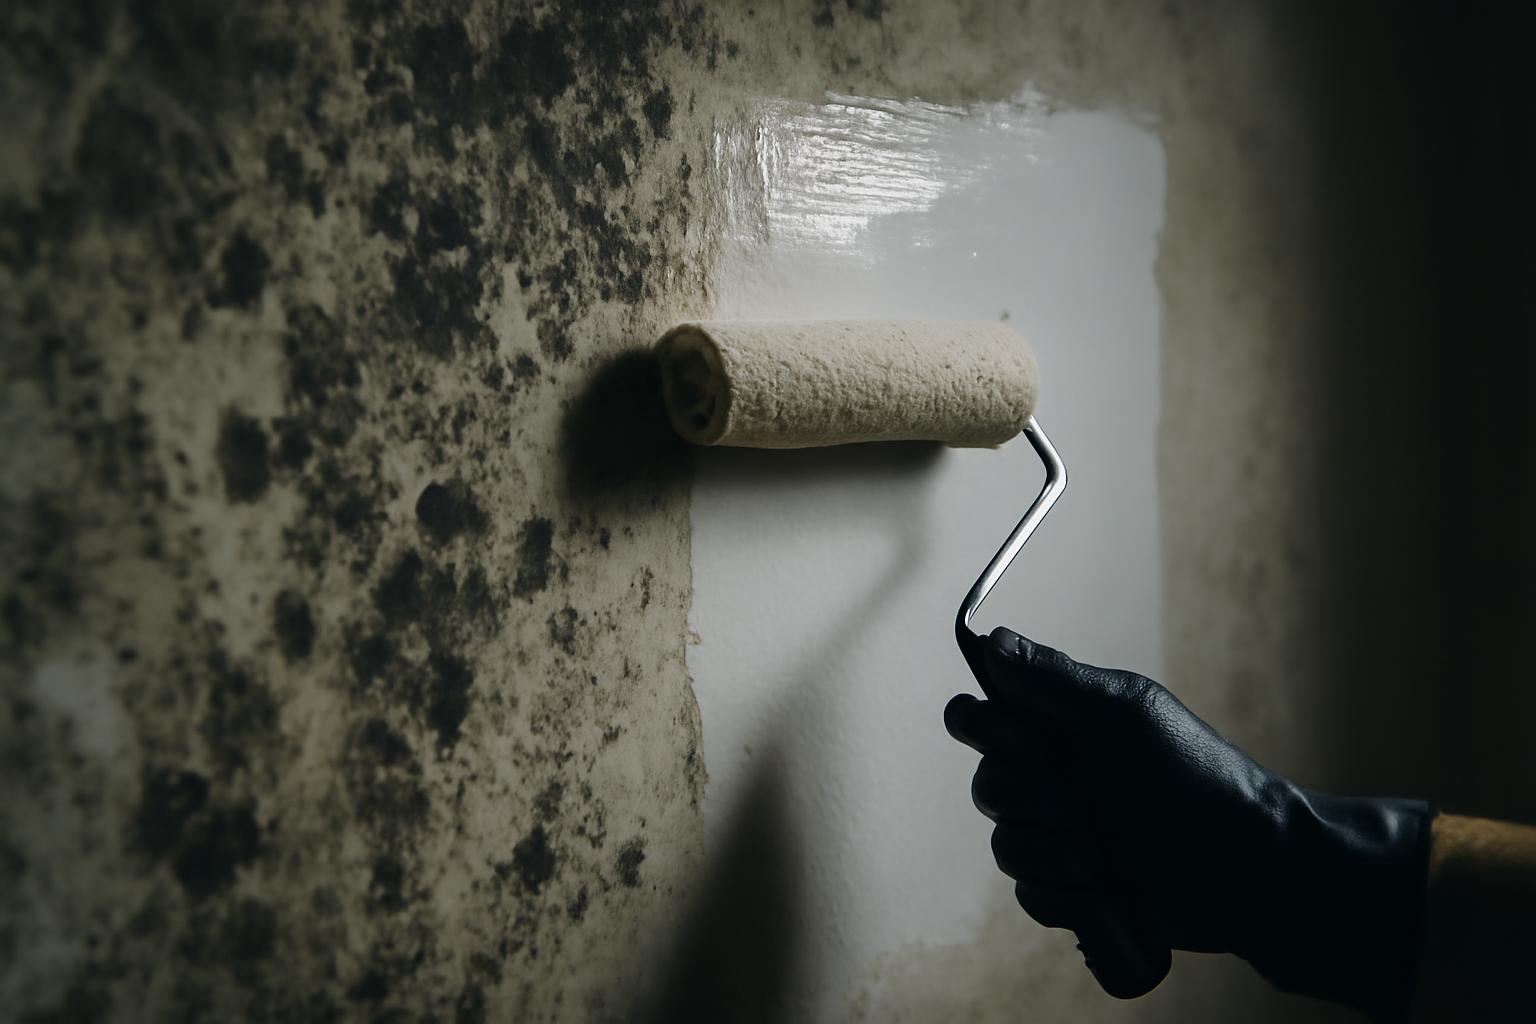
Usually, no. Mold encapsulation can be a useful finishing step, but it is not a durable stand-alone solution if the moisture problem remains. Across the reviewed remediation guidance, the consistent pattern is this: clean or remove contaminated materials first, dry the area, correct the leak or humidity problem, and only then consider a specialty coating on the remaining structural surfaces.
A quick note on confidence: much of the public material on mold encapsulation comes from contractors, product sellers, and consumer how-to pages, not direct standards text. So the safest way to read this topic is to separate broadly consistent practice from marketing claims. The broadly consistent practice is narrow:
- Cleaned, dry, structurally sound framing, wood joists, concrete, and masonry may sometimes be encapsulated.
- Drywall, insulation, carpet, carpet pad, ceiling tiles, and similar porous materials are usually removed when mold-contaminated.
- If moisture is still present, encapsulation can fail by hiding regrowth under or behind the coating.
That last point is the headline answer. Encapsulation does not solve the conditions that let mold grow. It can only help after those conditions have been corrected.
Another term trap matters here. Homeowners often hear “encapsulation” used in two different ways:
- Surface mold encapsulation: coating a cleaned structural surface after remediation.
- Crawl space encapsulation: installing vapor barriers, sealing vents, and managing humidity.
Those are related but not identical. In real projects, both may be used together: remediate mold first, then coat appropriate structural surfaces, and separately control crawl space moisture so the problem does not return.
What Is Mold Encapsulation in Remediation?
Mold encapsulation is best understood as a post-cleaning sealing step. A contractor applies a specialty coating or sealant over a surface that has already been cleaned and dried, with the aim of locking down residual microscopic contamination and creating a more stable finish on a previously affected structural surface.
In the reviewed materials, encapsulation is repeatedly described as part of a larger remediation sequence rather than the core treatment itself. The exact order varies by contractor and product, but the broad pattern is consistent:
- Contain the work area
- Remove or clean contamination
- Correct the moisture source
- Dry the materials
- Apply encapsulant where appropriate
- Perform final cleanup, verification, and rebuilding as needed
Some vendor-style workflows place antimicrobial treatment before coating and HEPA vacuuming after coating; others describe HEPA vacuuming before coating, or both before and after. That variation is important. It means you should not treat any one contractor blog’s sequence as a universal rule. The reliable takeaway is simpler: encapsulation is a late-stage step, not the first response to visible mold.
On the right surface, the coating is marketed as forming a bonded barrier that may be described as:
- elastic or flexible
- more adherent than ordinary paint
- moisture-resistant
- intended for remediation use rather than decoration
In practical home terms, this is why encapsulation usually comes up in places like:
- exposed wood framing
- floor joists and subfloor undersides
- attic framing
- basement walls
- concrete or masonry foundation surfaces
- exposed framing inside an opened wall cavity after damaged drywall has been removed
That is very different from painting over moldy drywall and calling it fixed.
It is also worth narrowing what encapsulation can and cannot do.
What encapsulation may do
On a properly prepared structural surface, encapsulation may:
- lock down fine residual contamination after cleaning
- reduce surface shedding from a previously affected area
- create a uniform, cleanable finish in unfinished spaces
- help cover remaining staining or shadowing after bulk contamination has been removed
What encapsulation does not do
It does not:
- remove contaminated porous material from the building
- correct a leak, drainage issue, condensation problem, or high humidity
- reliably rescue materials that are wet, soft, deteriorated, or deeply colonized
- turn ordinary paint into a remediation method
A useful mental model is this: encapsulation is a finish coat for a remediated structural surface, not a rescue coat for a contaminated absorbent material.
Encapsulation vs Physical Mold Removal: Key Differences
The decision between encapsulation and removal is mainly a decision about material type, contamination depth, replaceability, and moisture status.
Across the reviewed sources, the practical split is fairly consistent:
| Situation | Encapsulation may fit | Removal is usually the better choice |
|---|---|---|
| Material type | Cleaned non-porous or semi-porous structural surfaces such as concrete, masonry, metal, or sound wood framing | Porous materials such as drywall, insulation, carpet, carpet pad, and ceiling tiles |
| Contamination depth | Surface-level contamination only | Growth appears to extend into the material or the material cannot be cleaned with confidence |
| Structural role | Material is structural and difficult to remove without major demolition | Material is a replaceable finish or absorbent content |
| Moisture status | Source corrected and material fully dried | Ongoing dampness, leakage, recurring condensation, warping, or saturation |
| Inspection confidence | Scope is visible and accessible | Hidden cavities, uncertainty about spread, or persistent odor suggest deeper issues |
Several reviewed summaries of ANSI/IICRC S520 describe the standard in the same broad way: porous contaminated materials are generally removed, while encapsulation is a supplemental measure for cleaned structural surfaces. Because those summaries are secondary rather than the standard text itself, it is safer to treat that as the consensus direction reflected in the materials, not as a verbatim quote.
In plain-English homeowner terms, that usually means:
- Moldy drywall: usually remove it.
- Moldy insulation: remove it.
- Moldy carpet or pad: remove it.
- Concrete or masonry with past surface growth: often clean, dry, and possibly encapsulate.
- Minor surface growth on sound framing or joists: may be a candidate for cleaning plus encapsulation.
Wood is where many people get tripped up. Framing lumber is not fully non-porous, but the reviewed materials often treat it as a semi-porous structural material that may be saved when contamination is light and mostly at the surface. That is a narrower claim than “wood can always be painted over.” The conditions still matter:
- the wood must be structurally sound
- the growth must be surface-level or minor
- the wood must be dry
- the moisture source must be corrected
- the surface must be thoroughly cleaned first
A few additional decision factors matter even when the material seems salvageable:
- Porosity: the more absorbent the material, the weaker the case for coating it
- Depth: visual inspection may not tell you how deeply contamination extends
- Moisture history: repeatedly wet materials are poor encapsulation candidates
- Accessibility: if you cannot see the full extent of the issue, removal may be the only defensible way to inspect
- Odor: persistent musty odor after cleaning can point to deeper contamination or ongoing dampness
- Project context: consultants, insurers, buyers, or disclosure concerns may push a project toward removal instead of coating
Cost differences
One remediation/inspection source in the evidence set gave rough field estimates of about $2 to $6 per square foot for encapsulation versus about $10 to $25 per square foot for removal and replacement. Those numbers are useful only as broad comparisons, not as universal pricing.
Real project cost depends on:
- containment
- access
- demolition
- waste disposal
- drying
- moisture repair
- rebuild work
- labor market
- whether verification or consultant review is involved
So the real lesson is not the exact number. It is the tradeoff:
- Encapsulation can be cheaper upfront
- Removal is often more durable for porous materials
- If encapsulation is used where it should not be, you can pay twice
That is why two estimates on the same house can be far apart. One may be pricing a coating step on retained framing; the other may be pricing demolition, disposal, and reconstruction.
Prerequisites: Cleaning and Preparation Before Encapsulating
Most encapsulation failures start with bad prep, not bad paint. The coating only works as intended if it is going over a surface that has already been remediated to the extent that coating makes sense.
The reviewed sources vary in detail, but together they point to a practical preparation sequence.
1. Isolate the work zone
Containment comes first. Multiple sources describe some version of:
- separating the work area from clean areas
- protecting adjacent finishes
- avoiding use of the home’s HVAC during active cleanup so spores are not circulated
- using appropriate PPE
This matters even for DIY-minded homeowners. Disturbing mold can spread contamination. Once you start brushing, scrubbing, cutting, or vacuuming, you are no longer dealing with a passive stain.
2. Remove unsalvageable porous materials first
Before you talk about coating anything, you need to remove materials that generally should not be saved once mold-contaminated:
- drywall
- insulation
- carpet
- carpet pad
- ceiling tiles
- other absorbent soft materials that cannot be thoroughly dried and cleaned
That is why wall projects often follow this sequence:
- remove moldy drywall and insulation
- expose the framing or masonry
- clean the remaining structural surfaces
- dry the cavity
- encapsulate those remaining structural surfaces if justified
- rebuild
Encapsulating the framing inside the cavity is not the same thing as encapsulating the drywall face that was moldy.
3. Mechanically clean the remaining saveable surface
The sources repeatedly emphasize some form of physical cleaning before coating. Depending on the material and condition, that may include:
- scrubbing or wiping
- removing loose residue
- HEPA vacuuming
- brushing or power-brushing in decayed spots where appropriate
- cleaning until there is no loose visible colony material left on the surface
One contractor-style source describes power-brushing decayed areas, applying a moldicide, allowing roughly an hour of drying, then applying encapsulant and HEPA vacuuming afterward. That is best read as one product-specific or contractor-specific workflow, not a universal standard.
The universal part is the need for physical cleaning. Encapsulant is not meant to bond over fuzzy growth, loose dust, or dirty residue.
4. Use antimicrobial treatment, if that is part of the chosen method
Many reviewed materials describe a chemical treatment step before encapsulation. The labels used vary:
- moldicide
- antimicrobial
- biocide
- fungicidal treatment
At the same time, the reviewed EPA-related guidance is more cautious about relying on chemicals as the primary solution. The balanced takeaway is:
- some contractors use a treatment product before coating
- the exact chemical step varies by protocol and product
- chemical treatment does not replace cleaning, drying, or removal
So if a contractor says “we sprayed it” but did not remove moldy drywall, dry the assembly, or correct moisture, that is not convincing remediation.
5. Dry the substrate and fix the moisture source
This is the step that determines whether encapsulation has a chance of lasting.
Before any coating goes on, you need reasonable confidence about:
- what caused the mold
- whether that cause has been corrected
- whether the substrate is actually dry enough for the product and material involved
One remediation source recommends wood moisture below 15% before coating. That is useful as a field benchmark, but it should not be presented as a universal threshold for every material and every product. Exact acceptable moisture varies by substrate, meter method, and coating instructions.
The broader and better-supported rule is:
- do not coat wet materials
- do not assume “looks dry” means “is dry”
- do not use coating as a substitute for fixing the water problem
Common moisture problems that need to be corrected first include:
- roof leaks
- plumbing leaks
- groundwater or bulk water intrusion
- slab or basement wall moisture
- condensation
- high indoor humidity
- poorly managed crawl spaces
- missing vapor barriers
- duct leakage or attic moisture problems
6. Match the coating to the condition
Most reviewed guidance assumes dry surfaces before encapsulation, and that is the safest default.
A smaller set of product-specific advice promotes breathable primers or coatings for assemblies that are still drying after flood or water damage. That is a niche case, not a general rule for moldy surfaces. The risk is obvious: if you put a vapor-closed coating on a damp material that still needs to dry, you may trap moisture and make hidden conditions worse.
So the practical hierarchy is:
- first choice: dry the material, then coat if appropriate
- special case: if a breathable product is being considered on a damp assembly, follow the product instructions closely and get project-specific professional guidance
7. Apply the product as directed
Professional and consumer sources commonly describe one or two coats, often with the second coat applied after the first has dried. Application methods commonly mentioned include:
- airless sprayer
- roller
- brush
Here again, specifics are product-dependent. Coverage, recoat time, thinning, surface prep requirements, and finish type can all vary. Generic internet advice is less reliable than the label.
A practical readiness checklist
Before encapsulating, ask:
- Has the moisture source been identified and corrected?
- Have moldy porous materials already been removed where needed?
- Has the remaining structural surface been physically cleaned?
- Is there no active loose colony material left on the surface?
- Is the substrate dry enough for the material and product?
- Am I using a remediation coating, not ordinary wall paint?
- Can the work be contained so contamination is not spread?
If the answer to any of those is no, you are not ready to encapsulate yet.
Suitable Surfaces and Common Applications
The strongest candidates for mold encapsulation are cleaned, dry, structurally sound surfaces that are hard or semi-hard and expensive or disruptive to remove.
That is why encapsulation is most often discussed in:
- basements
- crawl spaces
- attics
- utility or mechanical areas
- exposed framing after demolition
- concrete or masonry surfaces with prior mold growth
Wood framing and joists
Encapsulation is commonly considered for:
- floor joists
- rim joists
- sill plates
- exposed studs
- roof framing
- subfloor undersides
This is the classic “maybe” category rather than an automatic yes. It may be appropriate when the wood is:
- structurally sound
- dry
- only lightly or surface-contaminated
- accessible enough to clean properly
It is much harder to justify when the wood is:
- soft or decayed
- repeatedly wet
- actively growing visible mold after cleanup attempts
- part of an assembly with unresolved moisture
One old forum discussion in the reviewed material captured this gray area well: a homeowner with minor white mold on basement joists got conflicting advice about whether to apply a white encapsulating coating or simply clean and treat the wood. That disagreement is believable because minor structural wood cases are where encapsulation is most optional. It may add a finish barrier, but it is not always the deciding factor in success. Dryness and moisture control are.
Concrete, masonry, and foundation surfaces
Concrete and masonry are frequent encapsulation candidates because they can often be:
- scrubbed
- HEPA cleaned
- dried
- coated after remediation
These materials are also where homeowners can be misled by appearances. A freshly coated basement wall can look solved while still taking on moisture from outside or below. So a coating on concrete is only as good as the moisture management around it.
Crawl spaces
Crawl spaces are where the vocabulary gets messy.
Homeowners may hear both of these on the same job:
- Surface mold encapsulation on cleaned joists, framing, or masonry
- Crawl space encapsulation using vapor barriers, sealing, and dehumidification
A thorough crawl space project may include both, in this order:
- remediate visible mold first
- remove wet insulation or other contaminated porous materials
- clean the remaining framing
- coat cleaned structural surfaces if appropriate
- install the vapor barrier and humidity-control strategy needed to keep the space dry
If the crawl space remains humid, coating the joists does not fix the real problem.
Attics and other structural high-humidity areas
Attics are another common use case, especially after:
- roof leaks
- condensation issues
- ventilation problems
- duct leakage into the attic
Potential surfaces include:
- rafters
- truss members
- accessible sheathing surfaces after cleaning
- framing around penetrations or vents
Again, success depends less on the coating itself than on correcting the moisture source.
What usually does not belong in the encapsulation category
The stricter and more defensible line in the reviewed materials is that these are usually removal candidates, not encapsulation candidates, when mold-contaminated:
- drywall
- insulation
- carpet
- carpet pad
- ceiling tiles
- absorbent soft goods
- damp or warped finish materials
Some marketing copy uses broader language, but the narrower rule is the safer one: save structural surfaces when justified; remove absorbent contaminated materials.
Commercial Encapsulant Products and Application
The product market is crowded, and the names can be misleading. Some products are true coatings or encapsulants. Some are primers. Some are antimicrobial treatments used before coating. They are not interchangeable.
That separation matters because homeowners often shop by label language instead of function.
Coatings and encapsulants mentioned in the reviewed materials
Examples mentioned across the evidence set include:
- Fiberlock IAQ coatings
- Fiberlock AfterShock
- Sentinel 24-7 Zero
- Foster 40-50
- Bioesque mold-resistant coatings
These are the kinds of products most closely aligned with the “encapsulant/coating” category in the reviewed materials.
Primers or related products mentioned alongside encapsulation
The reviewed materials also mention products that may be discussed in the same conversation but should not automatically be treated as the same thing:
- Zinsser Mold Killing Primer
- product-specific breathable primers promoted for damp assemblies still drying
These may play a role in some systems, but a primer is not automatically a full substitute for a remediation encapsulant.
Treatments and antimicrobials often paired with coatings
Separate from the coating itself, some sources describe using:
- antimicrobial sprays
- moldicides
- fungicidal treatments
- biocides
Those are part of some workflows, but again, they are not the same as encapsulation.
How these products are commonly sold
Retail and supplier pages in the evidence set commonly show:
- 1-gallon and 5-gallon containers
- white or clear finishes, with some dark or black variants
- spray, brush, or roller application
- one-coat or two-coat instructions, depending on product and substrate
One supplier page listed an entry-level encapsulant at about $62 per gallon, while larger pails and some premium products ran into the hundreds of dollars. That is only product cost, not job cost.
Chemistry claims: treat marketing carefully
The reviewed product descriptions use a wide range of chemistry language, including:
- polymer-based or propylene-based coatings
- antimicrobial additives
- calcium hydroxide in some fungicidal encapsulants
- silver-based marketing claims
The safe reading is not “this ingredient solves mold.” It is:
- Does the coating adhere to the cleaned substrate?
- Is it intended for remediation use?
- Is it appropriate for the moisture condition?
- Is it being applied over a surface that has actually been remediated?
Some sales materials make dramatic claims about mold-killing chemistry or very long warranties. In this evidence set, those claims are not independently verified. Treat them as marketing unless supported by stronger documentation.
Application basics
Common application methods include:
- sprayer for open framing and larger unfinished areas
- roller for flat masonry or broad surfaces
- brush for edges, corners, and smaller repairs
Two practical cautions matter:
- Product thickness varies. One contractor-style source notes that some water-based encapsulants are thick enough that users may consider dilution for spraying. Do that only if the manufacturer allows it.
- Label instructions matter more than generic advice. Recoat windows, minimum temperature, substrate prep, and compatible surfaces vary.
White vs clear finishes
Finish appearance is not just cosmetic.
- White coatings can brighten dark basements and crawl spaces and make future spotting easier.
- Clear coatings are less visually obvious but may make later contamination harder to notice.
A forum discussion in the evidence set raised one practical downside of white encapsulants: a bright white basement ceiling can prompt questions from inspectors or buyers. That does not mean white is wrong; it means documentation matters if the house is later sold.
Industry Standards and EPA Guidelines
This is the section where precision matters most, because the evidence base here is weaker than homeowners might assume.
What the reviewed S520 summaries generally indicate
Several secondary summaries in the reviewed materials describe ANSI/IICRC S520 in roughly the same way:
- remove contaminated porous materials
- clean and dry remaining structural surfaces
- use encapsulation as a secondary or supplemental measure where appropriate
That is the consistent direction reflected in the evidence set. Because the reviewed materials are mostly summaries rather than the standard itself, it is more accurate to say the evidence consistently describes S520 this way than to present detailed procedural claims as direct standard language.
In practical terms, that supports the familiar material split:
- drywall, insulation, carpet, ceiling tiles: usually remove
- framing, joists, concrete, masonry: may clean and possibly encapsulate if sound and dry
Verification: common practice, not one-size-fits-all rule
Meaningful remediation often includes some form of verification before finishing or rebuilding, but the scope varies.
The reviewed materials mention things like:
- moisture readings
- visual confirmation that bulk contamination is removed
- final HEPA cleanup
- job documentation
- consultant review or post-remediation clearance on larger projects
The careful version of that advice is:
- verification is common and often important
- what level of verification is appropriate depends on project size, stakes, and who is involved
- “the coating is on” is not good verification by itself
For a small accessible area, moisture confirmation and visual cleanliness may be enough. For a larger project, home sale, consultant-led scope, or insurance dispute, more formal clearance may be appropriate.
EPA-style guidance reflected in the reviewed materials
A consumer source in the evidence set, citing EPA-related guidance, presents a cautious view of biocides and encapsulants:
- they may be used in some situations
- they are not generally presented as the primary strategy
- moisture control, drying, and removal of unsalvageable materials come first
That caution is useful because it pushes back against the idea of “mold-killing paint” as the answer.
The same consumer guidance also repeats a practical threshold often associated with EPA mold advice: visible mold larger than about 10 square feet is a strong reason to bring in professionals. That should be treated as a practical rule of thumb, not the only factor. Even smaller projects can justify professional help if they involve:
- hidden cavities
- HVAC systems
- recurring water intrusion
- attics or crawl spaces
- structural concerns
- home sale or insurance documentation
Regulation and testing: less certainty than many homeowners expect
The reviewed materials do not support the idea of one simple nationwide legal rulebook for mold remediation. Licensing, disclosure expectations, and contractor practice vary by location.
Testing is similarly mixed. The evidence set includes both of these claims:
- testing before encapsulation can be useful
- testing can be noisy, misleading, or over-relied on
The balanced reading is:
- testing can help when scope is unclear, hidden growth is suspected, or post-remediation documentation is needed
- testing is not a magic referee
- visible mold on wet drywall or carpet usually does not need a lab result to justify removal
- consumer kits can confuse more than they clarify if used without context
For many encapsulation decisions, the most useful inputs are still basic ones:
- what material is this?
- how wet is it?
- has the moisture source been fixed?
- can it be fully cleaned?
- is the contamination likely deeper than the surface?
Risks, Mistakes, and Why Encapsulation Fails
When encapsulation fails, the pattern is usually predictable.
1. The moisture problem was never corrected
This is the main failure mode. If water keeps entering, humidity remains high, or condensation continues, mold can regrow under the coating or on nearby materials.
That is the direct answer to the headline: encapsulation does not work long-term without fixing moisture.
2. The surface was not truly cleaned
Encapsulant is not intended to bury active growth, dust, and loose debris. If the prep was weak, the coating may simply hide contamination rather than finish a remediated surface.
3. It was used on the wrong material
The classic misuse cases are:
- moldy drywall
- moldy insulation
- moldy carpet or carpet pad
- damp finish materials
- warped materials
- assemblies that keep getting wet
These are usually removal problems, not coating problems.
4. Ordinary paint was used instead of a remediation coating
Multiple reviewed sources draw this line clearly: regular paint is not mold encapsulation. It may cover staining, but that is not the same as cleaning, drying, and applying a remediation product to an appropriate substrate.
5. A non-breathable coating was applied to a damp assembly
One product-focused source strongly warns against non-breathable coatings on wet moldy surfaces. Even if you do not use that specific product line, the broader failure pattern is credible: coating a damp assembly with the wrong film can slow drying and trap moisture where you do not want it.
6. DIY work spread contamination
Without containment and HEPA methods, brushing, demolition, and fan use can move contamination into adjacent spaces. The risk rises in:
- open basements
- ducted homes
- wall cavities
- attics with air leakage pathways
- furnished living areas
7. The coating created false confidence
This is the subtle failure. The surface looks clean and finished, so the homeowner stops watching the area. Meanwhile, the real issue may still be present:
- the wall cavity is still damp
- the joist pocket is still condensing
- the crawl space is still humid
- the basement wall is still wicking water
A hidden failure can be worse than a visible one because it delays the real fix.
Signs a coated area may be failing
No single sign proves failure, but these are warning signals:
- musty odor returns
- staining reappears or spreads nearby
- peeling or blistering develops
- new condensation is visible
- moisture readings rise again
- adjacent untreated materials start showing growth
Notice what most of these have in common: the coating is not the root issue. The root issue is usually moisture, wrong material choice, or poor prep.
DIY Feasibility, Costs, and When to Hire Pros
Some homeowners can handle very small, surface-only cleanup on sound structural material. Many cannot handle mold encapsulation safely once the problem extends beyond that.
A narrow DIY case might look like this:
- the affected area is small
- the material is sound wood or concrete, not drywall or carpet
- the growth appears surface-level
- the moisture source is already corrected
- the surface can be cleaned and dried properly
- containment and PPE are manageable
- there is no guesswork about hidden cavities
That is much narrower than “I found mold, so I’ll buy a coating.”
When DIY is usually the wrong choice
Professional help is the safer call when:
- visible growth exceeds roughly 10 square feet
- drywall, insulation, or carpet are involved
- you suspect hidden mold in walls or ceilings
- the moisture source is unclear
- the problem keeps returning
- structural wood appears soft or damaged
- odor remains after basic cleaning
- the area is in an attic, crawl space, or HVAC-related location
- the house is being sold or documented for insurance
The real cost question
DIY encapsulation can look inexpensive because a gallon of product may cost far less than a remediation quote. But that comparison usually ignores everything except the coating.
A true cost comparison has to include whether the DIY plan also covers:
- containment
- PPE
- HEPA vacuuming
- removal of contaminated porous materials
- moisture diagnosis
- drying confirmation
- cleanup and documentation
If not, you are not comparing a cheaper version of the same work. You are comparing two different scopes.
Why professionals still disagree on minor wood cases
One of the more useful pieces of evidence in the set is the disagreement itself. In a forum discussion about minor white mold on basement joists, some advice favored encapsulation, while other advice said cleaning and a borate or antimicrobial treatment were enough.
That disagreement makes sense. On minor structural wood cases, encapsulation is often situational, not mandatory. The variables include:
- how well the wood was cleaned
- whether the moisture issue is genuinely solved
- whether the owner wants a cleanable finish coat
- whether the contractor prefers a visible barrier as extra insurance
- whether appearance matters, especially with white coatings
So be skeptical of anyone who says encapsulation is always necessary or never useful. For structural wood, it can be a judgment call. For moldy drywall or carpet, the case for removal is much stronger.
What a professional sequence often looks like
A competent remediation scope commonly follows this pattern:
- Inspect and identify the moisture source
- Set containment and PPE
- Remove contaminated porous materials
- HEPA clean and mechanically clean remaining structural surfaces
- Dry and confirm acceptable moisture condition
- Use antimicrobial treatment if part of the chosen method
- Encapsulate appropriate structural surfaces
- Final cleanup and project verification as needed
- Rebuild or refinish
That is why encapsulation works best as a targeted finish, not a first-response shortcut.
Does mold encapsulation paint kill or eliminate mold?
No. Mold encapsulation paint or coating may seal in residual contamination and may include antimicrobial ingredients, but it does not by itself remove mold from the building.
That is the consistent warning across the reviewed materials. If contaminated drywall, insulation, or carpet are still present, or if the assembly is still damp, coating the surface does not turn that into complete remediation.
A safer way to think about it is:
- removal and cleaning deal with contamination
- drying and moisture repair deal with cause
- encapsulation, where appropriate, is a finishing step
Is mold encapsulation breathable or waterproof?
It can be either, depending on the product.
Some product-specific guidance promotes breathable coatings or primers where some drying still needs to occur. Other products are marketed as moisture-resistant or more protective topcoats.
Those terms are not interchangeable:
- Breathable refers to vapor movement.
- Moisture-resistant or waterproof refers to resisting water at the surface.
For most homeowners, the safest default remains simple: dry the substrate first, then coat it. The more unusual the assembly condition, the more important it is to follow the label and get professional guidance.
Can I encapsulate mold on drywall or carpet?
Generally, no.
Across the reviewed materials, drywall, insulation, carpet, carpet pad, and similar porous materials are usually treated as removal candidates once mold-contaminated. The concern is not just visible staining. It is that contamination may extend into the material, and the material may not be reliably cleaned and dried.
A common exception causes confusion: after moldy drywall is removed, a remediator may encapsulate the exposed framing or masonry inside the wall cavity before rebuilding. That is appropriate in some cases. It is not the same thing as coating moldy drywall itself.
How reliable is mold testing before encapsulation?
Useful sometimes, decisive rarely.
The reviewed materials swing between two extremes:
- testing is crucial before encapsulation
- testing is unreliable and overused
The practical middle ground is better:
- Testing can help when the scope is unclear.
- Testing can help when hidden growth is suspected.
- Testing can help when documentation or clearance is needed.
- Testing is less useful when the basic decision is obvious, such as visible mold on wet drywall or carpet.
Consumer kits and casual sampling can be hard to interpret. A single result does not automatically tell you whether a material should be coated or removed. In many projects, material type, moisture condition, inspection quality, and whether contamination is likely deeper than the surface matter more than a DIY test result.
Prevent mold during household cleaning to avoid encapsulation needs?
One small but practical prevention rule from the reviewed household-cleaning material is this: do not saturate upholstery foam or padding during cleaning.
The reason is straightforward:
- padding dries slowly
- trapped moisture can linger
- lingering moisture can support mold growth
So during household spot-cleaning:
- blot more
- use less liquid
- avoid flooding cushions or padded furniture
- dry the item thoroughly afterward
That advice belongs to a different problem category than structural mold remediation, but the moisture lesson is the same: many mold problems begin when absorbent materials stay wet too long.
The simplest rule to remember is this: encapsulate only what should be saved, and save only what has already been cleaned, dried, and separated from the moisture problem that caused the mold in the first place.