 StainList
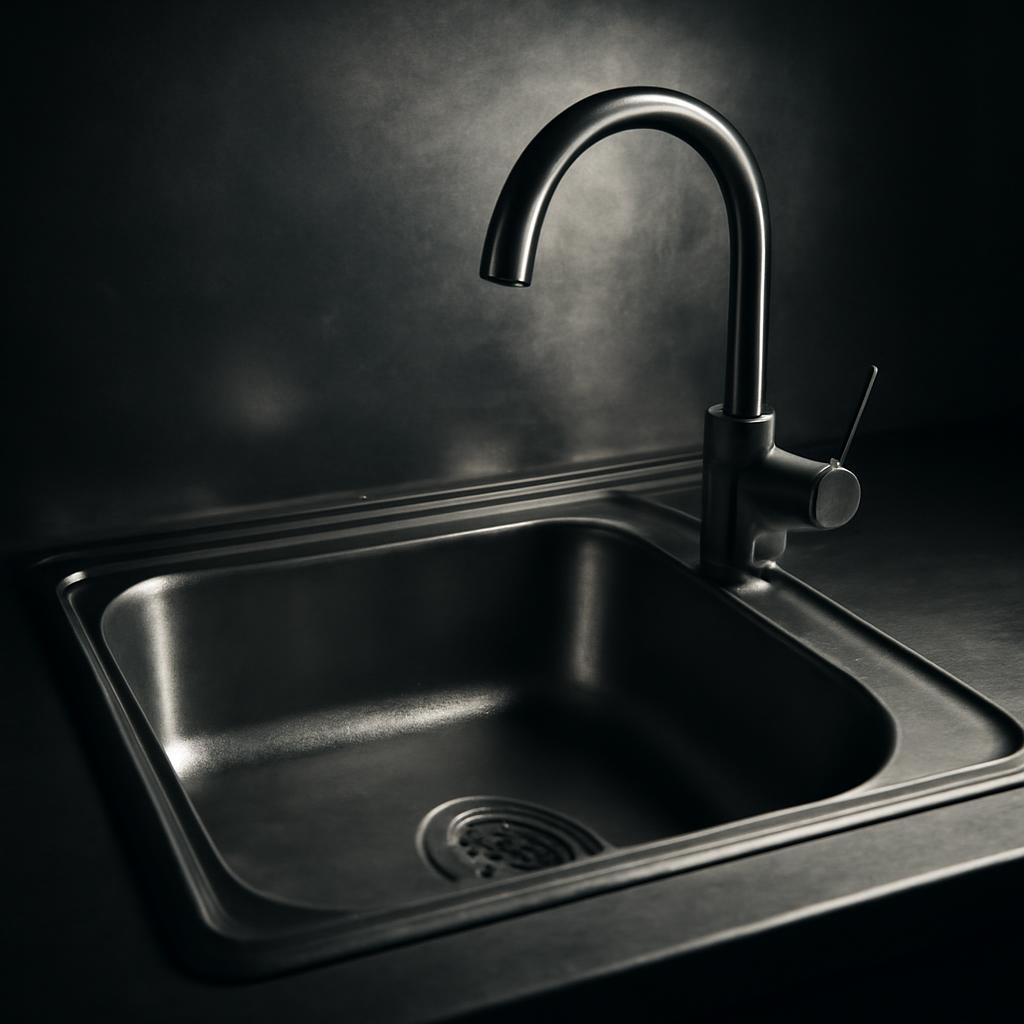
If you’re asking how can I polish stainless steel, the safest home answer is still the simplest one: clean it first with mild dish soap and water, dry it completely, and work with the grain. That is the baseline advice repeated by appliance makers and by metal-finishing guides, even when those sources disagree about DIY extras like vinegar, oil buffs, or abrasive refinishing (KitchenAid).
The next important distinction is what kind of “polishing” you mean. Many homeowners really mean “make it look shiny again.” That is usually a cleaning-and-buffing job. True scratch removal is different: it means changing the metal finish with abrasives, then refining it step by step. A refrigerator door, a sink basin, and a saucepan do not all tolerate that equally well.
This guide keeps that distinction clear. It starts with the conservative, low-risk methods most households should use first. More aggressive sanding and buffing appear later as optional refinishing guidance for bare stainless only, not as routine maintenance for coated, fingerprint-resistant, or manufacturer-restricted appliance surfaces (KitchenAid).
Understanding Stainless Steel Finishes and When to Polish
Before you polish anything, it helps to know what finish you already have.
Mill or matte finishes are practical, low-gloss finishes commonly used where function matters more than reflection. Atlantic Stainless describes mill and matte finishes as basic utilitarian finishes and notes their use on sinks and work surfaces (Atlantic Stainless).
Brushed or satin finishes have visible parallel lines created by abrasive finishing. They are popular in kitchens because they disguise ordinary wear better than a mirror finish, but several finishing guides note that brushed finishes can be slightly less corrosion-resistant than smoother polished finishes in some cases (Atlantic Stainless; Kramer Industries).
Mirror or gloss finishes are the most reflective and the easiest to wipe visually clean, but they also reveal defects fastest. Atlantic Stainless notes that polishing can improve appearance, remove contaminants, and reduce tiny crevices where corrosion can begin, while also warning that pre-existing dents and scratches may become more obvious if they are not corrected first.
At a home level, polishing usually has four goals:
- restore luster on a dull or streaky surface
- remove residue that ordinary wiping leaves behind
- slightly refine the surface so grime has fewer places to sit
- reduce the visibility of scratches, if you move into abrasive work
That last goal is where many articles blur two different jobs. Consumer cleaning advice often uses polish to mean “make shiny.” Finishing guides use it to mean refine the actual metal surface. Both uses exist, but the method changes once you are dealing with scratches instead of fingerprints or haze.
A useful rule is this:
- If the surface is cloudy, greasy, streaky, or water-spotted, start with cleaning and a gentle buff.
- If you still see scratches after cleaning and drying, you are moving from cleaning into refinishing.
That distinction alone prevents a lot of unnecessary damage.
Tools and Supplies for Home Polishing
For most homeowners, the default kit is small. KitchenAid, Whirlpool, and other home-care sources consistently center the same basics:
- mild dish soap
- warm water
- microfiber cloths
- a soft sponge or other non-abrasive cloth (Southern Living).
That is enough for the vast majority of appliance cleaning and for many sink touch-ups.
If you want a temporary cosmetic shine-up, consumer articles also mention a few household options:
- a tiny amount of olive, mineral, or baby oil on a cloth
- flour on a completely dry sink
- baking soda for light sink film
- club soda for a quick wipe-down (Ferguson).
Those are best understood as consumer cleaning hacks, not durable protection. They may improve appearance temporarily, but they do not replace proper scratch repair, and they are not equally appropriate for every surface.
For scratch removal or finish restoration, the tool list changes. The more detailed abrasive guidance in the evidence comes mainly from finishing suppliers, so it should be treated as optional, not routine. Their common framework is:
- progressive abrasives, often starting around 150–240 grit for heavier prep and moving through 400, 600, 800, 1200, sometimes 2000 for finer refinement
- nonwoven abrasive pads for brushed or satin finishes
- a dedicated buffing wheel or pad if you are trying to chase a higher polish on a small bare-metal piece (Senmit).
Just as important is what to avoid. Multiple appliance-care sources warn against:
- steel wool
- bleach or chlorine-based cleaners
- ammonia
- abrasive powders or harsh abrasive brushes
- acidic cleaners as a routine appliance method
- rough cloths that drag or scratch (Ferguson).
One more practical limit matters before you do anything aggressive: if you are dealing with fingerprint-resistant, black stainless, or another specialty appliance finish, manufacturer guidance should take priority over DIY polishing culture. KitchenAid says fingerprint-resistant stainless should be cleaned with mild soap and water only, not standard stainless polish, and Whirlpool advises checking the owner’s manual before choosing products.
Step 1: Clean and Prep the Surface
This is the least exciting step and the one that matters most.
Appliance makers and finishing guides agree on the same starting point: wash the surface with mild dish soap and water, rinse it, and dry it thoroughly before polishing. Dirt or grit left in place turns your cloth into an abrasive.
A solid prep routine looks like this:
- Wash with warm water and a little dish soap.
- Use a soft sponge or microfiber cloth.
- Rinse thoroughly.
- Dry fully, including edges, seams, drain rims, and handle areas.
Drying is not just cosmetic. It helps prevent water spotting, and it lets you see the actual condition of the finish instead of judging through a wet film.
Next, find the grain direction. On brushed stainless, the grain usually shows as faint horizontal or vertical lines. Ferguson notes that trim and handles may have a different grain direction than the main panel, so check each piece rather than assuming the whole surface runs the same way. KitchenAid and Whirlpool both say to wipe with the grain once you identify it.
If the surface is only dull, this may already be enough. A lot of stainless that looks “worn out” is really just smeared, water-spotted, or residue-covered.
If the surface is actually damaged—for example, welded, rough, or gouged—some finishing guides describe an initial leveling pass around 80–120 grit before finer work. But those same guides frame that as prep for significant damage, not as normal appliance upkeep. For ordinary sink wear or light appliance marks, starting that coarse is usually more than you want.
Two prep habits make the rest of the job safer and cleaner:
- Inspect under good light so you can tell residue from actual scratches.
- Mask nearby areas if you plan to sand, especially where a different finish, trim piece, or edge meets the stainless (Senmit).
If you move into abrasive work, clean between every stage. Finishing guides repeatedly stress that leftover grit and dust cause fresh scratches in the next step.
The most important stop-sign here is surface type. If you have a fingerprint-resistant appliance finish, KitchenAid says to stop at mild soap and water. That is not a surface to treat like bare stainless sheet metal.
Quick Shine Methods Using Household Items
If your stainless steel is clean but still looks dull, there are a few common household touch-up methods. These should be treated as appearance boosters, not true refinishing. They are also more suitable for sinks and small trim areas than for every appliance exterior.
Oil buff for appliances, sinks, or trim
Consumer cleaning guides often suggest putting a tiny amount of olive, mineral, or baby oil on a microfiber cloth, buffing with the grain, then wiping off all excess (Family Handyman). This can deepen the look of the finish and make a cleaned surface look more uniform.
The limits matter:
- it is temporary
- it does not repair scratches
- too much oil leaves residue and can make the surface look worse instead of better.
For appliances, this is optional at best. It is not required for proper care, and it makes less sense when the manufacturer already recommends soap, water, and drying.
Flour buff for a dry sink
The flour trick appears mainly in sink articles, not manufacturer appliance guidance. Family Handyman and Taste of Home both describe applying flour to a fully clean, fully dry sink, then buffing with a soft cloth. Ferguson makes a similar point: flour makes the most sense on contained surfaces like sinks or pots and pans, where cleanup is manageable.
This is best viewed as a quick sink-only cosmetic method. If the sink is not dry, flour simply turns into paste.
Baking soda for light sink grime
For sinks, baking soda is a more defensible middle ground than jumping straight to sandpaper. Sink-focused articles describe sprinkling baking soda on a damp sink and rubbing gently with the grain, then rinsing and drying (Horow). That is useful for film, light staining, and mineral haze. It is not a substitute for real scratch removal.
Vinegar fizz: sink-specific, not a default appliance polish
Some sink-cleaning articles pair baking soda with a brief vinegar spray to loosen mineral buildup, followed by rinsing, drying, and sometimes a final buff (Horow).
That does not make vinegar a good universal stainless polish. KitchenAid warns that acidic cleaners such as vinegar may damage stainless over time, and Southern Living notes that Maytag does not recommend vinegar for appliance exteriors.
So the cautious takeaway is:
- occasional sink-cleaning method: sometimes used
- routine appliance polish: poor default
Club soda for a quick wipe-down
Club soda is one of the milder DIY options in the evidence. Southern Living suggests spraying it on and wiping dry, and Ferguson includes it among low-risk household methods. It will not remove scratches, but it may help with light streaking.
If you want a simple hierarchy for household methods, use this one:
- Soap + microfiber + drying: best default
- Club soda: mild streak touch-up
- Tiny amount of oil: temporary gloss only
- Baking soda: sink film or light deposits
- Flour: sink-only cosmetic touch-up
- Vinegar: sink-specific and occasional, not a routine appliance polish
Removing Light Scratches with Progressive Sanding
This is the point where “polishing” stops meaning routine home care and starts meaning refinishing.
That matters because the detailed grit sequences in the evidence come largely from metal-finishing suppliers and one supplier blog. They are useful as a framework, but they are not a universal recipe for every stainless object in a kitchen. Start only if the surface is bare stainless, the manual does not limit care to soap and water, and the scratch remains visible after cleaning and drying.
For light scratches, Senmit describes a progression of 400 → 800 → 1200 grit.
For deeper scratches, the same source suggests starting coarser, such as 220 or 320 grit, then refining through 400 → 800 → 1200 grit. Empire Abrasives and Kramer Industries describe similar progressive approaches and stress starting only as coarse as necessary.
The rules matter more than the exact brand of paper:
- On brushed stainless, sand with the existing grain so the repair blends in.
- Change your sanding angle slightly between grit stages so leftover scratches are easier to spot.
- Use light, even pressure rather than trying to force the cut.
- Clean between stages so old grit does not introduce new scratches.
Senmit gives a rough expectation of 10–15 minutes per square foot for multi-stage sanding by hand or with a homeowner-grade sander, but that is best treated as a loose estimate, not a rule. Actual time varies with thickness, finish, and damage level.
Cookware deserves special restraint. Senmit explicitly says to match aggressiveness to the thickness and value of the piece and warns that heavy abrasives may be too much for thinner or glossy pans.
For many sinks, the most realistic DIY goal is not a perfect mirror. It is a more even brushed finish with reduced scratch contrast.
Buffing for Brushed, Matte, or Mirror Finishes
Once the surface is clean and, if necessary, sanded, buffing determines the final look.
For most households, this is where scope control matters. A neat brushed re-blend is often realistic. A uniform mirror finish across a sink basin or large appliance panel is much harder.
Brushed or matte finishes
For brushed or matte stainless, finishing guides commonly use 150–240 grit coated abrasives or nonwoven media to establish a directional pattern, with matte work often living in the 220–400 grit range depending on the target look.
At home, that usually means something simpler than shop finishing: restoring a consistent grain direction rather than chasing reflectivity. For sinks especially, that is often the smarter target because it hides future wear better than a glossy finish.
Mirror finish
A true mirror finish is much more demanding. Supplier guides from Empire and Kramer describe taking stainless through progressively finer abrasives—often to 1200 or 2000 grit, sometimes beyond—before a separate cut-buff and color-buff sequence.
Those supplier systems commonly describe a sequence like this:
- sand progressively to a very fine grit
- use a cut buff with a more aggressive compound such as black emery
- follow with a color buff using finer compounds such as tripoli and then rouge
- keep wheels and compounds separate between stages to avoid contamination.
Empire and Kramer also describe machine buffing speeds around 4000–6500 RPM and changing direction roughly 90 degrees between stages to track scratch removal more clearly.
That is useful context, but it is best understood as small-part metal-finishing guidance, not ordinary home maintenance. Atlantic Stainless specifically notes that hand abrasives are inefficient and can produce inconsistent results at scale, which is exactly why large sink basins and full refrigerator doors are hard to refinish evenly by hand.
Hand polish versus machine polish
For a small touch-up area, hand polishing after proper prep can improve clarity and help finish a brushed repair. For a true mirror finish, a machine pad or buffing wheel gives a better chance of consistency—but only if the sanding is already correct. Compounds refine; they do not magically erase deep scratches.
For most home kitchens, that leads to a practical conclusion: brushed restoration is the more achievable DIY target; mirror finishing is an advanced option, not the default goal.
Appliance vs Sink Polishing: Surface-Specific Tips
The safest method depends heavily on what you are polishing.
Appliances
For refrigerators, dishwashers, ranges, and similar exteriors, the conservative method is the right one:
- clean with warm soapy water and microfiber
- wipe with the grain
- dry thoroughly
- use specialty stainless products only if the manufacturer allows them.
If the appliance has a fingerprint-resistant finish, KitchenAid says to use mild soap and water only and skip standard stainless polish.
That is why a lot of popular DIY shine tricks should not be treated as appliance defaults. Southern Living notes that vinegar is not recommended by Maytag for appliances, and oil-based DIY combinations may leave film or smell on appliance surfaces even if some people like them on sinks.
Sinks
Sinks are different. They are plain working stainless surfaces, get rinsed constantly, and collect water spots, mineral haze, and fine scratches from ordinary use. Sink-focused consumer guides therefore allow a bit more flexibility:
- baking soda for light film
- flour on a dry sink for quick cosmetic brightening
- a tiny amount of oil for final gloss if you like the look
- frequent rinse-and-dry maintenance.
Family Handyman suggests polishing a heavily used sink every 1–2 weeks, while lighter-use households may only do monthly touch-ups. That is not a formal rule, but it is a practical reminder that sink shine is mostly about steady maintenance, not one dramatic restoration.
Cookware
Cookware is the least forgiving of the three. Thin stainless pans are easier to overwork than a sink basin, and Senmit specifically cautions against overly aggressive abrasives on thinner or glossy pieces.
So for cookware, the safest progression is:
- start with soap, water, and a soft cloth
- dry fully and reassess
- use only mild additional measures if needed
- avoid assuming a sink-style sanding sequence is automatically safe on every pan
In other words, the thinner or more decorative the stainless item, the less aggressive you should be.
Maintenance and Long-Term Care
Once you restore some shine, maintenance matters more than heroics.
For sinks, consumer guides suggest a simple rhythm: rinse and dry regularly, do a deeper refresh weekly or as needed, and reserve heavier polishing for occasional touch-ups rather than constant scrubbing.
For appliances, the habits are simpler and better supported:
- wipe fingerprints and splashes before buildup hardens
- use mild soap when needed
- dry completely to limit spotting
- always wipe with the grain on brushed stainless.
A few long-term realities help set expectations:
- higher shine usually means more visible smudges and water spots
- brushed finishes usually hide wear better than mirror finishes
- routine, gentle maintenance is usually better than frequent aggressive polishing.
If you want one dependable strategy, it is this: clean early, dry thoroughly, and use the least aggressive method that solves the actual problem.
Can I use vinegar or WD-40 to polish stainless steel?
Vinegar: sometimes used for sinks, not a good default for appliances. Sink-focused articles use it briefly for mineral film after baking soda, then rinse and dry. But KitchenAid warns that acidic cleaners may damage stainless over time, and Southern Living says Maytag does not recommend vinegar for appliance exteriors.
WD-40: it appears in some household tip roundups, but Ferguson also notes that it is petroleum-based and should be used carefully near food surfaces. For most households, it is unnecessary for routine stainless care.
Safest default: soap, water, microfiber, and thorough drying.
Is mirror polishing practical for a kitchen sink?
Possible, yes. Practical for most kitchens, usually no.
Finishing guides explain how mirror stainless is achieved, but they also show how much more refinement it takes: progressively finer abrasives, then multiple buffing stages. Atlantic Stainless also notes that polished surfaces can highlight defects if the underlying dents and scratches are still there.
For a working kitchen sink, a refreshed brushed finish is usually the more realistic target.
What should I avoid when polishing stainless steel?
Avoid steel wool, bleach, chlorine-based cleaners, ammonia, harsh abrasive cleaners, and aggressive random scrubbing, especially on appliances.
Also avoid two common mistakes:
- working against the grain on brushed stainless, which can leave more visible streaking or push residue deeper into the surface texture
- jumping to abrasives before cleaning and drying first, which often makes light cosmetic problems worse instead of better.
How do I find the grain direction on stainless steel?
Look closely for faint straight lines running horizontally or vertically. KitchenAid and Whirlpool describe the grain that way, and Ferguson notes that attached pieces like handles may run differently from the main panel.
Once you find it, keep your cleaning and buffing strokes aligned with it.
Are household oils safe for food-contact surfaces like sinks?
Household oils are commonly mentioned as a final cosmetic buff for stainless sinks, but the supported case for them is limited and temporary. The most careful version of the advice is to use only a few drops, buff lightly, and wipe away all excess so you are not leaving a heavy residue behind.
In practice, that makes oil a skip-if-you-want touch-up, not a necessary maintenance step. If residue bothers you, stick with cleaning, rinsing, and drying well.
The practical decision tree is simple: if the surface is merely dull, clean and dry it first. If it still looks tired, use a light, temporary buff only if the surface type allows it. If scratches remain visible, you are no longer doing ordinary cleaning—you are deciding whether that item is worth a careful refinishing attempt or whether a tidy brushed finish is the smarter stopping point.
Sources
- Third Party · A Guide to Polishing Stainless Steel.
- Third Party · How to Buff & Polish Stainless Steel - A Beginner’s Guide - Empire Abrasives.
- Third Party · DIY Stainless Steel Polishing: Matte to Mirror Finish | Senmit.
- Third Party · Stainless Steel Polishing and Buffing | Kramer Industries.
- Appliance Manufacturer Guide · How to Clean Stainless Steel Appliances in 4 Steps | KitchenAid.
- Lifestyle Magazine Article · How To Clean Stainless Steel Appliances For A Streak-Free Shine.
- Appliance Manufacturer Guide · How to Clean and Polish Stainless Steel Appliances | Whirlpool.
- Third Party · 10 Surprising Ways to Clean Stainless Steel Appliances.
- Third Party · Polish a Stainless Steel Sink: Steps for a Shiny, Scratch - Free Sink.
- Third Party · How to Polish a Stainless Steel Sink.
- Third Party · How to Polish a Stainless Steel Sink | Taste of Home.