 StainList
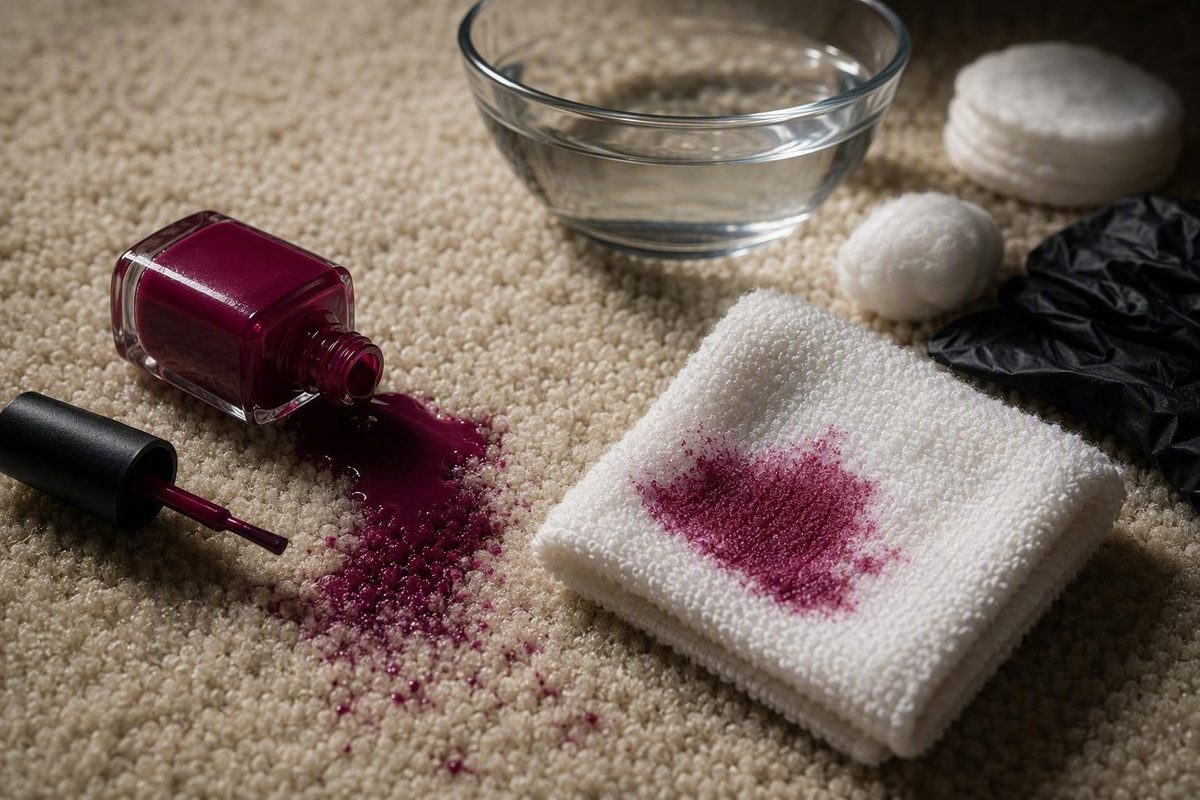
The safest answer to “How do I remove nail polish from carpet?” is a controlled sequence, not a miracle ingredient:
- Lift wet polish or remove loose dried flakes.
- Check the carpet’s care and warranty instructions.
- Patch-test a compatible treatment in a hidden area.
- Apply the cleaner sparingly to a white cloth, not directly to the carpet.
- Blot from the perimeter toward the center.
- Remove cleaner residue, rinse minimally, and air-dry.
- Stop if transfer ends, the carpet changes, or liquid reaches the backing.
This cautious approach matters because stain removal and carpet preservation can compete. A solvent that dissolves nail polish may also affect carpet dye, fibers, finishes, adhesive, or backing. Publicly available instructions also come largely from flooring retailers, cleaning companies, product brands, and household guides rather than controlled comparisons, so no solvent can be declared universally safest or most effective.
Quick action improves the opportunity to lift surface polish, but complete removal cannot be promised. Old, large, deeply absorbed, bright, red, or dark spills may leave a colored shadow even after the surface film is gone.
First response: contain a wet spill without spreading it
If the polish is still wet, begin with this emergency checklist:
- Keep people and pets off the area. Foot traffic can spread the spill or press it deeper into the pile.
- Collect clean white paper towels or absorbent white cloths. Have several ready so you can change sections frequently.
- Do not wipe, rub, scrub, or brush.
- Do not pour water, remover, or another cleaner onto the spill.
- Lift the wet polish straight upward.
Place the edge of a folded white towel lightly against the surface polish, let the material absorb it, and lift vertically. Move to a clean section as soon as color transfers. Flooring-retailer guidance likewise recommends lifting softened polish with clean white absorbent material and working toward the center rather than spreading the spill (Carpet One’s carpet-care procedure).
The immediate goal is to collect accessible polish without driving it toward the backing. Continue only while the towel is visibly picking up material.
Wipe the spoon between lifts, and do not drag it sideways or dig underneath the fibers.
Replace or rotate it frequently so dissolved color is not deposited back onto the carpet.
For a large or deeply soaked spill, limit the first response to gentle surface blotting. Do not try to compensate by flooding the area with remover.
Act promptly but conservatively. Fast blotting may improve the result; aggressive treatment can turn a small surface spill into a larger discolored or saturated area.
Before using a cleaner: identify risks and run a patch test
Before applying any solvent, look for the purchase invoice, manufacturer label, maintenance booklet, fiber information, or warranty. The carpet maker may specify approved spot treatments or prohibit particular products. Carpet One warns that fibers can react differently and that failure to follow applicable stain-removal instructions may affect warranty coverage.
If you cannot identify the carpet, treat that as unresolved uncertainty—not permission to use a stronger remover.
Seek manufacturer or professional guidance before treatment when the carpet is:
- Wool or another natural fiber
- Antique, handmade, delicate, or valuable
- Covered by a warranty with unclear treatment requirements
- Constructed with special dyes or backing
- Of unknown fiber or construction
If the care instructions permit spot treatment and you choose to proceed, run a qualitative patch test:
- Select a concealed location, such as inside a closet or behind furniture.
- Put a tiny amount of the proposed cleaner on a white cotton swab or cloth. Do not pour it onto the test area.
- Touch the carpet sparingly.
- Blot with a clean white section.
- Let the area dry completely.
- Compare its color, feel, sheen, and pile texture with the surrounding untreated carpet.
A wet patch can temporarily look darker or feel different, so make the comparison only after complete drying.
Stop if you notice:
- Carpet color on the white cloth
- Fading or a new color cast
- Softening, tackiness, or stiffness
- Altered sheen or pile texture
- Matted, distorted, or misshapen fibers
- A mark that spreads beyond the test area
- Liquid reaching the backing
- Movement or separation within the carpet construction
Step-by-step method for wet nail polish
After lifting the excess, checking the carpet instructions, and completing a successful patch test, a colorless non-acetone nail-polish remover is a frequently suggested cautious starting option. It is not proven safe for every carpet, and “non-acetone” does not mean harmless.
You will need:
- Clean white absorbent cloths or plain white paper towels
- White cotton swabs for a very small spot
- Colorless non-acetone remover, if permitted by the carpet instructions
- Separate cloths for residue removal
- A dull spoon if surface liquid remains
Use this procedure:
- Mark the boundary visually. Identify the outer edge of the stained fibers.
- Dampen the applicator. Put a small amount of remover on a white swab or folded cloth. It should be damp, not dripping.
- Touch one outer section. Do not cover the entire stain at once.
- Blot toward the center. Lift dissolved polish with a clean, dry section.
- Inspect the transfer. Confirm that the color on the cloth is polish, not carpet dye.
- Rotate the cloth immediately. Never place a stained section back onto the carpet.
- Repeat lightly. Soften and lift a small amount at a time.
This layer-by-layer method follows flooring guidance that recommends applying remover sparingly, preventing it from reaching the backing, and removing softened material gradually rather than rushing the treatment.
Watch both the cloth and the carpet. Polish appearing on the cloth indicates useful transfer. Carpet dye on the cloth, an expanding boundary, tackiness, softening, or texture change indicates that treatment should stop.
Do not hold a solvent-wet cloth against the carpet for a prolonged soak.
Do not keep adding remover if the pile is already wet. Blot with dry material instead.
Keep each application inside the original boundary. A less distinct stain is not a reason to expand treatment into clean carpet.
If cautious attempts produce no visible polish transfer, stop. Adding more solvent without evidence of progress only increases exposure.
How to remove dried nail polish from carpet
Dried polish needs a mechanical step before liquid treatment.
Use a dull spoon, old plastic card, blunt butter knife, or similarly smooth edge. Hold it at a shallow angle—nearly parallel to the carpet—and gently lift the edge of the hardened film in small sections.
Do not use a razor blade, utility knife, sharp scissors, or a forceful sawing motion. Do not pull fibers that appear embedded in the polish. If a section does not release under light pressure, leave it for the controlled softening step.
Collect larger chips carefully, then vacuum smaller flakes before introducing liquid. Commercial carpet guidance similarly recommends loosening dried residue with a dull tool and vacuuming the flakes before treating what remains (wet and dried polish procedure).
After removing the loose film:
- Recheck the carpet’s care instructions.
- Patch-test the proposed cleaner in a hidden area.
- Dampen a white swab or cloth with colorless non-acetone remover.
- Touch a small section at the stain’s outer edge.
- Blot inward with a clean, dry section.
- Rotate the cloth whenever polish transfers.
- Repeat with light soften-and-lift passes instead of saturating or scraping harder.
Dried polish may require patience. Stop if the fibers begin to fray, flatten, move, or feel altered.
Do not routinely trim stained fiber tips. Cutting can leave fibers shorter than their neighbors, produce a visible depression, or cause permanent pile damage. It removes part of the carpet rather than cleaning it.
Keep expectations conservative. Dried, old, bright, red, dark, or widely spread polish may leave a tint after the brittle film has been removed. Cleaning-service guidance specifically notes that red polish on pale carpet may leave a visible pinkish shadow (limitations and precautions for dried red polish).
Non-acetone remover, acetone, or rubbing alcohol: understanding the tradeoffs
No solvent is universally best. Compatibility depends on the carpet’s fiber, dye, finish, backing, adhesive, installation, warranty, and the way the product is applied.
| Option | Possible advantage | Main concerns | Cautious position |
|---|---|---|---|
| Colorless non-acetone remover | Frequently suggested as a gentler starting solvent | Can still alter dye, texture, finishes, or backing; some formulas may leave residue | Consider only after checking care instructions and completing a successful patch test |
| Clear acetone | Dissolves nail polish quickly | Greater compatibility concerns for susceptible fibers, dyes, backing, or adhesive | Do not escalate to it on unknown carpet without manufacturer or professional guidance |
| Rubbing alcohol | Sometimes suggested as an alternative | Not established as safer or more effective; may still affect dye or construction | Treat as a separate solvent requiring its own patch test and sparse application |
Colorless non-acetone remover
Colorless non-acetone remover is the most consistently suggested cautious starting option across the carpet-specific household guidance reviewed. That is a pattern of recommendation, not comparative proof that it is safest.
“Colorless” reduces the risk of introducing dye from the remover itself. “Non-acetone” does not guarantee compatibility with carpet.
Formulas vary, and some may leave an oily residue that changes the appearance or attracts soil. That is why residue removal is part of the procedure rather than an optional finishing step.
A slower-acting product can tempt repeated application. Preserve the same decision rule throughout: continue only while polish transfers and the carpet remains unchanged.
Acetone
Advice about acetone conflicts. One beauty editorial recommends clear acetone applied to a rag rather than poured onto carpet, illustrating the pro-acetone household approach (example of advice favoring clear acetone). That article does not address carpet identification, warranty requirements, ventilation, patch testing, or backing compatibility.
By contrast, carpet-oriented commercial guidance warns that acetone may bleach or alter susceptible fibers and may damage some synthetic backing. These warnings do not prove that acetone destroys every carpet, but they do show why compatibility cannot be assumed.
When the fiber, dye, finish, backing, adhesive, or warranty terms are unknown, do not escalate to acetone without approval from the carpet manufacturer or advice from a qualified carpet professional. A successful hidden-area test also does not justify pouring acetone onto the stain.
Rubbing alcohol
Rubbing alcohol is sometimes proposed when non-acetone remover is unavailable or unsuitable, but the available household guidance does not establish it as safer or more effective.
Treat it as a separate solvent with its own compatibility risks. If carpet guidance permits it, patch-test first, apply it to a white cloth rather than directly to the carpet, and stop if the carpet changes or no polish transfers.
Do not move directly from remover to alcohol while the first product remains in the pile. Remove the previous residue, let the carpet dry, and reassess before changing methods.
Why carpet color is not enough
A light carpet is not automatically compatible with one solvent, nor is a dark carpet automatically compatible with another. Color may make fading or residual pigment easier to see, but it does not identify the fiber, dye chemistry, finish, backing, adhesive, or warranty requirements.
Avoid treatment charts based only on “light carpet” versus “dark carpet.” The complete construction matters.
Solvent precautions
Follow the product label and ventilate the room. Keep solvent-treated carpet and damp cleaning materials away from smoking materials, flames, sparks, pilot lights, space heaters, hair dryers, and other ignition or high-heat sources. Carpet One notes that some spot-cleaning solvents may be flammable, while cleaning-service guidance advises against heated drying after solvent treatment.
Close the product container after dampening the cloth. Keep people and pets away from the treatment area until it has air-dried, and follow the label’s directions for handling used cleaning materials.
Remove cleaner residue, rinse sparingly, and dry the carpet
Removing the polish is not the end of the process.
When polish has stopped transferring:
- Prepare a weak detergent solution. Add a small amount of clear dishwashing detergent to water. Published recipes vary, so avoid making the mixture thick or sudsy.
- Apply it to a white cloth. Do not pour it onto the carpet.
- Blot the treated fibers. Stay within the existing treatment boundary.
- Rinse sparingly. Use a separate white cloth lightly dampened with cool water to pick up detergent and solvent residue.
- Press with dry towels. Absorb moisture by pressing and lifting rather than rubbing.
- Air-dry completely. Keep traffic off the spot while it dries.
- Vacuum gently. Once dry, vacuum to help restore the pile and reassess the appearance.
The rinse cloth should be damp, not dripping.
Use only one treatment at a time. Remove residue and allow the area to dry before considering another method. Cleaning-service guidance likewise recommends using one method at a time and rinsing before changing treatments.
Never combine solvents or household cleaners. The available carpet guidance does not validate mixed-product recipes as a safer or more effective approach.
Do not accelerate drying with a hair dryer, heater, or other heat source. Allow ventilation and natural air-drying instead.
Stop further DIY treatment if the area:
- Feels sticky after drying
- Develops a ring beyond the original spill
- Retains a strong solvent odor after ventilation and drying
- Appears wet through to the backing
- Becomes stiff, soft, faded, matted, or distorted
- Shows movement or separation within the carpet construction
- Looks larger after each treatment
If the polish film is gone but a slight tint remains, professional assessment—or accepting the shadow—may be safer than repeated solvent treatment.
What not to use or do
Avoid methods that spread the stain, damage the pile, introduce difficult residues, or drive liquid into the carpet construction.
Do not wipe, rub, scrub, or brush aggressively. Work from the outside toward the center.
Do not pour cleaner directly onto the carpet. Direct pouring makes the dose difficult to control and increases the chance of wetting the backing.
Do not saturate the pile. More solvent is not evidence of better cleaning. If nothing is transferring, continued application increases exposure without demonstrating progress.
Do not scrape with sharp tools. Use only a blunt edge at a shallow angle to loosen brittle surface material.
Do not choose a treatment solely by carpet color. Light and dark carpets can both contain solvent-sensitive fibers, dyes, finishes, backing, or adhesive.
Do not mix products. Remove one treatment, rinse minimally, let the carpet dry, and reassess before considering another.
Household-remedy lists often propose hairspray, window cleaner, WD-40, vinegar, baking soda, ginger ale, sugar, hair gel, toothpaste, or hand sanitizer. Support for these methods is inconsistent, and some can add oil, dye, fragrance, gel, moisturizers, or sticky residue. Cleaning-service guidance specifically discourages several such remedies because of residue or effectiveness concerns.
Hydrogen peroxide should not be treated as a routine nail-polish remover. Some commercial instructions restrict it to white or very light carpet and warn that it may alter darker colors. Color categories alone still do not prove fiber or dye compatibility.
Do not routinely trim stained fibers. A faint tint is generally less destructive than a permanently shortened or uneven patch.
Finally, do not use a hair dryer, space heater, flame, or spark-producing equipment around solvent-treated carpet. Solvent precautions should follow the product label, and the carpet should air-dry naturally.
The practical priority is preserving the carpet, not removing the final trace of color at any cost.
When to stop DIY treatment and call a carpet professional
Professional assessment is sensible before treatment when the carpet is wool, natural-fiber, antique, handmade, delicate, valuable, or warranty-covered and the compatible procedure is uncertain.
Stop immediately if you observe:
- A failed patch test
- Carpet dye on the white cloth
- Fading or a new color shift
- Softened, tacky, stiff, frayed, or distorted fibers
- Liquid reaching the backing or padding
- Movement or separation within the carpet construction
- A stain that expands during treatment
- A strong odor that remains after ventilation and complete drying
A large or deeply soaked spill also warrants professional evaluation. Surface blotting may contain it, but household spot treatment may not reach polish in the lower pile or padding without distributing more solvent through the carpet.
Call a professional when cautious treatment no longer produces visible transfer. The chosen product may be ineffective, the accessible film may already be gone, or the remaining mark may be pigment or carpet damage.
Tell the cleaner every product you applied—including remover, rubbing alcohol, detergent, or an improvised treatment—and whether you rinsed afterward.
Professional cleaning cannot guarantee complete removal. Old, bright, red, dark, extensive, or deeply absorbed polish may still leave a tint, especially on pale carpet.
Use one decision rule: continue only while polish is visibly transferring and the carpet remains unchanged; stop when progress ends or signs of damage appear.
Frequently asked questions
Can I use acetone nail-polish remover on carpet?
Do not assume acetone is compatible with your carpet. It may dissolve nail polish quickly, but carpet-oriented guidance warns that it may discolor or alter susceptible fibers and may create backing or adhesive concerns. Other household articles recommend clear acetone, which is precisely why there is no universal yes-or-no answer.
If the carpet manufacturer specifically approves acetone for that fiber and construction, patch-test it in a hidden area and apply it sparingly to a white cloth—not directly to the stain. Follow the label, ventilate the room, and keep the area away from heat, flames, sparks, and other ignition sources.
If the carpet is unknown, warranty-covered, wool, natural-fiber, delicate, or valuable, seek manufacturer or professional guidance instead.
What should I use if I do not know what fiber my carpet is?
Unknown fiber means unknown compatibility. Check purchase records, an installation invoice, manufacturer labels, maintenance instructions, and warranty documents. If identification remains uncertain, contact the retailer, carpet manufacturer, or a professional cleaner.
If the care instructions permit spot treatment and you accept the remaining uncertainty, colorless non-acetone remover is a frequently suggested cautious option after a fully dried hidden-area test. Apply it only to a white swab or cloth and stop at the first sign of dye transfer, fading, tackiness, softening, distortion, or excessive moisture.
Do not treat uncertainty as a reason to use acetone or another stronger solvent.
Can dish soap remove nail polish from carpet by itself?
Dish soap may collect light residue and is useful after solvent treatment, but it should not be expected to dissolve every hardened nail-polish film. Commercial household guidance generally presents diluted dish detergent as a cleanup step or an option for limited surface residue rather than a universally effective replacement for a compatible solvent (comparison of household treatment methods).
Use a weak solution of clear dishwashing detergent and water on a white cloth. Blot rather than scrub, then rinse with a separate cloth lightly dampened with cool water. If no polish transfers, do not strengthen the solution or saturate the carpet.
Why is no nail-polish color transferring to my cloth?
Possible explanations include:
- The remaining polish is too hard for the tested treatment.
- The proposed solvent does not dissolve that polish effectively.
- The removable film is gone and the visible mark is residual pigment.
- The polish has penetrated below the accessible fiber tips.
- The cloth section is already too soiled to show new transfer.
- The remaining discoloration is carpet damage rather than polish.
First confirm that you are using a clean white section and working at the stain’s outer edge. If cautious attempts still produce no transfer, stop adding solvent. Carpet-cleaning guidance similarly advises stopping when rubbing alcohol is not visibly transferring polish rather than applying it indefinitely (visible-transfer guidance).
Remove the treatment residue, blot dry, allow complete air-drying, and reassess. Consult the manufacturer or a carpet professional if the mark remains.
Will a red or dark nail-polish stain come completely out of pale carpet?
It may improve substantially, but complete removal cannot be promised. Bright, red, dark, old, large, or widely spread polish may leave a residual tint after the hardened film has been lifted.
The compact decision path is:
- Blot wet polish, or lift and vacuum loose dried flakes.
- Check the carpet’s care and warranty instructions.
- Patch-test in a hidden area and let it dry fully.
- If permitted, apply colorless non-acetone remover sparingly to a white cloth.
- Work from the perimeter inward only while polish transfers.
- Remove residue with a weak clear-detergent solution.
- Rinse minimally, press dry, and air-dry completely.
- Stop if the carpet changes, liquid reaches the backing, or visible transfer ends.
A faint remaining shadow is preferable to permanent dye loss, altered fibers, or backing damage.