 StainList
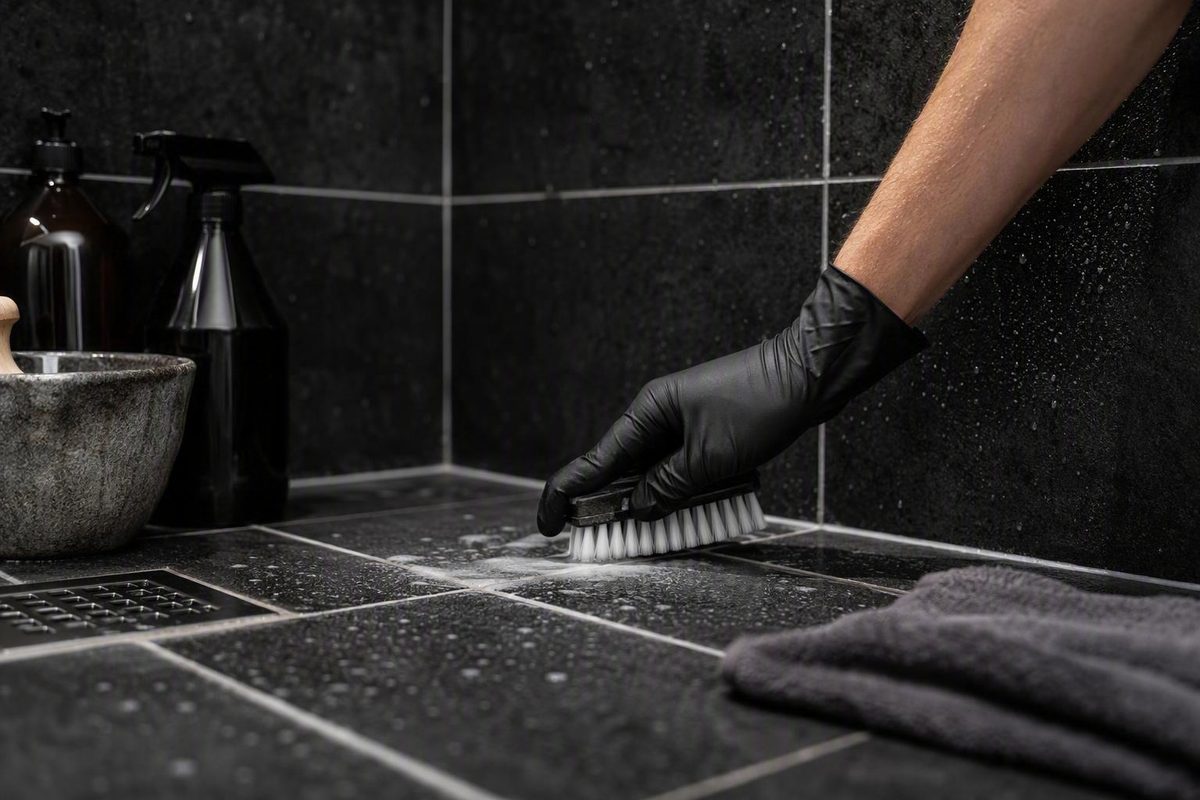
The best way to clean shower grout is not to reach immediately for the strongest chemical or a one-size-fits-all homemade recipe. Start by identifying the joint and surrounding surface as far as possible, then choose the least aggressive compatible cleaner.
For ordinary grime, the conservative starting method is a pH-neutral tile-and-grout cleaner, a soft nylon brush, a complete rinse, and thorough drying. If discoloration remains, escalate cautiously to a patch-tested peroxide paste, oxygen bleach, a labeled specialty cleaner, or—only on a suitable installation—steam.
Quick decision guide
- Intact grout and an uncertain installation: Start with a pH-neutral cleaner labeled for both the tile and grout.
- Natural stone or polished tile: Use only a product expressly approved for that material and finish.
- Dark or colored grout: Patch-test before using peroxide, oxygen bleach, an abrasive eraser, or another oxidizing treatment.
- Silicone caulk: Do not automatically apply grout-cleaning advice to it, and do not use steam.
- Cracked, soft, loose, or crumbling joints: Stop cleaning and consider repair.
- Discoloration that returns quickly: Investigate moisture, ventilation, failed joints, or a possible leak instead of repeatedly applying stronger chemicals.
Before You Clean: Check the Joint, Tile, Color, and Condition
Before choosing a cleaner, answer four questions:
- Is the joint cementitious grout, epoxy grout, or silicone caulk?
- What surrounds it: ceramic, porcelain, glass, polished tile, or natural stone?
- Is the grout white, colored, or dark?
- Is the joint intact, or is it cracked, loose, soft, separated, or crumbling?
These details matter because cleaner compatibility varies with the grout formulation, pigment, tile, finish, and sealer. A method that works on one shower should not be assumed safe for another.
Distinguish grout from silicone caulk
Grout is commonly used between tiles. Placement is only a clue, not definitive identification.
Check installation records, leftover packaging, renovation invoices, or manufacturer information. If the material remains uncertain, ask the installer, property manager, or product manufacturer.
Do not automatically apply cement-grout instructions to silicone. In particular, steam should not be directed onto silicone because heat may damage it, according to Duravit’s guidance distinguishing standard grout from silicone joints.
Treat epoxy grout as a manufacturer-instructions case. The appropriate cleaner depends on the specific epoxy formulation, surrounding tile, finish, and approved maintenance products.
Identify the tile as well as the joint
Determine whether the surrounding surface is ceramic, porcelain, glass, polished tile, or natural stone. Do not infer compatibility from the word “tile” alone.
Marble, travertine, limestone, and similar acid-sensitive stones require particular caution. Vinegar, citric acid, and acidic bathroom cleaners can etch those materials, while acidic or abrasive products may also affect grout and finishes. A pH-neutral cleaner approved for the particular stone and grout is the conservative choice for these installations, as reflected in surface-care guidance on acids and natural stone.
Glass, polished tile, dark surfaces, and high-gloss finishes may show scratches or dull patches from coarse brushes and abrasive cleaning erasers. An unknown sealer creates another compatibility question, so test the complete cleaning method—not just the cleaner—in a hidden area.
Inspect the condition before wetting the shower
Look closely for:
- Cracked, missing, loose, soft, or powdery grout
- Grout that comes away under a soft brush
- Gaps at wall corners or where tile meets the shower base
- Silicone that is peeling, split, deeply stained, or separating
- Loose tile or movement around a joint
- Dampness that persists when the shower has not recently been used
- Staining that appears to extend below the joint’s surface
Cleaning cannot repair these conditions. Continued scrubbing, prolonged wetting, or high-pressure steam may make a weak joint worse.
Color alone is not a reliable diagnosis. Cleaning can reveal whether some material is removable, but it cannot establish what is hidden behind tile or caulk.
If the grout type, finish, or sealer is unknown, choose a pH-neutral cleaner expressly labeled for both the tile and grout. Test it in an inconspicuous area, rinse, and inspect the test area only after it has dried.
Gather Safe Tools and Prepare the Shower
For routine cleaning, gather:
- Cleaning gloves
- Eye protection if splashing is possible
- A nylon grout brush or soft toothbrush
- Microfiber cloths
- A soft, surface-compatible sponge
- Clean water
- One cleaner confirmed compatible with the installation
- A squeegee or dry cloth for the final pass
Open a window or run the bathroom exhaust fan before using a cleaning product. Read the entire label, including its surface restrictions, protective-equipment requirements, ventilation directions, dilution, contact time, rinsing instructions, and first-aid information.
Remove bottles, razors, soap dishes, bath mats, and other movable items. Wipe the tile and grout with a clean damp cloth to remove hair, dust, loose dirt, and surface residue.
Patch-test before treating a prominent section, especially when the shower has:
- Dark or colored grout
- Natural stone
- Polished or high-gloss tile
- An unknown sealer
- Metal trim or decorative inlays
- A peroxide- or oxygen-bleach cleaner
- An abrasive cleaning eraser
Apply the proposed cleaner and tool to a hidden spot. Rinse and let it dry completely. Check for grout lightening, blotchiness, tile dulling, scratches, residue, softened caulk, or a change in sheen.
Work from the top of a shower wall downward. Divide large walls into small sections so the cleaner remains controllable, does not dry on the surface, and does not stay longer than its label allows.
Use one cleaning product at a time. Never strengthen a commercial cleaner with bleach, vinegar, ammonia, peroxide, or another product. Mixing cleaners can produce hazardous fumes or unpredictable reactions, while wire brushes, steel wool, and coarse pads may wear grout or scratch adjacent surfaces; tile-and-grout safety guidance recommends one product at a time and soft or nylon tools.
Protect nearby fixtures as the product label directs. Chlorine bleach in particular may discolor darker grout and should be kept away from incompatible metals and other adjacent materials; if the cleaner cannot be controlled around those surfaces, choose another method, as cautioned in natural-stone and grout care guidance.
The Safest Routine Method: pH-Neutral Cleaner, Gentle Scrub, Rinse, and Dry
This is a conservative starting process for ordinary shower grime and soap residue, particularly when the exact installation is uncertain. It is not proof that every pH-neutral product is compatible: the cleaner must still be labeled for the relevant tile and grout.
Step 1: Remove loose residue
Wipe the area with a clean damp microfiber cloth. Remove hair, dust, loose soap, and surface dirt.
Lightly dampen the area only if the cleaner’s instructions call for it. Application and dilution requirements differ, and some concentrates are intended for a particular surface condition.
Step 2: Apply a compatible pH-neutral cleaner
Choose a product whose label expressly includes the relevant tile and grout. A generic “bathroom cleaner” or “all-purpose cleaner” is not enough when the shower contains natural stone, polished tile, colored grout, or a specialty sealer.
Use the stated dilution. Do not create a stronger concentration in the hope of reducing scrubbing.
Step 3: Observe the directed dwell time
Apply the cleaner to a small section and leave it for the label-directed contact time. Keep the section evenly treated without allowing the product to dry or remain longer than permitted.
Dwell time allows the cleaner to loosen residue. A longer dwell is not automatically more effective or more compatible with porous grout, pigment, sealers, and sensitive finishes.
Step 4: Scrub gently
Use a nylon grout brush or soft toothbrush. Make short, controlled passes along the joint, using several light passes rather than heavy pressure.
The goal is to lift softened soil, not grind away the grout surface. Stop if the brush collects sandy or powdery material. That may indicate joint deterioration rather than removable dirt.
Step 5: Rinse away all cleaner
Wipe repeatedly with a clean wet microfiber cloth or compatible sponge, changing the water as it becomes soiled. Where the installation and product directions allow it, use a brief, controlled rinse.
Continue until no cleaner or loosened residue remains.
Thorough rinsing is different from leaving porous joints saturated for a prolonged period. Use enough clean water to remove the product, then move promptly to drying rather than allowing water to stand.
Step 6: Dry and ventilate
Dry the tile and grout with a clean microfiber cloth. Run the exhaust fan or open a window until the shower is dry.
Judge the result only after the grout has dried completely.
If the dry grout has improved but remains dirty, repeat the mild process once. A second controlled pass is preferable to an abrupt jump to a stronger chemical.
A Patch-Tested DIY Paste for More Visible Buildup
If a compatible pH-neutral cleaner does not remove visible buildup, one published DIY option combines the following ingredients:
- 1/2 cup baking soda
- 1/4 cup hydrogen peroxide
- 1 teaspoon mild hand-dishwashing liquid
The quantities and a 5–10 minute dwell time come from an informal household comparison and shower recipe published by Bren Did. The testing primarily involved white floor grout, not controlled testing across different shower tiles, grout colors, sealers, or finishes.
The thick texture helps the mixture remain on vertical grout rather than immediately running down the wall. The small amount of dishwashing liquid helps it cling and loosen greasy residue, but it also makes complete rinsing important.
Do not assume the paste is universally safe. Test the complete method in a hidden area and inspect it after drying.
To use the paste:
- Mix only what you need. Combine the measured ingredients in a clean container. Do not add vinegar, bleach, ammonia, or another cleaner.
- Test a hidden section. Keep the paste mainly on the grout instead of spreading it unnecessarily over tile, metal, caulk, or fixtures.
- Wait 5–10 minutes. Stop sooner if the grout color changes or the adjacent finish reacts unexpectedly.
- Scrub lightly. Use a nylon grout brush or soft toothbrush without heavy pressure.
- Remove the paste. Lift the bulk with a damp cloth, then wipe or rinse repeatedly with clean water.
- Dry completely. Remove any remaining white powder or soap film.
- Evaluate the dry surface. Do not confuse temporary wet darkening with remaining soil.
Published DIY ratios and dwell times vary substantially. That inconsistency is a reason to keep homemade methods subordinate to grout, tile, sealer, and installation guidance.
The paste may brighten some visible staining. It should not be described as disinfecting, non-toxic, laboratory-proven, universally material-safe, or superior to a compatible commercial cleaner.
How to Escalate for Stubborn Stains Without Jumping Straight to Chlorine Bleach
If the mild method and, where suitable, the patch-tested paste do not produce an acceptable result, escalate in this order:
- Repeat the compatible mild method once.
- Consider oxygen bleach or a specialty grout cleaner.
- Consider steam only for intact, compatible grout.
- Treat chlorine bleach as a conditional, label-driven option rather than a default brightener.
- Stop and consider repair or professional assessment if the joint is deteriorated or discoloration returns quickly.
Oxygen bleach
Choose an oxygen-bleach product whose label permits use on the grout, grout color, tile, sealer, and nearby materials. Follow its concentration and maximum contact time rather than adopting a universal recipe.
Published contact times differ. For example, one retailer guide permits up to 15 minutes after hidden-area testing, but that figure applies to its described method and is not a universal instruction; see The Home Depot’s oxygen-bleach guidance.
Another seller-published method uses 20 minutes and recommends applying the solution to a damp sponge for vertical shower grout. Those directions are product-oriented guidance, not proof that the timing or cleaner is appropriate for every installation; see the vertical-grout application method.
For a label-compatible product on a shower wall:
- Prepare the solution exactly as directed.
- Apply it to a compatible damp sponge.
- Press the sponge against a small section of grout to improve contact and reduce runoff.
- Keep within the product’s permitted dwell time.
- Scrub gently with a nylon brush.
- Rinse completely and dry.
Oxygen bleach may improve visible staining, but it is not established as universally safe for colored grout or every sealer and finish. It also cannot be assumed to remove growth beneath grout, caulk, tile, or the wall assembly.
Specialty grout cleaner
A commercial grout cleaner may be appropriate when its label explicitly confirms compatibility with:
- The tile material and finish
- The grout type and color
- The existing sealer
- Silicone or other nearby joints
- Metal fixtures and trim
Follow the stated dilution, application, contact time, ventilation, protective-equipment, and rinsing directions. Do not apply a specialty cleaner over residue from a DIY paste or another cleaning product.
No branded cleaner is automatically “best.” A more aggressive product may remove a particular residue faster while carrying a greater risk of grout discoloration, finish damage, or sealer loss.
Abrasive cleaning erasers
A cleaning eraser is an optional surface treatment, not a universal grout-cleaning method.
Test it with light pressure and stop if the finish changes or grout transfers to the eraser. One manufacturer specifically excludes several sensitive finishes and warns against combining its eraser with bleach or other cleaners; see Mr. Clean’s surface and mixing precautions.
Chlorine bleach
Do not use chlorine bleach as the default way to whiten grout. Available guidance conflicts: some manufacturers permit a labeled bleach-containing product for severe surface growth or compatible white grout, while other surface-care guidance warns of colored-grout fading, sealer damage, metal effects, residue, or reduced grout longevity.
If milder treatment fails, consider a chlorine-containing mold product only when its label expressly permits every contacted material. Follow its exact ventilation, protective-equipment, application, contact-time, rinsing, and surface-protection directions. Do not substitute a homemade dilution.
Never mix chlorine bleach with ammonia, vinegar, acids, peroxide, or another cleaner. If changing products, follow the labels and rinse the first product away completely before beginning another treatment.
When Steam Cleaning Is Appropriate—and When It Is Not
Steam is an occasional deep-cleaning option rather than the first method for ordinary shower residue.
Consider it only when all of the following are true:
- The joint is confirmed compatible grout, not silicone caulk.
- The grout is intact and firmly bonded.
- There are no cracks, gaps, soft areas, loose sections, or crumbling edges.
- The tile and finish tolerate the machine and attachment.
- The sealer instructions do not prohibit steam.
- The steam-cleaner manufacturer permits the intended use.
Use water only in the steam cleaner unless its manufacturer expressly permits a specific additive. Steam-cleaner guidance also notes that steam may remove grout sealer, so the machine, grout, tile, and sealer instructions should all be checked before proceeding; see The Home Depot’s steam-cleaning instructions.
Do not direct steam onto silicone.
Heat and pressure may worsen grout that is already chipped or damaged. Re-Bath therefore limits steam use to intact grout because it may aggravate existing chipping, according to its shower-grout preparation and steam guidance.
Do not assume steam disinfects the entire installation, kills all concealed mold, or is safe for every tile, grout, finish, and sealer. It may loosen visible soil without resolving contamination or moisture beneath caulk, grout, tile, or the wall assembly.
After cleaning:
- Wipe away loosened residue.
- Let the shower dry completely.
- Inspect for cracks, powdering, color changes, or weakened joints.
- If the dry grout appears to absorb water differently, treat that only as a reason to consult the applicable product guidance—not as proof that the sealer has failed.
- Check the grout, tile, machine, and sealer instructions before deciding whether resealing is appropriate.
Steam cleaning does not automatically require immediate resealing. The decision depends on whether the grout is intended to be sealed, what product was used, and what the applicable manufacturers specify.
Suspected Mold, Persistent Discoloration, and Signs Cleaning Is Not Enough
A cleaner may lighten the surface without resolving growth beneath caulk, within a damaged joint, or behind the tiled assembly.
For suspected surface growth, begin with the same compatible mild-cleaning process:
-
Remove loose residue.
-
Scrub gently.
- Rinse completely.
- Dry the shower and ventilate the room.
- Reassess after the surface is dry.
If visible growth remains, a labeled mold-and-mildew cleaner may be considered only when it is compatible with the grout, tile, sealer, silicone, and nearby fixtures. Follow its exact safety and contact-time directions. One bleach-product manufacturer recommends starting with a milder cleaner and escalating only when needed while acknowledging that harsh products may reduce grout longevity; see Lysol’s mild-first grout guidance.
The disagreement about chlorine bleach matters. Some product guidance allows conditional use for severe surface growth or compatible white grout. Other sources advise against routine use because chlorine bleach may affect colored grout, sealers, metals, or grout longevity. A product label and a hidden compatibility test are more defensible than a generic bleach recipe.
Never mix bleach with ammonia, vinegar, acids, peroxide, oxygen bleach, or another cleaner. When moving from one product to another, follow the label and rinse thoroughly rather than layering chemicals.
Stop cleaning and consider repair when you find:
- Cracked, loose, soft, powdery, or crumbling grout
- Missing material or open gaps
- Silicone peeling away from tile or the shower base
- Deep staining that appears embedded in silicone
- Persistent discoloration below the surface
- Loose tile or movement at a joint
- Dampness that returns without recent shower use
- Growth that returns rapidly after complete cleaning and drying
Dirt or growth that has penetrated silicone may require removal and replacement of the caulk. Deeply discolored or deteriorated grout may require regrouting or professional restoration. Surface cleaning cannot repair a concealed leak, movement, or failed waterproofing.
Check whether the exhaust fan works, whether the shower dries between uses, and whether plumbing, caulk joints, or tile transitions are leaking. Repeatedly applying stronger chemicals may change the appearance temporarily without correcting the moisture source.
Seek qualified inspection when growth returns quickly despite cleaning and drying, a leak is suspected, grout or tile is loose, damage appears to extend below the surface, or the shower contains valuable natural stone or another unusually sensitive finish.
Preventing Grout Buildup and Deciding Whether to Reseal
After showering:
- Run the exhaust fan or open a window.
- Squeegee tile walls and doors.
- Wipe grout lines, corners, ledges, and the shower base where water collects.
- Leave the enclosure arranged so air can circulate.
- Remove visible soap or product residue before it becomes established.
Use a compatible pH-neutral tile-and-grout cleaner for spot cleaning. Address small areas of residue before they require wall-wide scrubbing.
There is no mandatory weekly, monthly, or annual schedule suitable for every shower. Cleaning frequency depends on shower use, household products, humidity, ventilation, grout type, grout color, sealer, and manufacturer instructions. Use deeper cleaning when routine wiping no longer removes buildup rather than relying repeatedly on strong oxidizers or steam.
Should the grout be sealed?
Before considering a sealer, the grout must be:
- Structurally sound
- Thoroughly cleaned
- Completely rinsed
- Free of cleaner residue
- Dry to the standard required by the sealer manufacturer
Not every grout or installation uses the same sealer, and epoxy or other specialty grout may have different requirements from conventional cementitious grout. Do not follow a universal drying time or resealing interval; consult the grout, tile, and sealer instructions.
A compatible sealer may reduce absorption and make future soil easier to remove. It cannot repair cracked or loose grout, failed silicone, movement, plumbing leaks, or waterproofing defects.
Use this maintenance checklist:
- Ventilate during and after showering.
- Squeegee or wipe wet surfaces.
- Spot-clean with a compatible pH-neutral product.
- Inspect joints for cracks, gaps, softness, and separation.
- Repair leaks and failed joints rather than covering them with cleaner.
- Reseal only when appropriate for the specific installation.
Frequently Asked Questions
Can I use vinegar to clean shower grout?
Generally, avoid vinegar on cementitious grout or an unidentified shower installation. It is acidic and may affect grout or sealer, and it can etch acid-sensitive stone such as marble, travertine, and limestone.
Although some guidance conditionally discusses diluted vinegar for silicone, that advice should not be transferred to ordinary grout or surrounding stone. Unless every contacted material is confirmed compatible, use a labeled pH-neutral cleaner instead.
Is chlorine bleach safe for white or moldy shower grout?
Not universally. White grout does not establish that its sealer, surrounding tile, caulk, fixtures, or backing materials tolerate chlorine bleach.
Begin with a compatible mild cleaner. If a chlorine-containing mold product is needed, use only one whose label approves the installation and follow its ventilation, protective-equipment, contact-time, and rinsing directions. Never mix it with vinegar, ammonia, acids, peroxide, or another cleaner.
Will hydrogen peroxide or oxygen bleach lighten colored grout?
Compatibility depends on grout pigment, sealer, concentration, contact time, and surrounding finish.
Test a hidden section using the intended method. Rinse it completely, let it dry, and compare it with untreated grout under similar lighting. Stop if the test area becomes lighter, blotchy, dull, or otherwise altered.
Should grout be resealed after cleaning or steam cleaning?
Not automatically. Reseal only when the grout is intended to be sealed, the existing sealer requires attention, and the proposed product is compatible with the grout and tile.
Steam may affect some sealers, but that does not prove every steam-cleaned joint needs immediate resealing. Consult the applicable grout, tile, steam-machine, and sealer instructions.
When should shower grout or silicone caulk be replaced instead of cleaned?
Consider repair or replacement when grout is cracked, missing, loose, soft, powdery, or crumbling, or when silicone is split, peeling, separated, or deeply stained below its surface.
Penetrated dirt or growth in silicone may require caulk removal and replacement. Deteriorated grout may require regrouting or professional restoration. If discoloration returns quickly, investigate ventilation, leaks, failed joints, and possible waterproofing problems instead of continuing to scrub.
The safest overall approach is to verify the surface as far as possible, start with a compatible pH-neutral cleaner, scrub with a soft nylon brush, rinse completely, and dry. Escalate only after patch testing. Treat chlorine bleach and steam as conditional tools, and stop cleaning when the real problem is cracked grout, failed caulk, recurring moisture, or another defect that cleaning cannot repair.