 StainList
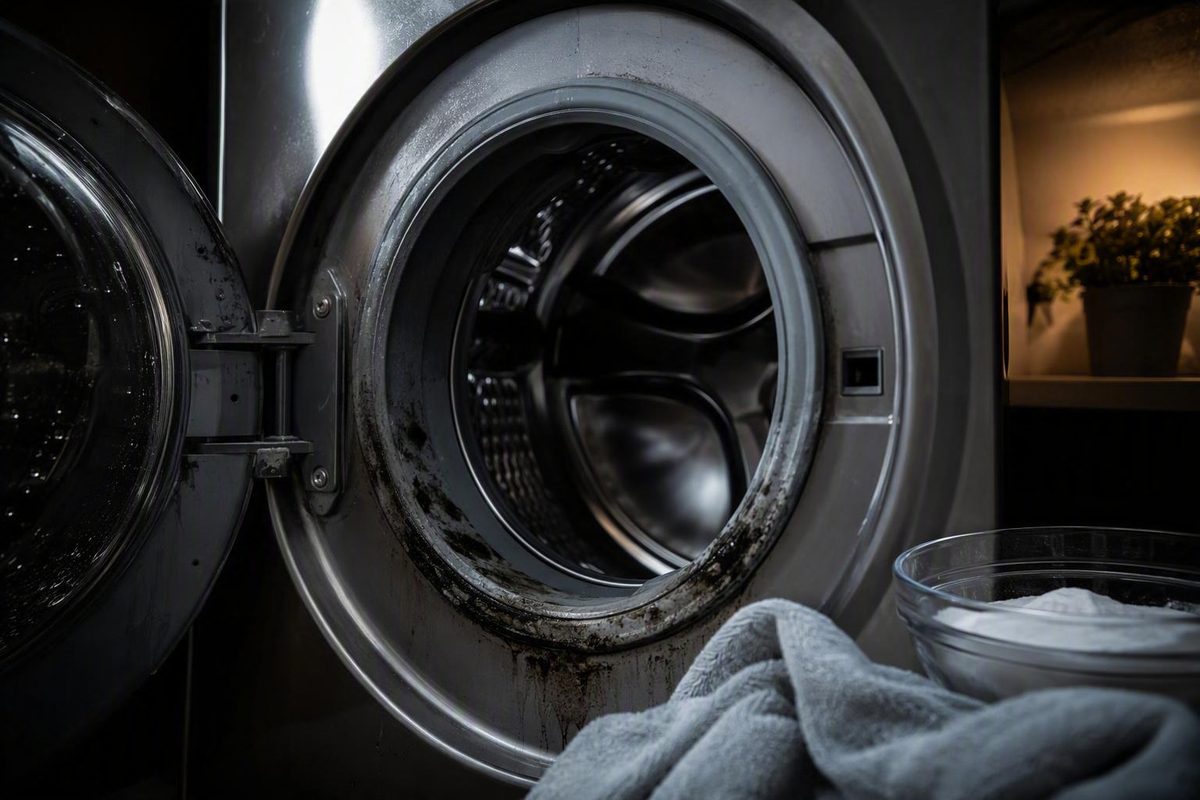
Learning how to deep clean a washing machine starts with one important limitation: there is no single household-chemical recipe that is right for every appliance. Front-loaders, traditional top-loaders, high-efficiency machines, compact washers, and combination units can differ in their cycles, internal materials, dispenser routing, filters, and maintenance procedures.
The safest approach is to identify the exact model, read its use-and-care guide, and choose one compatible cleaning method. Run the specified cycle with an empty drum, then manually clean the residue-prone areas that a tub cycle may miss: dispensers, gasket folds, the door or lid, the rim, and any user-serviceable filter. Rinse when directed, wipe away loosened residue, and dry accessible surfaces.
Allow roughly one to three hours for the complete job.
Related: How Can I Polish Stainless Steel: DIY Guide for Appliances, Sinks & More.
Before You Start: Identify the Washer and Choose One Approved Method
Find the washer’s model number and use the manufacturer’s support site to locate the corresponding use-and-care guide. If you are unsure where the identification label is, consult the manufacturer’s model-identification instructions rather than relying on a universal location.
The model-specific guide should control four decisions:
- Which cleaner is permitted
- Where the cleaner goes
- Which maintenance cycle or alternative setting to use
- Which dispensers, caps, and filters the user may remove
Look for a cycle called Clean Washer, Tub Clean, Self Clean, Drum Clean, or something similar. Confirm that it is intended to run with an empty drum. Do not assume that an ordinary high-temperature cycle is a safe substitute or that every washer may run empty.
If the manual specifies a product or procedure, use it instead of adapting a generic recipe. Whirlpool, for example, tells owners to consult the use-and-care guide before selecting a cleaner or maintenance cycle for a particular washer in its six-step cleaning guide.
For a beginner, the lowest-conflict default is a washing-machine cleaner that the appliance instructions and product label both permit. This avoids improvising concentrations from household ingredients. It does not mean that one brand is required or that every tablet is suitable for every appliance.
Choose one cleaning method for the entire session. Do not build a sequence involving bleach, vinegar, peroxide, powdered cleaners, and tablets. A quick or unspecified rinse is not proof that it is safe to switch between incompatible products.
If you use a washer-cleaner tablet, check where it belongs. Tablets commonly go directly in the bottom of the empty drum rather than in the detergent dispenser, but the tablet label and washer manual take precedence.
Treat chlorine bleach as a conditional option. Use it only when the washer manual and bleach label both permit it. Concentration, dose, placement, cycle, contact time, and rinse requirements can differ by product and machine, so do not transfer a quantity written for one washer to another.
Vinegar guidance is inconsistent. Some commercial cleaning guides recommend it, while Whirlpool warns that repeated acid exposure may weaken rubber seals and hoses over time. Unless your model’s manual expressly permits vinegar in the drum, choose another method as Whirlpool advises in its vinegar guidance.
Do not put dish soap in the washer tub. Whirlpool warns that it can produce excessive suds. Mild dish detergent may be permitted for hand-washing a detached dispenser, but that is different from adding it to the machine.
Before continuing, confirm that:
- The washer is empty.
- You have the correct model instructions.
- You know which cycle to run.
- Your chosen cleaner is compatible with the washer.
- You know where to place the cleaner.
- No incompatible cleaner is already present.
- You know whether a separate rinse is required.
- Every component you intend to remove is identified as user-serviceable.
Chemical Safety: Clean With One Product, Never a Mixture
Warning: Never mix chlorine bleach with vinegar, ammonia, acids, hydrogen peroxide, or another cleaner. Bleach mixed with an acid can release chlorine gas, while bleach mixed with ammonia can produce toxic chloramine gases. Read every product label before use, including labels for glass cleaners, rust removers, drain cleaners, and other products that may contain ammonia or acids. The Washington State Department of Health warns that these reactions can cause serious injury.
Follow every precaution on the cleaner label. If the label calls for gloves or ventilation, wear the specified protection and ventilate the laundry area. Avoid leaning into the washer while vapors are present.
Do not assume that a short rinse makes it safe to change products. Complete only the procedure specified for the single cleaner selected for that session.
If incompatible products are accidentally mixed:
- Stop using the washer.
- Do not reach inside or add another substance.
- Leave the contaminated area and keep other people and pets away.
- If symptoms occur, contact a healthcare provider or emergency service.
- Before handling the machine again, obtain instructions from the product manufacturer using the contact information on the label.
Concerning symptoms include coughing, nausea, watery or burning eyes, chest discomfort, wheezing, and difficulty breathing. Public-health guidance directs anyone who becomes ill after exposure to a chemical mixture to contact a healthcare provider or emergency response service rather than attempting further cleanup.
The Universal Deep-Clean Workflow
The exact cycle and cleaner vary by model, but the following sequence provides a practical framework for most washers.
1. Gather the supplies
Prepare:
- The model-specific use-and-care guide
- One washer-compatible cleaner
- Microfiber cloths
- A soft nylon brush or nonabrasive sponge
- Warm water
- Absorbent towels
- A shallow container if you will open a user-serviceable filter
- Gloves or other protection required by the cleaner label
Keep steel wool, abrasive pads, metal scrapers, and stiff tools away from coated surfaces and flexible seals. Do not put dish soap or another high-sudsing product in the tub.
2. Empty and inspect the drum
Remove all clothing, towels, and laundry aids. Check the drum for coins, pins, tissues, lint, pet hair, and other objects.
Note any standing water, corrosion, damaged surfaces, or unusual debris. Water that remains after the washer should have drained may indicate a fault that cleaning will not resolve.
3. Inspect accessible residue-prone areas
Before running the cleaning cycle, check:
- Front-loader gasket folds
- Dispenser drawers and cups
- Door glass or the underside of the lid
- The rim around the opening
- Accessible agitator or wash-plate surfaces
- The entrance to any documented user-serviceable filter compartment
Remove loose hair, lint, coins, and debris by hand or with a cloth. Do not push tools into internal channels or spaces that are not intended for user access.
4. Add one approved cleaner
Follow both the washer manual and the cleaner label. If both direct you to place a tablet in the drum, put it in the bottom of the empty drum rather than in a dispenser. Do not add laundry detergent or fabric softener unless the maintenance procedure expressly requires it.
If bleach is permitted, use only the specified bleach type, concentration, amount, and dispenser location. An estimated “splash” is not a substitute for model and product directions.
5. Run the designated maintenance cycle
Select Clean Washer, Tub Clean, Self Clean, or the corresponding program for your model. Let the cycle finish without adding laundry.
If the washer lacks a dedicated maintenance cycle, use only the alternative identified in the manual. That alternative may involve a particular hot, long, or high-water program, but do not automatically select every maximum setting. The washer’s temperature, water-level, and empty-cycle restrictions still apply.
6. Rinse when directed
Run an additional rinse or rinse-and-spin cycle if the appliance instructions or cleaner label requires one. Whirlpool lists rinse-and-spin as an option for removing excess cleaner after the maintenance cycle in its washer-cleaning instructions.
A directed rinse completes the selected procedure. It does not authorize the use of an incompatible chemical afterward.
7. Wipe away loosened residue
When the cycle ends, inspect the drum, glass, lid, rim, gasket, and dispenser area. Remove cleaner fragments, foam, lint, and loosened film with a clean damp cloth. Rinse or change the cloth frequently so that residue is not transferred between surfaces.
If material remains, repeat the wiping and any rinse specified in the instructions. Do not immediately double the cleaner concentration.
8. Dry accessible surfaces
Dry the gasket folds, glass, lid, rim, and dispenser opening. If you leave the door or lid open for airflow, make sure the laundry area is inaccessible to children and pets. Commercial washer guidance recommends securing the area when an open washer could create a hazard during drying.
If the washer cannot safely remain open, dry accessible surfaces manually and use another secure ventilation method.
Clean the Dispensers, Door, Exterior, and User-Serviceable Filter
Those areas need separate attention.
Dispensers
Inspect the detergent, fabric-softener, and bleach compartments. Remove a drawer, siphon cap, cup, or insert only if the manual identifies it as removable and explains the release method.
For a permitted removable dispenser:
- Release it using the specified mechanism.
- Soak it in warm or hot water, or wash it with mild detergent if allowed.
- Use a soft brush to loosen dried product from corners and channels.
- Rinse it thoroughly.
- Dry the part and the accessible dispenser housing.
- Reinstall it in the correct orientation.
Do not assume that a dispenser component is dishwasher-safe. Whirlpool notes that removable dispenser parts may not be suitable for dishwasher cleaning because heat or detergent can damage them.
For a fixed dispenser, clean only the surfaces you can reach with a damp cloth or soft brush. Do not flood a control panel or drive a tool deeply into a dispenser channel.
Door, lid, and exterior
Wipe the door or lid, handle, hinges, glass, rim, and control-area crevices with a soft damp cloth. On a top-loader, include the underside of the lid. On a front-loader, wipe both sides of the door glass and the accessible face of the gasket.
Use only a mild exterior cleaner permitted by the manufacturer. Dry the exterior afterward.
User-serviceable filter
Washer filters differ considerably. A machine may have a pump filter behind a small access door, a lint filter in another accessible area, or no filter intended for routine user removal. A generic location diagram is not proof that a panel should be opened.
Before accessing a filter:
- Empty the washer.
- Unplug it.
- Confirm in the manual that the filter is user-serviceable.
- Read the complete drainage and removal procedure.
- Place towels and a shallow container nearby for retained water.
Open it only as the manual directs because cap, drain-tube, and release arrangements vary by model.
Remove accessible coins, fibers, hair, and other debris. Rinse or gently brush the removable filter if instructed. Clean debris from its accessible sealing surface, then reinstall and tighten it exactly as directed. Manufacturer-specific access and correct reassembly matter because filters and other removable parts vary by machine; Home Depot’s appliance guide likewise advises consulting the owner’s manual and unplugging the washer before removing such components during cleaning.
If access would require taking off a cabinet panel, disconnecting a hose, moving wiring, or otherwise dismantling the appliance, stop and consult the manufacturer or a qualified technician.
Front-Load Washer Checklist: Focus on the Door Gasket
A front-loader’s flexible door gasket has folds where water and residue can remain. That makes the seal an important inspection point, although a musty smell alone does not prove that mold is present.
With the washer empty and stopped, gently pull back only the accessible folds. Look for:
- Retained water
- Lint and pet hair
- Detergent or fabric-softener residue
- Coins, buttons, and other small objects
- Dark staining
- Tears, distortion, or cracking
Remove loose material by hand or with a microfiber cloth. Do not puncture the rubber, stretch it away from its mounting point, or attempt to detach it.
Wipe the accessible folds with a damp cloth or a washer-cleaning product approved for the model. Use a fresh area of cloth as residue transfers, then dry the folds thoroughly. Rotate the drum by hand only if the manual permits it and the washer is safely stopped.
Do not apply a universal bleach mixture, concentration, or soak time to visible gasket growth. Some models permit a specific bleach treatment, while others restrict how bleach may contact the seal. Follow the model’s procedure instead of trapping chemical-soaked rags in the gasket or leaving an improvised solution to dwell.
The gasket is only one part of a front-loader deep clean. Also address:
- Door glass and frame
- Detergent and fabric-softener drawer
- Empty drum
- Approved maintenance cycle
- User-serviceable pump filter, if present
- Exterior and control-area surfaces
After cleaning and after normal wash loads, remove wet laundry promptly. Wipe persistent water or residue from accessible gasket folds and allow the drum and seal to dry using a method that is safe around children and pets.
If dark staining remains embedded after the manufacturer-approved treatment, do not keep increasing the chemical strength. Seek model-specific service guidance if the gasket is cracked, distorted, pulling away, or leaking.
Top-Load Washer Checklist: Lid, Rim, Agitator, and Wash Plate
A top-loader does not require front-loader gasket instructions unless its design includes a comparable seal. Instead, concentrate on the opening and central washing mechanism.
Wipe:
- The underside and edges of the lid
- The tub rim
- Accessible dispenser cups
- The top of the basket
- Surfaces around the agitator or center post
- The accessible edge of a wash plate
Use a damp microfiber cloth, nonabrasive sponge, or soft brush. Work residue out of visible seams without forcing a tool beneath the wash plate or agitator.
Some agitators have removable caps or dispenser cups; others do not. Remove a cap only when the manual identifies it as removable and explains how. If it resists, stop. Whirlpool specifically cautions owners not to force a resistant agitator cap and directs them to the model instructions for design-specific access.
Top-load designs differ substantially. One washer may have a removable fabric-softener dispenser on the agitator, another may route products through fixed compartments, and another may have no central agitator. Filters and wash plates are similarly model-dependent.
Run the same type of model-approved process used for other washers: an empty maintenance cycle with one compatible cleaner, followed by a rinse if directed. Afterward, wipe away loosened film and dry beneath the lid, around the rim, and inside accessible dispenser cups.
Those actions cross from ordinary user maintenance into appliance disassembly.
If the Washer Still Smells: Troubleshoot Before Adding More Cleaner
One correct deep-cleaning session may remove substantial residue, but it cannot be guaranteed to eliminate every odor or restore a washer affected by a drainage, seal, or mechanical problem.
A recurring smell does not necessarily prove mold or bacterial growth. Possible contributors include:
- Trapped moisture
- Excess detergent or fabric softener
- Loosened but unwiped cleaner residue
- Mineral deposits
- Debris in an accessible filter
- Standing water
- Slow or incomplete drainage
- A leak or damaged seal
- A laundry-drain problem
- Another appliance fault
First, confirm that the maintenance cycle completed. Make sure any required rinse was run and all visible cleaner residue was wiped away. Reinspect the drum, door or lid, rim, dispenser channels, front-loader gasket folds, and user-serviceable filter.
Look for water where it should not remain. Moisture on a gasket is different from a pool of standing water in the drum or filter compartment. Persistent water after a completed drain cycle calls for troubleshooting, not another dose of cleaner.
Inspect visible hoses and fittings without disconnecting them. Look for bulges, cracks, looseness, dampness, drips, or staining that could indicate a leak. Check accessible metal surfaces for corrosion. Do not move the washer or reach behind it if doing so would strain connections or expose damaged electrical components.
Stop cleaning and seek model-specific support or qualified service when you find:
- Persistent standing water
- Drainage failure or repeated drain errors
- A filter that should be serviced but cannot be accessed safely
- An electrical odor, sparking, damaged wiring, or abnormal heat
- Corrosion
- A cracked or leaking gasket
- Visible water leakage
- A resistant component that would require force
- Odor that quickly returns after the correct procedure
Commercial washer guidance identifies retained moisture, detergent, grime, hard-water deposits, damaged components, and drainage trouble as possible contributors to recurring washer problems, while directing users to follow manufacturer instructions for filters and other model-dependent components before attempting further work.
Do not respond by doubling the cleaner, shortening a dilution, repeating bleach cycles, or alternating bleach with acidic products. Stronger chemistry cannot repair a blocked pump, damaged seal, loose fitting, or electrical fault.
When an odor persists, note when it occurs: after the washer sits closed, during draining, after particular loads, or immediately after a cleaning cycle. That information may help the manufacturer or technician distinguish a drying or residue issue from a drainage or component fault.
Maintenance Schedule to Reduce Moisture and Residue
Affresh, a commercial washer-cleaner brand, recommends that interval while distinguishing ordinary cleaning from sanitizing in its maintenance guidance.
Follow the washer’s maintenance alert or model-specific interval whenever one is provided. A lightly used household may not need the same schedule as a machine running several loads each day.
More frequent inspection may be useful when the washer regularly handles:
- Pet bedding
- Athletic wear
- Heavily soiled work clothes
- Several loads per day
- Loads in a hard-water area
- Heavy detergent or fabric-softener use
- Recurring visible residue
Inspection does not always require another chemical cycle. It may mean wiping a gasket, washing a dispenser, checking the rim, or correcting detergent use.
After each load
- Remove wet laundry promptly.
- Check for objects or debris left in the drum.
- Wipe persistent water from accessible front-loader gasket folds.
- Let the interior dry using a secure method.
- Keep an open washer inaccessible to children and pets.
Regularly
- Inspect dispensers for concentrated detergent or softener buildup.
- Wipe the door, lid, glass, and rim.
- Check accessible gasket folds.
- Use the detergent type and dose specified for the machine and load.
- Do not add extra detergent as an odor treatment.
Excess detergent can leave more residue to rinse and dry. Follow the detergent and washer instructions rather than filling to the highest line for every load.
On the model’s specified schedule
- Run the approved cleaning cycle.
- Clean any user-serviceable filter.
- Inspect visible hoses and connections for cracks, bulges, looseness, or leaks.
- Respond to maintenance alerts.
Do not adopt a universal filter interval or mandatory hose-replacement date. Filter layouts, usage conditions, materials, and manufacturer schedules differ.
Finally, distinguish cleaning from sanitizing. Cleaning removes soil, film, detergent residue, and debris. Sanitizing aims to reduce germs and requires a separately approved procedure. An ordinary tub-clean cycle should not be described as sterilizing the appliance.
Frequently Asked Questions
Can I use vinegar to deep-clean my washing machine?
Only if the model-specific manual expressly permits vinegar and explains how to use it. Published instructions conflict: some commercial guides recommend vinegar, while Whirlpool warns that repeated acid exposure may weaken rubber seals and hoses. Compatibility may depend on the washer’s design, materials, application method, concentration, and frequency.
Never combine vinegar with chlorine bleach. Vinegar is an acid, and combining an acid with bleach can release toxic chlorine gas.
If the manual does not authorize vinegar, a compatible washing-machine cleaner is generally the lower-conflict choice. Do not assume that vinegar and baking soda provide a superior treatment, and do not use an improvised rinse as permission to switch from vinegar to bleach during the same session.
Can I use chlorine bleach, and how much should I add?
Use chlorine bleach only when both the washer manual and bleach label permit it. There is no responsible universal dose for all washers.
The correct instructions can depend on:
- Washer type and capacity
- Standard or high-efficiency design
- Bleach concentration
- Product formulation
- Dispenser design
- Maintenance-cycle programming
- Required contact and rinse procedures
Commercial bleach instructions can vary by washer and product, so transferring a quantity from one guide to another machine is unsafe. Follow the exact appliance and product directions, use gloves and ventilation when required, and complete any specified rinse.
Never mix bleach with vinegar, ammonia, acids, hydrogen peroxide, or another cleaner.
What cycle should I use if my washer has no clean-washer setting?
Use the alternative cycle named in the model-specific manual. It may be a particular hot or long program, but do not automatically select every maximum setting.
Confirm that the washer may run empty and that the temperature, water level, and cycle are compatible with the chosen cleaner. If the manual provides no alternative, contact the manufacturer rather than guessing. Run an additional rinse only when the appliance instructions or cleaner label directs it.
Where is the washing-machine filter, and can I remove it myself?
There is no universal filter location. Depending on the model, a user-serviceable pump filter may be behind a small access door, while a lint filter may be located elsewhere. Some washers have no filter intended for routine user removal.
Remove a filter yourself only if the manual identifies it as user-serviceable and provides a drainage and removal procedure. Empty and unplug the washer first, and prepare towels or a shallow container because the compartment may retain water.
Do not remove an outer housing, disconnect internal hoses, or dismantle the agitator to search for a filter. If the manual does not show user access—or the part is stuck—contact the manufacturer or a qualified technician.
How often should a washing machine be deep-cleaned?
About once a month or every 30 cycles is a commonly recommended baseline, not a universal requirement. Follow the washer’s maintenance alert and model-specific schedule when available.
Several daily loads, pet bedding, athletic wear, heavily soiled clothing, hard water, heavy product use, and recurring residue may justify more frequent inspection or cleaning. However, wiping a gasket or washing a dispenser does not require a full chemical cycle every time.
Between deep cleans, unload promptly, use the specified detergent and dose, remove dispenser residue, dry accessible gasket folds, and provide safe airflow. Clean filters according to the manual. If odor quickly returns—or the machine retains water, leaks, corrodes, or fails to drain—seek service instead of cleaning more aggressively.
Final Deep-Clean Checklist
- Consult the model-specific manual.
- Empty and inspect the washer.
- Select one approved cleaner.
- Put it only where the instructions direct.
- Run the specified maintenance cycle.
- Clean accessible dispensers, seals, filters, lids, rims, and agitator or wash-plate surfaces as applicable.
- Rinse when directed.
- Wipe away loosened residue.
- Dry accessible surfaces and provide safe airflow.
Recurring odor, standing water, leakage, corrosion, inaccessible filters, damaged seals, or resistant parts call for troubleshooting or qualified service—not additional chemicals or forced disassembly.