 StainList
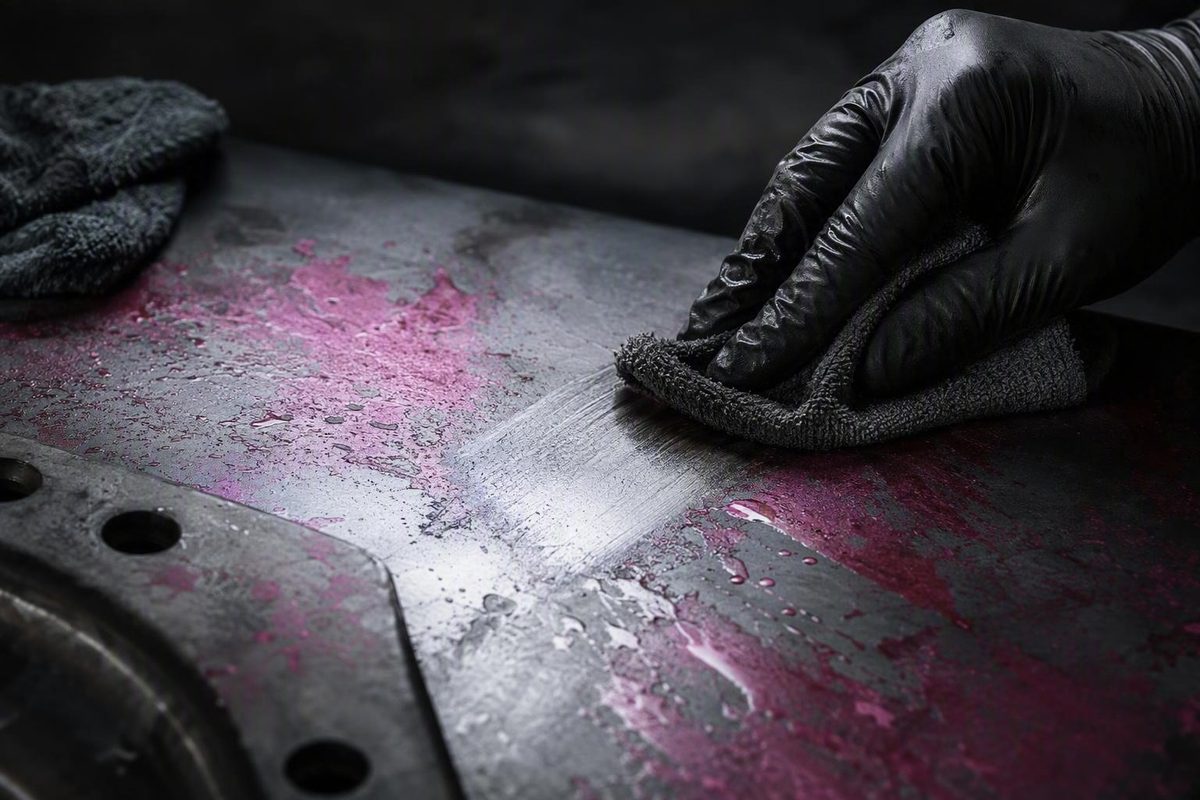
The safest answer to how to get spray paint off metal depends on what lies beneath it. Bare steel may tolerate a treatment that would ruin factory paint, lacquered brass, anodized aluminum, powder coating, plating, or a decorative patina.
Before choosing a remover, determine what must be preserved. Test every chemical and tool in a hidden area, begin with the mildest compatible method, and escalate only while the underlying surface remains unchanged.
This is a high-level decision framework rather than a product-specific compatibility guide. When the metal, finish, or product compatibility cannot be verified, stop rather than guessing. Complete restoration is not guaranteed: paint age, coating thickness, metal type, original finish, and prior damage all affect the result.
Diagnose the Surface Before Reaching for a Solvent
Start with this decision checklist:
- How old is the unwanted paint? Is it wet, tacky, recently dried, or fully cured?
- How much paint is present? Is it light overspray, isolated spots, or a thick continuous coating?
- What is the objective? Must an existing finish survive, or are you intentionally stripping to bare metal?
- What is the substrate? Identify the metal as far as reasonably possible.
- What else is on the surface? Look for factory paint, clear coat, powder coating, lacquer, plating, anodizing, galvanizing, polish, or patina.
- What sensitive materials are nearby? Note plastic, vinyl, rubber, adhesives, gaskets, trim, wiring, and sealed assemblies.
Metal objects are rarely just “metal.” A steel tool, aluminum lamp, plated handle, and powder-coated chair may react very differently to the same solvent. Trimaco’s general spray-paint removal guidance likewise recommends identifying the surface and testing the removal method before broad application.
Preserving an underlying coating is fundamentally different from stripping an object completely. A solvent capable of dissolving the unwanted spray paint may soften the desired paint, clear coat, lacquer, or decorative finish at the same time.
If you cannot identify the metal or coating, treat the object as finish-sensitive. Do not assume a shiny surface is bare stainless steel or that a gold-colored object is solid brass. It may be plated, lacquered, polished, anodized, or clear-coated.
Test every proposed chemical and tool separately:
- Clean a small hidden area without scratching it.
- Apply the proposed method using the same product amount, contact time, and tool intended for the visible surface.
- Remove the product exactly as its label directs.
- Let the area dry completely.
- Inspect it in strong light from several angles.
Dry evaluation matters because haze, discoloration, oxidation, loss of gloss, or a boundary around the test spot may be difficult to see while the surface is wet.
Stop immediately if:
- The desired color or coating transfers to the rag.
- The surface becomes cloudy, dull, tacky, discolored, oxidized, or pitted.
- A tool creates visible scratches.
- Thin metal begins to distort.
- Plastic, vinyl, adhesive, gasket material, or trim begins to soften.
- An unexpected layer appears beneath the paint.
Use this escalation order:
- Basic cleaning.
- A mild, surface-compatible solvent where appropriate.
- A paint remover whose current label explicitly supports the intended application.
- Mechanical treatment only when permanent surface alteration is acceptable.
Failure of one gentle method proves only that the method was ineffective. It does not prove that a stronger chemical or abrasive tool is safe.
Gather Safer Tools and Control Chemical and Fire Risks
A conservative starter kit includes:
- Clean, low-nap rags
- Mild dish soap
- Clean water
- A smooth plastic scraper
- A soft detail brush confirmed as compatible with both the surface and the selected chemical
- A container or compatible covering for catching debris
- Masking material for nearby components
- A solvent or remover only when its current label supports the intended surface and use
- All personal protective equipment specified by that label
Begin with cloths and smooth plastic tools. Metal scrapers, wire brushes, and abrasive pads may scratch the surface or change its visible texture. Even plastic can scratch if grit becomes trapped underneath it, so remove loose dirt before wiping or scraping.
Before opening a product, read its complete current label and any accompanying safety instructions. Verify:
- Permitted substrates and excluded materials
- Whether coated or painted metal is included
- Ventilation requirements
- Required gloves, eye protection, clothing, or respiratory protection
- Application method and contact time
- Cleanup or neutralization instructions
- Storage and disposal directions
There is no universal glove material, respirator cartridge, ventilation arrangement, or cleanup method suitable for every remover. Formulations differ, so generic protective-equipment advice cannot replace the selected product’s instructions. General removal guidance also emphasizes testing, ventilation, protective equipment, and manufacturer directions (Trimaco).
Acetone, lacquer thinner, and other solvents may be highly flammable and release harmful fumes. Keep them away from flames, smoking materials, sparks, pilot lights, and other ignition sources, and follow the label’s ventilation and storage requirements. Milwaukee’s guidance says acetone and lacquer thinner are highly flammable, release toxic fumes, and can damage plastics or vinyl Graffiti Removal Techniques.
Use one removal product at a time. Do not mix solvents, paint removers, or household cleaners in an attempt to create a stronger treatment. If a product fails, complete its label-directed cleanup before considering a different method.
Protect nearby paint, flooring, plastic, vinyl, adhesives, seals, and electrical parts from splashes and runoff. Remove hardware or isolate the object where practical. Do not soak an assembly when liquid can reach sensitive components that cannot be inspected or cleaned afterward.
Brush compatibility matters as much as surface compatibility. Milwaukee’s guidance specifically warns that acetone may attack nylon bristles.
Start With Fresh Overspray and Small Spots
Fresh overspray generally offers the best chance of removal with a mild method. There is no universal safe working window, however. Paint formulation, film thickness, airflow, temperature, and humidity all influence drying and curing.
Where the underlying surface tolerates water:
- Remove loose dust and grit with a clean cloth.
- Add a small amount of mild dish soap to water.
- Dampen rather than saturate a low-nap rag.
- Wipe a small test area gently.
- Dry the area and inspect it before continuing.
Avoid flooding seams, joints, openings, or assemblies where water could remain trapped. If the object contains electrical parts or materials that should not become wet, do not use this method unless those areas can be isolated safely.
If washing does not work, do not jump automatically to acetone, lacquer thinner, or paint stripper. First determine whether the object’s label, manufacturer information, or known finish documentation identifies a compatible remover.
When evaluating a product, look for explicit information covering:
- The exact substrate, such as steel or aluminum
- Whether the product is intended for bare or coated metal
- Exclusions involving lacquer, clear coat, powder coating, plating, plastic, or vinyl
- Required contact time and application temperature
- The prescribed applicator and cleanup procedure
“Suitable for metal” is not enough when a desired finish remains on top of that metal. If the documentation does not address the coating you must preserve, the product is not verified for the job.
When solvent wiping is supported, use the clean-rag technique:
- Dampen a small section of the rag rather than saturating it.
- Wipe one small area.
- Turn the rag to expose a clean section.
- Wipe again with that clean section.
- Replace the rag as paint transfers.
Using a fresh section on each pass reduces smearing and redeposition. Inspect the rag each time: it should show the unwanted spray-paint color, not the color or coating you intend to preserve.
If the paint smears, stop broad rubbing. Use less liquid, reduce the working area, and expose a clean rag section for each pass. Allow the patch to dry before deciding whether another cycle is safe.
Continue only if the dried test area remains free of haze, tackiness, discoloration, oxidation, gloss change, and desired-finish transfer.
Remove Cured or Thick Spray Paint in Short Stripping Cycles
Fully cured paint, multiple layers, or a thick continuous coating may require a chemical paint remover. Choose one whose current label addresses the substrate and any underlying finish you intend to preserve.
Use this controlled workflow:
- Test the remover in a hidden area.
- Apply it only as the label directs.
- Wait for the paint to soften or lift.
- Hold a smooth plastic scraper at a shallow angle.
- Push gently beneath the loosened paint.
- Contain and remove the residue without spreading it.
- Inspect the exposed surface after cleanup and drying.
- Repeat with another short treatment cycle only if the surface remains stable.
- Remove or neutralize residue exactly as the label specifies.
The product label—not a generic number of minutes—must determine contact time. Performance varies with remover chemistry, spray-paint formulation, layer thickness, temperature, and substrate. Longer exposure is not automatically more effective and may increase the chance of affecting the underlying surface.
Keep the scraper nearly parallel to the object and use light pressure. Do not dig its corners into the metal. If it chatters, catches, or leaves lines, stop rather than pressing harder.
For seams, texture, and ornamentation, use another small, controlled application. Do not automatically use a nylon brush with acetone or lacquer thinner, and do not substitute a metal pick or wire brush on a finish that must remain intact.
Each cycle provides an opportunity to detect a changing finish.
One DIY project illustrates the process without proving universal compatibility. A painted brass lamp was treated with Citristrip, lifted with a plastic scraper, detailed with a toothbrush, and wiped with an acetone-dampened rag to remove remaining film. The author reported revealing the brass appearance, but this was one project rather than controlled testing across different metals and coatings (Pretty Handy Girl’s brass-lamp example).
Do not generalize that example to aluminum, plating, lacquer, patina, clear coat, powder coating, or automotive paint. Acetone is not a universal residue cleaner and may affect desired coatings, plastics, vinyl, adhesives, and some polished surfaces.
Likewise, do not invent a universal rinse or neutralization step. Some removers call for water; others require a different cleanup process. Follow the selected product’s instructions before recoating or protecting the metal.
Adjust the Method for Bare, Coated, and Finish-Sensitive Metal
The following is a risk-screening and referral matrix, not a claim that one treatment has been validated for every listed surface.
| Surface condition | Conservative starting point | Major risk | Escalation or referral limit |
|---|---|---|---|
| Bare durable steel or iron | Soap and water for fresh contamination; then a verified compatible product | Rust, staining, scratches, or chemical attack | A labeled stripper may be considered after testing; dry completely and select suitable corrosion protection |
| Bare stainless steel | Clean cloth, smooth plastic scraper, and chemically compatible soft tools | Visible scratching or alteration of a directional finish | Do not default to wire brushes or aggressive abrasives |
| Aluminum | Mild cleaning and especially cautious testing | Clouding, discoloration, oxidation, or corrosion | Stop at the first appearance change; avoid unverified or prolonged chemical exposure |
| Brass | Mild cleaning and hidden-area testing | Loss of lacquer, plating, or patina | Chemical stripping may suit an intentional bare-brass project but is not a preservation method for unidentified finishes |
| Powder-coated or factory-painted metal | Mild cleaning and a product explicitly approved for the coating | Softening, dulling, or removal of the desired coating | Stop if color transfers, gloss changes, or the surface becomes tacky |
| Clear-coated metal | Mild cleaning until compatibility is verified | Haze, softening, or dissolution of the clear coat | Do not assume a bare-metal-safe solvent is clear-coat-safe |
| Plated, anodized, galvanized, polished, or patinated metal | Surface-specific manufacturer documentation or professional assessment | Irreversible color, texture, or coating change | No general DIY chemical procedure is established here |
| Automotive finish | Gentle spot treatment with an application-approved product | Clear-coat or color-coat damage | Refer large, cured, or uncertain areas to an automotive refinisher |
| Antique or valuable object | Documentation and professional assessment | Loss of historic finish, plating, patina, or value | Do not experiment with aggressive solvents, heat, or abrasion |
For bare steel or iron, a compatible solvent or labeled remover may be possible after testing. Once bare steel is exposed, complete drying and appropriate corrosion protection become part of the project.
Stainless steel may resist corrosion in many ordinary settings, but that does not make every tool appearance-safe. Wire brushes and coarse abrasives can alter a brushed or polished finish even when they remove the paint successfully.
Treat aluminum particularly cautiously. Stronger or prolonged chemical treatment may cause clouding, discoloration, oxidation, or corrosion. Milwaukee’s metal-removal instructions specifically warn that lacquer thinner may cloud or oxidize polished aluminum.
Before treating brass, determine whether it is solid brass, brass-plated, lacquered, or intentionally patinated. The single lamp project described earlier demonstrates one successful result, not a procedure for preserving every brass finish.
Powder coating, factory paint, clear coat, plating, anodizing, galvanizing, automotive coatings, and decorative patinas should all be treated as finish-sensitive. Acetone, lacquer thinner, paint stripper, heat, and abrasion may remove the unwanted spray paint and the desired coating together.
Seek professional assessment when the object is valuable, antique, automotive, plated, structurally thin, electrically complex, or dependent on preservation of its existing finish. This guide does not provide a validated specialty procedure for chrome plating, anodized aluminum, galvanized steel, or lacquered brass.
Know Which Popular Methods Have Important Limits
Popular remedies should be compared by both likely effectiveness and damage risk.
| Method | Where it may fit | Important limitation |
|---|---|---|
| Dish soap and water | Fresh overspray on a water-tolerant surface | Not a dependable remover for thick, cured paint |
| Vinegar | Sometimes suggested for light contamination | Not established here as a reliable cured-paint remover |
| Baking-soda paste | Sometimes suggested as a household treatment | Rubbing may dull or scratch a finish |
| Cooking oil | May help with some light residue | Not established as a cured-coating remover and may leave a film |
| Rubbing alcohol | May affect some fresh or thin paint | Compatibility depends on both the paint and underlying finish |
| Acetone | Can soften or remove some paints | May damage coatings, plastics, vinyl, adhesives, or polished surfaces |
| Lacquer thinner | Can soften hardened paint | Strong finish-damage, vapor, and fire risks |
| Metal scraper or abrasive pad | Deliberate refinishing where surface change is acceptable | Can permanently scratch metal or remove a desired finish |
| Wire wheel, grinder, or blasting | Specialized refinishing | Changes the scratch pattern or surface profile and may remove metal |
| Heat gun | Specialized coating removal | May affect thin metal, coatings, adjacent materials, or flammable products |
| Pressure washer | Certain isolated outdoor projects | May damage coatings, force water into openings, or spread residue |
Retailer guidance describes vinegar, baking-soda paste, oil, soap, and rubbing alcohol as possible household approaches, but mainly for fresh paint, thin layers, residue, or paint loosened by another method. It does not establish them as dependable treatments for thick, fully cured spray paint (Benchmark Abrasives).
Soap and water remain a sensible conservative starting point on a water-tolerant surface. That does not make them effective against every cured coating.
Acetone and lacquer thinner may soften hardened paint, but they may also attack underlying paint, clear coat, plastic, vinyl, adhesives, and polished finishes. Product-specific testing remains necessary even when the visible substrate appears to be bare iron or stainless steel.
Mechanical methods work by scraping, cutting, or abrading material. A metal scraper, abrasive pad, wire wheel, grinder, or blasting medium may remove paint while permanently changing the metal’s scratch pattern or surface profile. These are refinishing methods, not non-damaging spot treatments.
Heat guns and pressure washing are specialized options rather than default DIY steps. Heat can affect thin metal, adjacent coatings, and nearby materials, and it must not be used around flammable products or vapors.
If an old or unknown coating may require hazardous-material controls, do not sand, grind, blast, or heat it based on this guide. The available evidence does not establish a safe hazardous-coating removal procedure.
The central rule is simple: when a gentle method fails, that proves only that it failed—not that the next aggressive method is safe.
Troubleshoot Smearing, Stubborn Paint, and Surface Changes
Use the symptom rather than frustration to determine the next step.
| Symptom | Likely issue | Response |
|---|---|---|
| Paint smears instead of lifting | It is softening but being redistributed | Stop using the contaminated rag area, reduce the work area, use less liquid, and expose a clean section for every pass |
| Paint does not soften | The product may be incompatible, incorrectly applied, or too mild | Recheck the label, application instructions, temperature limits, and substrate compatibility; do not automatically extend contact time |
| Residue remains in seams or texture | The scraper cannot reach it safely | Use another short, controlled application and a chemically compatible soft detail tool |
| Desired color transfers repeatedly | The underlying finish is dissolving | Stop immediately and complete label-directed cleanup |
| Surface becomes cloudy, dull, tacky, oxidized, pitted, or discolored | Chemical attack or finish damage may be occurring | Stop, remove the product as directed, and inspect after complete drying |
| Scratches appear | The tool, trapped grit, or pressure is too aggressive | Stop; more abrasion removes more material and cannot reverse the scratch |
| An unexpected layer appears | The object may be plated, coated, or previously refinished | Pause and determine whether the task has become a complete refinishing project |
| Bare steel begins changing after treatment | Moisture, residue, or lack of protection may be involved | Complete label-directed cleanup, dry thoroughly, and select a suitable corrosion-protection system |
When paint smears, do not continue polishing it around the object. Switch to a clean rag section on every pass and let the test area dry before deciding whether to continue.
If paint does not soften, confirm that the remover was applied according to its label and is intended for the coating and substrate. Excessive contact time may affect the surface without improving removal.
For recesses, apply only enough compatible remover to soften the residue. Use an applicator confirmed as compatible with the chemical rather than assuming every nylon brush is suitable.
Desired-coating transfer, tackiness, haze, oxidation, pitting, or discoloration is a stop signal. Complete the product’s prescribed cleanup and reassess after drying.
If a tool creates scratches, further abrasion may make the area look more uniform only by removing more finish or metal. That is refinishing, not restoration of the original surface.
Consult a professional if repeated tests fail, the surface cannot tolerate the chemical needed to soften the paint, or preserving the existing finish matters more than complete removal.
Clean Up, Dry the Metal, and Decide Whether It Needs Protection
After removing the paint, clean away remaining solvent, stripper, or film exactly as the product label directs. Do not assume every remover should be rinsed with water or neutralized with a household chemical.
Contain loosened paint, remover residue, used rags, and contaminated liquid while working. The evidence available here does not establish one disposal procedure for every formulation or location. Follow the product’s current storage and disposal instructions; if those instructions do not answer the situation, pause rather than putting material into ordinary trash or a drain based on a generic rule.
Dry the object completely, paying particular attention to:
- Seams
- Fastener holes
- Joints
- Hinges
- Rolled or folded edges
- Hollow sections
- Decorative recesses
- Areas beneath removable trim
Exposed steel or iron may need prompt corrosion protection. The appropriate system could involve a compatible primer, finish coating, clear protective system, or another treatment, depending on the metal, environment, and intended appearance.
Do not apply a generic clear coat or rust converter to every metal. Aluminum, stainless steel, brass, galvanized metal, plating, and decorative finishes may require different treatment—or no new coating at all.
Inspect the fully dry surface in strong, angled light before recoating. Remaining residue may interfere with adhesion. Conversely, if the desired finish already looks acceptable, additional wiping or polishing may create damage that was not previously visible.
Seek professional refinishing help for valuable, antique, plated, automotive, structurally thin, electrically complex, or highly finish-sensitive objects. The goal is not merely to remove spray paint, but to avoid replacing a removable coating with permanent surface damage.
Frequently Asked Questions
What is the fastest safe way to remove fresh spray paint from metal?
Remove loose grit, then wipe a hidden test area with mild dish soap and a damp low-nap cloth if the surface tolerates water. If that fails, verify a mild solvent against the product label and the known metal and finish.
Dampen rather than saturate the rag, work in a small area, and use a clean section for every pass. Prompt treatment improves the chance that a mild method will work, but no universal safe solvent or exact time window applies to every paint and finish.
Will acetone remove spray paint from metal without damaging it?
Acetone can soften or remove some spray paints, but damage-free use is not guaranteed. It may also attack factory paint, clear coat, lacquer, plastic, vinyl, adhesives, or nearby components.
Use it only when current product documentation supports the application and a hidden-area test remains unchanged after drying. Do not use a nylon applicator with acetone unless its manufacturer confirms chemical compatibility.
Can vinegar or baking soda remove dried spray paint from metal?
They may help with light or fresh contamination in some situations, but the available evidence does not establish either as a dependable remover for thick, fully cured spray paint.
Baking-soda paste also depends on rubbing, which may dull a finish. Test first, use minimal pressure, and do not compensate for poor results by scrubbing more aggressively.
How long should paint remover sit on metal before scraping?
Follow the remover’s current label. There is no universal dwell time because performance varies with product chemistry, paint formulation, coating thickness, temperature, and substrate.
Wait only as directed for the paint to soften, then lift it gently with a shallow-angle plastic scraper. If paint remains, use another controlled cycle rather than automatically extending exposure.
When should spray paint removal be left to a professional?
Seek professional help when:
- The object is valuable, antique, automotive, plated, or patinated.
- An underlying factory paint, clear coat, powder coating, lacquer, or decorative finish must remain intact.
- The metal is structurally thin or already damaged.
- Electrical parts, adhesives, gaskets, or plastic trim cannot be isolated.
- Hidden-area tests produce coating transfer, haze, tackiness, discoloration, oxidation, or pitting.
- The old or unknown coating may require hazardous-material controls.
- Complete removal would require aggressive abrasion, heat, or prolonged chemical exposure.
- Preserving the object matters more than achieving a completely paint-free surface.
Conclusion
The safest way to get spray paint off metal is not one universal chemical. It is a controlled escalation process: identify what must remain, test a hidden area, begin with cleaning or a verified mild treatment, move to a label-approved remover only when necessary, and use finish-conscious tools before considering mechanical refinishing.
Stop at the first sign that the desired surface is changing. When the metal, finish, chemical compatibility, or safe cleanup process cannot be verified, professional treatment is safer than trading unwanted paint for permanent damage.