 StainList
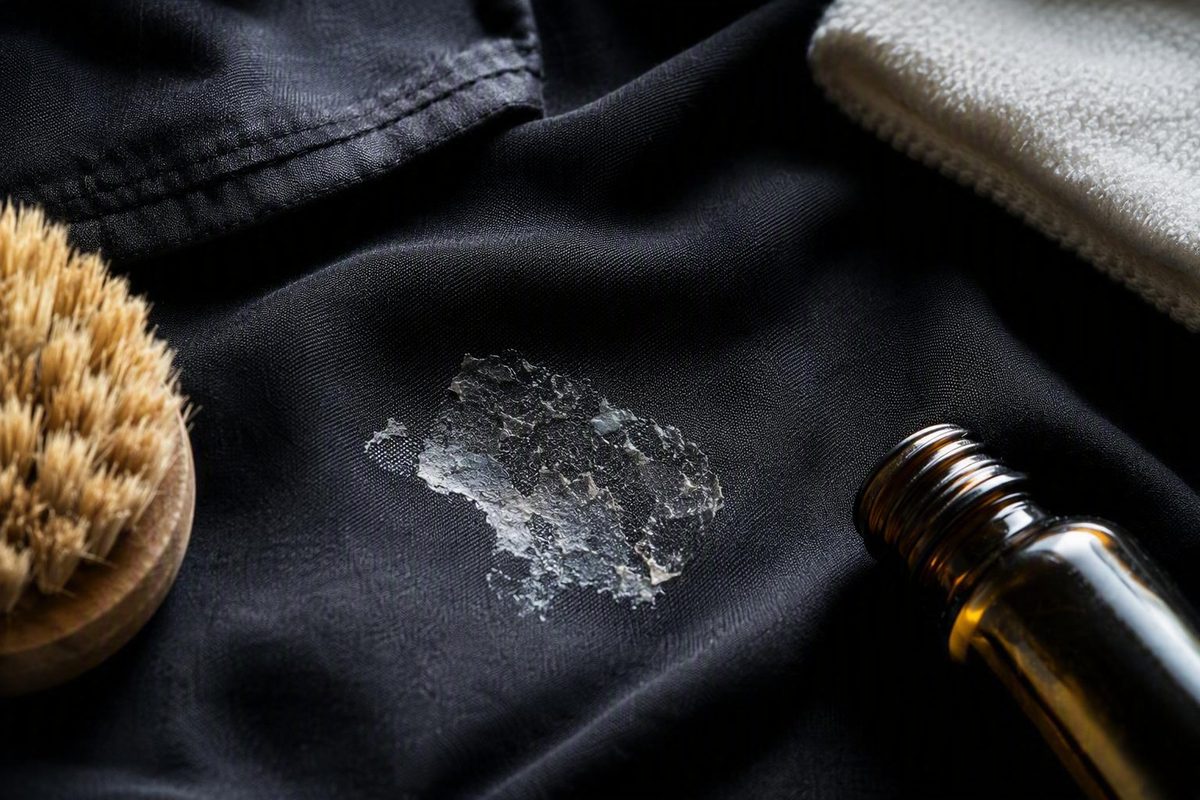
Quick answer: use a least-invasive removal sequence
When deciding how to get sticker residue off fabric, do not begin with the strongest solvent or hottest wash. Adhesives and garments vary, and no supplied source provides controlled comparative testing that identifies one universally best method.
Use this conservative sequence:
- Read the garment care label. Its restrictions on washing, water temperature, solvents, bleaching, and drying override general cleaning advice.
- Keep the garment out of the machine dryer. Remaining adhesive may become harder to remove after dryer heat.
- Classify the garment. Decide whether it is sturdy washable cotton or a cotton blend, another washable fabric, or a delicate, valuable, unusual, composition-unknown, or dry-clean-only item.
- Try dry lifting only where appropriate. On completely dry, sturdy cotton or cotton-blend clothing, lay the garment flat and use a manageable piece of tape to lift residue in small sections.
- Patch-test one liquid treatment if needed. For a suitable washable garment, test either rubbing alcohol or white vinegar—not a mixture—on a concealed area.
- Dab and lift gently. If the test area remains unchanged after drying, apply a controlled amount of the chosen liquid to the adhesive. Allow brief contact, then lift the softened residue without aggressive scraping.
- Clean the treated area. Apply a small amount of dish soap after loosening the adhesive, rinse, and launder only as the care label permits.
- Inspect and air-dry. Check the area by sight and touch. If residue remains but the fabric has not changed, repeat the tolerated treatment cautiously.
CRC Industries gives a similar sequence: spot-test either rubbing alcohol or white vinegar, apply the selected liquid, remove softened adhesive gently, follow with dish soap, and launder. Its instructions also warn that excessive scraping can damage fabric and dryer heat can make residue harder to remove. These are publisher instructions, not proof that either liquid is compatible with every garment or adhesive (CRC Industries’ clothing instructions).
Stop treatment if: dye transfers to your applicator, the color fades, the fabric stiffens, fibers rise or distort, a print or finish changes, tape deposits new adhesive, or the residue spreads beyond the original spot.
Delicate and dry-clean-only garments should normally go to a professional cleaner rather than being used to test a household remedy.
Choose a method by care label, fabric risk, and residue condition
The care label is the first decision point, not something to consult after choosing a remedy. Advice to saturate, soak, use a solvent, rinse in warm water, or wash hot does not override the garment manufacturer’s instructions. If the label requires cold water, use cold water even when a general guide recommends a higher temperature.
A washable label does not guarantee that every household treatment will be compatible with the garment. A concealed patch test is therefore useful even when home washing is permitted.
| Garment situation | Reasonable first step | Escalation option | Reason to stop |
|---|---|---|---|
| Completely dry, sturdy cotton or cotton blend | Lay flat and lift small sections with manageable pieces of tape | Patch-test either rubbing alcohol or white vinegar separately if residue remains | Tape deposits adhesive, removes color or print, raises fibers, stretches the fabric, or spreads residue |
| Ordinary washable garment with stubborn residue | Check the label and patch-test one liquid on a hidden area | If the dried test area remains unchanged, dab the selected liquid onto the residue, lift gently, then use dish soap and launder as permitted | Dye transfers, texture or finish changes, fibers distort, or adhesive spreads |
| Stretchy, synthetic, printed, coated, embellished, or loosely woven washable garment | Do not assume the cotton tape method is suitable; assess the construction conservatively | Seek professional assessment if the spot is prominent or the item is valuable | Stretch recovery, coating, print, embellishment, texture, or weave changes |
| Silk, wool, cashmere, fragile, valuable, dry-clean-only, or composition-unknown item | Leave the residue untreated and consult a professional cleaner | Follow the cleaner’s fabric-specific recommendation | Do not improvise with tape, soaking, or household solvents |
| Garment already exposed to machine-dryer heat | Check the care label and examine the material carefully; expect less predictable results | If washable and sturdy, use the same hidden-test sequence with stricter stop criteria | Repeated treatment produces little lifting or causes any fabric change |
This classification is deliberately more cautious than dividing clothing into “natural” and “synthetic” groups. Fiber family matters, but construction and finish matter too.
The residue can affect the choice as well.
Stain List describes its editorial process as prioritizing commonly owned supplies and checking claims against textile-chemistry literature and commercial laundry practice. That is a description of the site’s general methodology, not evidence that this particular procedure has undergone comparative fabric testing (Stain List’s methodology).
A commercial sticker retailer likewise recommends checking manufacturer guidance and testing solvents inconspicuously. However, its clothing advice groups fabrics broadly and does not provide enough fiber-, dye-, print-, or finish-specific evidence to replace the conservative decision process above. It also warns against using a dryer while residue remains (Decals.com’s surface-specific guide).
Method 1: lift dry residue from sturdy cotton with tape
Tape lifting is a reasonable starting point only for a narrow use case: completely dry, sturdy cotton or cotton-blend clothing. The supporting personal account does not establish that the method is safe for stretchy fabric, synthetics as a class, coated textiles, printed areas, loose weaves, embellishments, or delicate fibers.
Do not use this method if the fabric is damp, the adhesive is already smeared, or the surface appears vulnerable to pulling. If the residue crosses a printed logo, heat-applied design, flocked texture, embroidery, or decorative finish, professional assessment is safer than guessing whether the decoration can withstand tape.
To lift the residue:
- Let the garment become completely dry.
- Place it on a flat, sturdy surface.
- Smooth the area without stretching it.
- Tear off a manageable piece of tape no larger than your hand.
- Hold down the fabric surrounding the residue.
- Press the tape firmly onto a small section of adhesive.
- Pull the tape away while continuing to support the garment.
- Inspect both the garment and the tape before repeating.
- Move to an unused tape surface or take a new piece so collected adhesive is not pressed back into the fabric.
Work in small sections. The aim is to transfer adhesive to the tape, not to pull the entire garment upward.
The author documenting this method limits it to cotton and cotton blends, specifies completely dry fabric and a tape piece no larger than a hand, and reports duct tape as a personal preference because it worked faster than painter’s, packing, or transparent tape in her experience. She does not present a controlled comparison, so duct tape should not be described as proven best or safest. She also specifically warns against Gorilla tape because its unusually strong adhesive may make the problem worse (My Growing Creative Life’s cotton tape method).
Published advice is not uniform. LamPro Industries instead suggests fresh packing or masking tape for thin residue. That disagreement is a reason to judge how aggressively a tape grips and inspect the fabric after every pass—not to assume that one tape category is universally correct (LamPro Industries’ household-method guide).
Stop immediately if:
- The tape leaves a new sticky deposit.
- Color or printed material transfers to the tape.
- The surface becomes fuzzy or abraded.
- Threads lift from the weave.
- The garment stretches or puckers.
- A coating, design, or finish changes.
- The residue smears or expands instead of transferring.
Do not respond to poor results by pressing harder, pulling more sharply, or choosing exceptionally aggressive tape. If several careful passes lift nothing, move to a patch-tested liquid treatment only if the garment is washable and otherwise suitable for home treatment.
Method 2: patch-test rubbing alcohol or white vinegar separately
Rubbing alcohol and white vinegar are alternative treatments, not ingredients for a combined cleaning solution. Choose one, patch-test it, and keep track of what you used.
Follow the selected product’s label, and do not assume that a stronger concentration or non-household alcohol will work better or be equally compatible with the garment.
Before testing:
- Read the care label again.
- Confirm that the garment is washable.
- Find a concealed seam allowance, inside hem, or another inconspicuous area made from the same material.
- Use a white cloth or white cotton pad so transferred dye will be visible.
- Keep clean water available for rinsing if the care instructions permit it.
Use this conservative patch-test protocol:
- Apply a very small amount of the selected liquid to the hidden area.
- Blot gently with a white cloth.
- Check the cloth for transferred color.
- Let the test area dry fully rather than judging it only while wet.
- Compare it with the surrounding fabric for fading, stiffness, texture change, distortion, or finish damage.
This is a practical safety check, not a scientifically validated guarantee. It can, however, reveal obvious dye transfer or surface changes before the treatment is applied in plain sight.
LamPro Industries suggests holding an alcohol-treated pad against residue for about one minute and allowing vinegar 10–15 minutes of contact. The publisher provides no cited comparative testing showing that either duration is optimal or broadly safe, so use those figures only as commercial guidance—not as universal dwell times (LamPro Industries’ suggested timings).
Using rubbing alcohol
If the hidden test remains unchanged after drying, place a small amount of rubbing alcohol on a cotton ball, pad, or clean cloth. Dab it onto a controlled section of residue. Do not pour alcohol directly onto the garment or saturate a broad area without need.
Allow brief contact, then lift the softened adhesive with your fingers, a clean cloth, or a soft-bristled brush using minimal pressure. Work on the deposit rather than scrubbing the surrounding material. As adhesive transfers, move to a clean part of the cloth so it is not rubbed back into the weave.
Do not assume that rubbing alcohol is safe for every washable fiber, dye, print, coating, elastic, or finish. Stop if the garment changes, even when adhesive remains.
Using white vinegar
White vinegar may be tested instead of alcohol when the care label permits home treatment. Use the same concealed-area protocol: apply a small amount, blot with a white cloth, let the test dry, and check for color, texture, stiffness, distortion, or finish changes.
After an unchanged test, dab a controlled amount onto the residue. Give it brief contact, then gently lift the softened adhesive with a clean cloth, your fingers, or a soft brush.
Do not interpret “washable” as proof that vinegar is compatible with every garment. In particular, the supplied commercial claim that vinegar is suitable for delicate fabrics is not supported by comparative testing. Do not use that claim to justify treating silk, wool, cashmere, or other vulnerable materials at home.
Control pressure as well as liquid
Do not scrape hard with a knife, card, fingernail, or another rigid edge. Avoid vigorous circular rubbing and stiff brushing.
If the adhesive begins to smear:
- Stop adding liquid.
- Blot away material that has transferred.
- Reassess the spot.
- Rinse if the care label permits.
- Let the garment air-dry before deciding whether to continue.
Stop treatment if dye transfers, the color fades, a finish becomes dull or sticky, the material stiffens, fibers roughen, the weave distorts, or the adhesive spreads. Do not continue solely because the residue has not disappeared.
Remove treatment residue, wash correctly, and check before drying
Once the adhesive has begun to lift, apply a small amount of dish soap to the treated area. This is a cleanup step after loosening the residue; it should not be presented as a universal solvent that dissolves every sticker adhesive by itself.
Work the soap in gently with a fingertip or soft cloth. Avoid grinding remaining adhesive through the fabric. Rinse using only a method and water temperature permitted by the care label. If a general guide recommends warm or hot water but the label requires cold, follow the label.
Launder with regular detergent only when machine or hand washing is allowed. Use the permitted cycle, temperature, and agitation level. Do not increase the heat or choose a rougher cycle because the spot is stubborn.
After rinsing or washing:
- View the area in bright, even light.
- Look from more than one angle.
- Compare it with the surrounding fabric.
- Feel it gently with clean, dry fingertips.
- Check for tackiness, stiffness, roughness, or a thin clear film.
- Confirm that the color, print, sheen, and surface texture remain unchanged.
Use only light pressure during inspection.
Air-dry instead of using a machine dryer. Clorox’s branded procedure expressly specifies air-drying after treatment, although its product soak is described as something that “should” help dissolve adhesive rather than a guaranteed solution. The guide does not establish that the branded soak works on every fabric and adhesive or outperforms household methods (Clorox’s sticker-residue instructions).
If adhesive remains after air-drying and the garment shows no dye, texture, finish, or structural change, cautiously repeat the treatment that it already tolerated. Do not jump immediately to a stronger, untested solvent.
There is no universally safe number of treatment cycles in the supplied evidence. Reassess after every attempt and stop when progress becomes negligible or the material begins to change.
Keep a brief record of:
- The tape or liquid used
- Where it was patch-tested
- Whether dye transferred
- Approximate contact time
- Whether the garment was rinsed or washed
- Whether it had previously gone through a dryer
This prevents accidental repeated exposure and gives a professional cleaner useful context if home treatment does not finish the job.
Handle delicate, uncertain, and dryer-exposed garments conservatively
Silk, wool, cashmere, and dry-clean-only garments should go to a professional cleaner rather than receiving an adapted version of the cotton tape method or a general household-solvent treatment.
Use the same stop-and-refer approach for clothing that is:
- Valuable or sentimental
- Fragile or loosely woven
- Heavily printed or coated
- Embellished with embroidery, lace, sequins, or beads
- Made with a delicate nap, pile, or sheen
- Structured in a way that makes rinsing difficult
- Missing a readable composition or care label
This does not mean every such garment will be damaged by home treatment. It means the potential cost of a poor guess is greater, while the supplied evidence does not establish a reliably safe home recipe.
Professional assessment is especially sensible when the residue crosses a print, painted design, bonded decoration, embroidery, or specialty finish. Tell the cleaner what kind of sticker was involved, if known, and disclose every tape, liquid, detergent, or other treatment already used.
A garment that has already gone through a machine dryer belongs in a lower-confidence category. Supplied sources warn that dryer heat may make remaining adhesive harder to remove, but they do not provide a validated treatment for heat-exposed sticker residue. Do not declare the residue permanent, and do not promise that repeated alcohol, vinegar, soaking, or washing will restore the garment.
If the care label permits home washing and the item is sturdy, ordinary, and not unusually valuable, use the same conservative sequence:
- Inspect the residue and fabric closely.
- Try dry lifting only if the garment is completely dry, sturdy cotton or a cotton blend.
- Otherwise, patch-test either alcohol or vinegar on a hidden area.
- Let the test dry before comparing it with the surrounding fabric.
- Treat the residue only if the test area remains unchanged.
- Clean with dish soap, rinse, launder as permitted, and air-dry.
- Reassess after each cycle.
Use stricter stop criteria after dryer exposure. Stop for dye transfer, fading, stiffness, abrasion, fiber distortion, spreading adhesive, new adhesive deposited by tape, or any change to a print or finish. If cautious treatment produces little progress, consult a professional cleaner.
Avoid high-risk shortcuts and unsupported promises
Sticker-residue remedies are not interchangeable.
Avoid aggressive scraping, stiff brushing, and vigorous rubbing. Gentle lifting with clean applicator surfaces provides more control.
Avoid exceptionally aggressive tape. If tape begins depositing its own adhesive or pulling at the material, stop rather than switching to a stronger version.
Do not use peanut butter as a first-line treatment. Its support in the supplied evidence comes from a commercial household-hacks article rather than controlled testing, and its oil may create a secondary stain requiring detergent cleanup.
Do not recommend acetone or nail-polish remover as a general fabric treatment. One commercial retailer suggests acetone for broadly defined “natural” fabric, but that classification is too broad to establish compatibility with individual fibers, dyes, blends, prints, coatings, or finishes.
Freezing should not be presented as a proven method for synthetic clothing. A commercial source suggests it as a way to harden adhesive but provides no treatment duration, meaningful fabric exceptions, or corroborating testing. “Synthetic” encompasses garments with widely differing constructions and finishes.
Treat branded soaking instructions as product guidance, not proof of universal effectiveness. A manufacturer’s statement that a soak “should” dissolve adhesive does not guarantee success or demonstrate that the product outperforms tape, alcohol, vinegar, detergent, or professional cleaning.
Do not use hot water when it conflicts with the care label. Do not combine alcohol, vinegar, or other cleaning agents in an attempt to create a stronger formula. Using one patch-tested option at a time makes it easier to observe the garment’s reaction and track what has been applied.
The evidence base has clear limits. Several supplied guides come from companies selling cleaning products or stickers. The tape method is based on one author’s personal experience. Suggested contact times differ, and none of the supplied sources presents controlled comparative testing across common adhesives, fibers, dyes, prints, coatings, and finishes.
The practical hierarchy is therefore:
- Follow the care label.
- Use dry tape lifting only on completely dry, sturdy cotton or cotton blends.
- For a suitable washable garment, patch-test either rubbing alcohol or white vinegar separately.
- Dab a controlled amount and lift gently.
- Apply dish soap after the adhesive loosens.
- Rinse and launder only as permitted.
- Inspect by sight and touch.
- Air-dry before reassessing.
- Repeat a tolerated treatment cautiously.
- Stop and consult a professional if the garment is delicate, valuable, structurally unusual, changed by testing, or resistant after dryer exposure.
Can I remove sticker residue after the clothing has gone through the dryer?
Commercial clothing guidance warns that dryer heat may make remaining adhesive harder to remove; it does not establish that all dryer-exposed residue is permanent or provide a validated heat-set remedy (Decals.com’s clothing guidance).
If the garment is washable, sturdy, and not valuable or delicate, restart with the care label and a concealed patch test. Use either rubbing alcohol or white vinegar separately, proceed only if the dried test area remains unchanged, and air-dry after treatment. Stop if the residue spreads or the fabric, dye, print, or finish changes.
Can rubbing alcohol discolor fabric?
Compatibility is not established for every washable fiber, dye, print, coating, elastic, or finish. CRC Industries therefore advises testing rubbing alcohol on an inconspicuous area before treating the residue (CRC Industries’ clothing instructions).
Apply a small amount to a concealed seam, blot with a white cloth, let the area dry completely, and compare it with untreated fabric. Do not proceed if color transfers or you notice fading, stiffness, distortion, texture change, or finish damage. Remember that alcohol products vary in concentration and formulation; follow the product label rather than assuming they are interchangeable.
What kind of tape can I use on sticker residue?
On completely dry, sturdy cotton or cotton-blend clothing, try a manageable piece of ordinary tape while the garment lies flat and the surrounding fabric is held down. One author anecdotally prefers duct tape, while other commercial guidance suggests packing or masking tape for fresh, thin residue. Neither recommendation identifies a universally best tape.
Use small pieces and clean tape surfaces, inspecting the garment after every pull. Avoid exceptionally aggressive tape and stop if it deposits adhesive, lifts dye or print, raises fibers, stretches the garment, or spreads the residue.
When should I take sticker residue to a dry cleaner?
Take the garment to a professional cleaner when it is silk, wool, cashmere, dry-clean-only, valuable, fragile, embellished, loosely woven, coated, heavily printed, or made from uncertain materials. The personal account supporting the tape method expressly limits it to cotton and cotton blends and refers delicate fabrics to professional cleaning (My Growing Creative Life’s fabric guidance).
Professional help is also appropriate when residue crosses a decoration or finish, the garment changes during testing, or dryer-exposed residue resists cautious treatment. Follow the risk ladder rather than searching for a miracle remover: use dry lifting only where narrowly appropriate, patch-test one liquid at a time, clean and launder conservatively, air-dry, and stop when the garment’s condition makes further experimentation unjustified.