 StainList
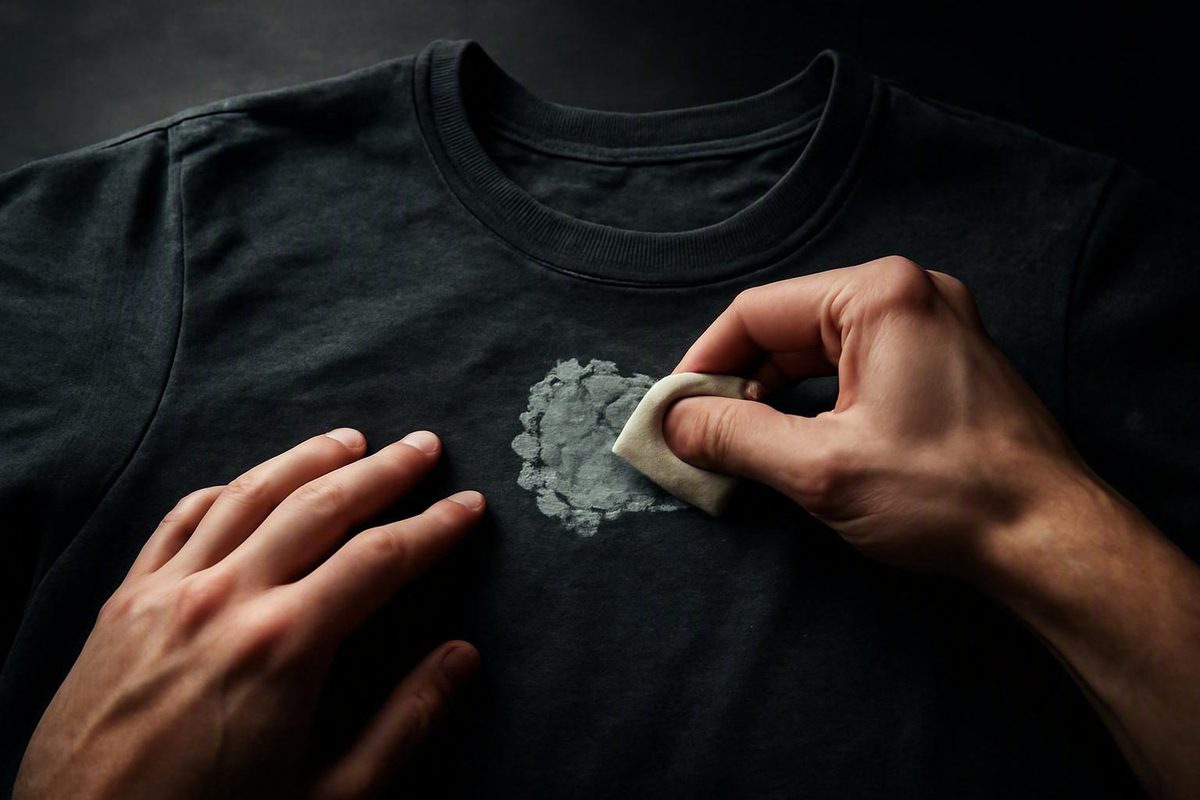
Quick answer: use the least aggressive method first
If you are wondering how to remove sticker residue from clothing, begin with the garment rather than the glue. Read the care label, identify the fiber if possible, and determine whether the item is sturdy and washable, synthetic or heat-sensitive, delicate, embellished, dry-clean-only, or of unknown composition.
For a sturdy, washable garment:
- Remove loose sticker material with your fingers without stretching the fabric.
- Try dry lifting on cotton or a cotton blend. Once the garment is completely dry, lay it flat. Press a manageable piece of ordinary duct, masking, or packing tape onto a small section of residue, hold the fabric down, and peel the tape away.
- Alternatively, chill the residue. Freeze the garment for about 30 minutes, or briefly apply ice. Lift the hardened adhesive gently with a fingernail or blunt plastic card rather than a metal scraper. Commercial sticker-removal guidance describes freezing as a way to make residue easier to lift, but does not establish that it works on every adhesive or textile (Decals.com clothing guide).
- Spot-test a liquid if adhesive remains. Test rubbing alcohol or white vinegar in a hidden location. If the fabric remains unchanged, dab a small amount onto the residue, wait a few minutes, and lift gently.
- Clean the treated area. Work in a small amount of mild dish soap, rinse, and launder only as the care label permits.
- Inspect before drying. If the area is still sticky, stiff, discolored, or uncertain, air-dry instead of using the machine dryer.
This is a conservative synthesis of limited household guidance, not a protocol validated through controlled textile testing. The available sources are primarily commercial how-to articles, personal demonstrations, and user reports. They do not establish one universally best treatment across different adhesives, fibers, dyes, finishes, prints, and laundering histories.
The objective is therefore not to find the strongest possible adhesive remover. It is to use the least aggressive treatment that works and to stop before the treatment becomes a larger problem than the residue.
Delicate, valuable, embellished, color-unstable, dry-clean-only, or unidentified garments are better taken to a professional cleaner. Tell the cleaner that the mark is sticker adhesive and disclose anything already applied.
Choose a route based on the care label and fabric
The care label cannot reveal every relevant detail, but it is the best starting point. Use it to choose one of four routes.
Washable and sturdy
This group may include uncomplicated cotton, denim, and some cotton blends. Begin with dry lifting or freezing. If a tacky film remains, consider a hidden-area test of rubbing alcohol or white vinegar, followed by mild dish soap and label-permitted laundering.
For completely dry cotton or cotton-blend clothing, tape lifting is a low-complexity option supported by personal experience rather than comparative testing. One household author reports pressing small pieces of duct tape onto the residue while holding the garment down; painter’s, packing, and transparent office tape also reportedly worked to some degree (My Growing Creative Life tape method).
Synthetic or heat-sensitive
For polyester and other synthetics, prioritize freezing, gentle lifting, mild dish soap, and a microfiber cloth or soft brush. Use warm water only if the care label allows it. Commercial guidance presents cold treatment and mild soapy cleaning as conservative starting points for synthetics, while also warning that aggressive solvents may be too harsh (Decals.com surface-removal guidance).
Do not assume that every polyester garment tolerates the same water temperature, brushing, or solvent. The fabric may contain elastane or another fiber and may incorporate a print, coating, pleat, bonded layer, performance finish, or heat-sensitive trim.
Delicate or dry-clean-only
Silk, wool, cashmere, loose knits, dry-clean-only garments, color-bleeding items, valuable clothing, and garments with sensitive embroidery, sequins, transfers, coatings, or glued embellishments should go to a professional cleaner. A cleaner’s garment-care guide likewise recommends professional treatment for dry-clean-only, delicate, or potentially color-bleeding clothing rather than uncontrolled home experimentation (Sage Cleaners garment guide).
Tell the cleaner what caused the mark and identify any tape, soap, vinegar, alcohol, oil, commercial remover, laundering, drying, or heat already used.
Unknown composition
If the care label is missing or unreadable, avoid escalating to a solvent or heat. Freezing may be a reasonable low-solvent attempt if the garment can be folded and handled without disturbing its structure. Stop if it snags, sheds color, changes texture, or becomes unusually distorted.
When the garment matters, professional evaluation is more prudent than guessing. Broad categories such as “natural” and “synthetic” do not account for blends, dyes, prints, stretch fibers, coatings, finishes, interlinings, or embellishments.
How to spot-test a liquid
Choose an inconspicuous location made from the same visible material, such as the reverse of a hem or an inside seam allowance. Apply a very small amount of the proposed treatment with a white cotton swab or clean white cloth.
Allow the test area to settle or dry as appropriate, then blot it with fresh white material and compare it with the untreated fabric. There is no validated universal waiting period in the supplied guidance, so assess the garment’s observable response rather than relying on an exact time.
Stop if:
- Dye transfers to the swab or cloth.
- The test spot fades, darkens, or develops a ring.
- The surface becomes rough, glossy, sticky, stiff, or fuzzy.
- A print, coating, or finish softens.
- The fabric stretches, puckers, swells, or loses shape.
Manufacturer guidance recommending alcohol or vinegar also directs users to test first because some fabrics may discolor or sustain damage (CRC Industries garment instructions).
| Option | Conservative role | Compatibility notes |
|---|---|---|
| Ordinary tape | Dry lifting on completely dry, sturdy cotton or cotton blends | Work in small sections. Avoid delicate, stretchy, textured, pile, or loose-knit fabric. |
| Freezing or ice | Hardens residue before gentle lifting | A low-solvent starting point, but not guaranteed to release every adhesive. |
| Mild dish soap | Helps remove loosened adhesive and treatment traces | Spot-test and rinse thoroughly. Follow the label’s water restrictions. |
| Rubbing alcohol or white vinegar | Escalation for residue that survives dry lifting | Test first and dab sparingly. Neither is established as safe for every garment. |
| Heat | Higher risk and disputed | One personal account reports success; other commercial guidance advises avoiding heat. Skip on heat-sensitive or uncertain garments. |
| Acetone | Higher risk | Not a routine clothing treatment. The supplied sources do not provide a reliable compatibility chart. |
| Oil | Insufficiently supported for routine use | May loosen adhesive but can create a secondary oily mark. |
| Commercial remover | Product-specific and insufficiently supported as a default | Consider only if the label expressly covers the particular washable textile. Test first and follow all directions. |
Method 1: lift dry residue with tape or cold
Dry removal limits the number of products introduced to the garment. It is therefore a sensible first attempt when the textile is suitable.
Tape lifting for sturdy cotton and cotton blends
Make sure the garment is completely dry and place it on a flat, stable surface with the affected section supported.
Then:
- Remove loose sticker paper with your fingers.
- Tear off a piece of ordinary tape small enough to control.
- Press it onto only part of the adhesive patch.
- Hold the fabric firmly beside the spot so it cannot stretch.
- Peel the tape away in a controlled motion.
- Move to a clean part of the tape—or use a fresh piece—before repeating.
Do not cover the entire patch at once or yank the tape away. Small sections provide more control and make it easier to see whether the adhesive is lifting or the textile surface is changing.
Painter’s tape, packing tape, and transparent office tape reportedly worked to some degree in one author’s personal use, while duct tape was that author’s preferred option. The same author warns against Gorilla Tape because its unusually strong adhesive may worsen the problem. That is an anecdotal caution, not a universally tested rule.
Regardless of brand, stop if the tape pulls up fibers, distorts a knit, roughens the surface, lifts a print, or leaves additional adhesive. The personal account supporting this method limits it to cotton and cotton blends and recommends professional cleaning for silk, wool, cashmere, dry-clean-only clothing, and other delicate fabrics.
Freezing or chilling
Position the garment so the adhesive cannot touch another section of fabric, then freeze it for about 30 minutes. If placing the whole garment in a freezer is impractical, apply ice briefly to the residue instead. The approximate freezing time and the use of a fingernail or plastic card come from commercial sticker-removal guidance rather than controlled textile testing.
Once the residue hardens:
- Support the fabric from underneath.
- Flex it only if that will not distort the garment.
- Lift an edge with a fingernail or blunt plastic card.
- Work in small increments.
- Brush away detached particles before they warm and become tacky again.
Use fingers or a blunt plastic edge rather than a sharp metal tool. Commercial guidance specifically recommends fingers or plastic instead of metal scraping tools for this task.
If the residue warms before it is removed, chill it again rather than scraping harder. Several gentle cycles are preferable to increasing force. Stop if the material stretches, pills, snags, develops a shiny patch, or changes texture.
Method 2: treat persistent residue with a spot-tested liquid
If dry lifting removes the raised material but leaves a tacky film, a carefully tested liquid may help.
Gather:
- Rubbing alcohol or white vinegar
- Cotton balls, cotton swabs, or a clean white cloth
- Mild dish soap
- An optional soft-bristled brush
- Laundry detergent
- Clean rinse water
Use one treatment at a time. Rinse it out and assess the garment before considering a different method; this makes it easier to identify what is helping or changing the fabric.
Step 1: test the treatment
Apply a small amount of the selected liquid to a hidden section. Blot with white material and inspect for dye transfer, fading, finish loss, puckering, stiffness, swelling, or a change in texture.
Alcohol, vinegar, and dish soap are not established as universally compatible with every dye, coating, finish, or fabric. Commercial garment guidance recommends testing alcohol or vinegar first because discoloration or damage is possible.
If the test changes the material, rinse the tested area if the care label allows it and do not apply that treatment to the visible residue.
Step 2: dab rather than saturate
Place the garment on a clean, absorbent surface. Lightly moisten a cotton ball or white cloth with the chosen treatment and dab the residue. Apply it to the adhesive instead of indiscriminately soaking a broad area.
Let it remain for a few minutes. That wording is intentionally imprecise: the supplied sources do not establish a validated dwell time for particular adhesive formulas, fibers, dyes, or treatment concentrations.
Sources also differ on vinegar preparation. Some describe undiluted white vinegar, while others recommend equal parts vinegar and water. No supplied comparison shows that either concentration is preferable. If vinegar is used, the hidden-area test and the garment’s response matter more than treating one recipe as universally correct.
Step 3: lift with minimal force
Use your fingertips or a soft-bristled brush to work gently at the softened residue. Avoid spreading it into a wider area.
If the adhesive does not release, repeat the dab-and-wait step instead of scrubbing harder. Manufacturer-authored guidance warns that excessive scraping force can damage fabric and recommends gentle removal with fingers or a soft brush.
A plastic card may help lift a raised edge on a sturdy woven garment. Keep it nearly flat and use very little pressure so that it lifts material rather than abrading the textile.
Step 4: remove treatment traces
Once the residue loosens, work a small amount of mild dish soap into the treated area with your fingers or a soft cloth. The purpose is to help remove loosened adhesive and traces of the selected liquid.
Rinse according to the garment’s care restrictions. Do not assume warm water is suitable merely because it appears in general cleaning guidance.
Step 5: launder and inspect
Launder only as the care label permits, using the garment’s normal detergent. The supplied evidence does not support one wash temperature for cotton, denim, polyester, and blends.
Inspect the area before machine drying. If it remains sticky, repeat the same conservative method or seek professional help. Partial improvement is not a reason to use substantially more liquid, extend the treatment indefinitely, or scrape more forcefully.
Neither rubbing alcohol nor vinegar is established as safe for all clothing, and neither has been proven superior. They are escalation options whose suitability depends on the complete garment, not just the fiber name.
Fabric-specific guidance for cotton, denim, polyester, and delicate clothing
Fiber content matters, but so do construction, dyes, prints, finishes, coatings, stretch fibers, and trim. Use the general sequence above, with these fabric-specific qualifications.
Cotton and cotton blends
For sturdy, completely dry cotton:
- Remove loose sticker material.
- Try ordinary tape on small sections, holding the fabric down.
- Alternatively, freeze and gently lift the hardened residue.
- If a tacky film remains, test rubbing alcohol or white vinegar in a hidden area.
- Dab, wait a few minutes, and lift gently.
- Apply mild dish soap, rinse, and launder according to the label.
- Inspect and air-dry if the result is uncertain.
A cotton garment blended with elastane, polyester, rayon, or another fiber may respond differently from plain cotton. A printed cotton shirt may also be more vulnerable at the graphic than on undecorated fabric. The word “cotton” should not override the rest of the care label or the garment’s construction.
Denim
Use the same conservative progression for denim: dry lifting or freezing first, then a spot-tested liquid only if needed.
Denim varies in dye stability, stretch content, wash effects, distressed areas, coatings, and decorative finishes. Test on an inside seam or hem. If blue or black dye transfers to the white testing material, stop rather than assuming that the visible area will withstand treatment.
Avoid vigorous brushing. Even on a sturdy garment, abrasion can create a conspicuous change in texture or color.
Polyester and other synthetics
For polyester, begin with:
- Freezing or brief chilling
- Gentle lifting with fingers or a blunt plastic card
- Mild dish soap
- A microfiber cloth or soft brush
- Water at a temperature permitted by the care label
- Rinsing and air-drying for inspection
This does not mean that every polyester garment tolerates warm water, brushing, alcohol, or vinegar. Polyester may be blended with a stretch fiber or used in bonded, coated, pleated, printed, or performance fabric. Continue to rely on the label and a hidden-area test.
Why acetone is not a standard cotton or denim step
Some commercial sticker-removal articles recommend acetone for broad categories such as natural fibers. Those recommendations do not establish compatibility with every cotton garment, blend, dye, print, finish, coating, or trim.
Acetone is therefore not part of the standard sequence here. The supplied source base does not contain a reliable textile compatibility chart showing when it can be used without damage.
A user-generated discussion specifically warns that acetone can damage or dissolve acetate. Because that warning comes from anecdotal user content rather than an authoritative compatibility reference, it should be treated as a reason for caution—not as a complete solvent rule (Quora discussion on laundered adhesive).
If the label identifies acetate, might indicate acetate, or cannot be read, do not infer compatibility from the garment’s appearance or from a broad “natural” or “synthetic” description. A professional cleaner is the more prudent option.
Delicate, valuable, or uncertain garments
Refer these items to a professional cleaner:
- Silk, wool, or cashmere
- Dry-clean-only garments
- Loose, open, or fragile knits
- Fabrics that bleed color
- Vintage, sentimental, or expensive clothing
- Garments with sequins, beads, transfers, embroidery, coatings, or glued trim
- Items with an unreadable care label
- Unidentified fabrics or blends
Show the cleaner the adhesive before applying additional products and describe everything already attempted.
What to do after the sticker has gone through the washer or dryer
Prior washing or machine drying does not prove that the garment is ruined, but complete removal is not guaranteed.
Begin again with the least aggressive sequence:
- Let the garment become completely dry.
- Try tape lifting if it is suitable, sturdy cotton or a cotton blend.
- Freeze or chill the residue.
- Lift hardened material with fingers or a plastic card.
- Test rubbing alcohol or white vinegar in a hidden area.
- Dab and lift rather than soaking and scrubbing.
- Clean the area with mild dish soap.
- Rinse, launder as permitted, and air-dry for inspection.
Check the garment between cycles. Stop if you see color loss, pilling, distortion, snagging, a shiny surface, or a spreading rough patch.
Is the remaining patch still adhesive?
A tacky patch that collects lint may still contain adhesive.
It may not be possible to distinguish the two reliably at home. If the area no longer responds to gentle treatment, further scraping or solvent exposure may make an existing texture change more visible without removing additional residue.
The disputed iron method
One personal blog describes covering machine-dried residue with two layers of paper towel, applying a dry iron for 5–10 seconds, and gently scraping the warmed adhesive with a fingernail. The author reports success on one shirt, but the method is based on personal experience and reader comments rather than controlled textile testing (Modernly Morgan iron account).
Commercial sticker-removal guidance takes the opposite position and advises avoiding irons and dryers while residue remains. The supplied evidence does not resolve whether heat helps or harms across different adhesives, fabrics, finishes, and previous dryer exposure.
For that reason, ironing is not a standard recommendation. Skip the experiment for:
- Polyester and other heat-sensitive synthetics
- Unknown fibers or blends
- Garments whose labels prohibit ironing
- Prints, transfers, coatings, or bonded structures
- Sequins, beads, appliqués, and other embellishments
- Delicate, valuable, or color-unstable garments
If someone nevertheless considers this anecdotal fallback, the care label must permit ironing, the setting must be appropriate for that particular fabric, and prints and embellishments must be avoided. The source’s high-heat setting should not be copied as a universal instruction.
Another cold-and-lift cycle or professional cleaning is the more conservative choice.
Riskier remedies and common mistakes to avoid
Popular household remedies can exchange a removable adhesive patch for a damaged surface, secondary stain, or harder-to-identify mark.
Forceful scraping
Do not use sharp metal tools, stiff brushes, vigorous rubbing, or repeated hard scraping. Commercial guidance warns that excessive heat, harsh solvents, and vigorous scrubbing may damage clothing, particularly delicate fabric (Custom Packaging LA garment guide).
A dull tool is not automatically harmless. Even a plastic card may alter the surface if held at a steep angle or used with excessive pressure.
Acetone as a general-purpose answer
Treat acetone as a higher-risk option rather than a routine answer for cotton, denim, “natural fabric,” or an unidentified textile. The available sticker-removal sources do not provide a dependable compatibility chart covering fibers, blends, dyes, prints, finishes, coatings, and trim.
The user-generated acetate warning discussed above reinforces why a broad category is not enough to establish compatibility. For valuable, uncertain, or stubborn cases, use a professional cleaner rather than treating acetone as the automatic next step.
Oil-based remedies
Cooking oil, baby oil, coconut oil, and similar products are sometimes suggested as adhesive treatments. The supplied commercial guidance acknowledges that an oil treatment may leave residue requiring washing, while another garment guide does not address the possibility of a secondary oily mark.
Because oil can create a second cleaning problem, it is not part of the core sequence. If an oily mark has already been created, treat it as a separate grease or oil stain according to the garment’s care restrictions.
General-purpose commercial adhesive remover
Do not assume that a remover intended for glass, metal, plastic, or finished wood is suitable for clothing. Consider one only if its label expressly covers the particular washable textile.
If it does:
- Read all directions and warnings.
- Test it in a hidden area.
- Use only the stated amount.
- Observe the stated contact time.
- Rinse or launder exactly as directed.
- Stop if the garment changes.
The supplied evidence does not establish that a commercial remover is safer or more effective than the milder household sequence.
Very strong tape
Reserve ordinary tape lifting for completely dry, sturdy cotton or cotton-blend fabric and work in small sections.
Do not use it on lace, silk, wool, loose knits, fuzzy surfaces, delicate finishes, or embellished areas. These restrictions are consistent with the personal tape account, which limits the method to cotton and cotton blends and refers delicate garments to a cleaner.
Layering treatments
Use one liquid treatment at a time. Rinse it out and reassess the garment before trying something else. This is a process-control measure: it limits unnecessary exposure and helps you identify which treatment caused any change.
Do not assume that a longer soak, a larger quantity, or a second product will improve a partial result. The supplied guidance does not validate such escalation.
Toothpaste and abrasive pastes
Do not prescribe toothpaste. One cleaner’s marketing guide discourages it because it may be abrasive or leave another stain. Improvised gritty pastes present the same basic concern: abrasion can alter the textile around the adhesive.
Finally, reject guarantees. No supplied source proves that a treatment is universally safe or that every garment can be restored after washing, machine drying, previous solvent exposure, or textile damage.
Rinse, inspect, air-dry, and know when to stop
Removal is not finished merely because the patch no longer feels sticky. Adhesive fragments, soap, or traces of the selected liquid may remain.
After lifting as much residue as possible:
- Apply a small amount of mild dish soap if the garment and care label permit.
- Work it in gently.
- Rinse out loosened adhesive and treatment traces.
- Launder according to the care label.
- Inspect the area in good light.
- Air-dry whenever the result is uncertain.
Manufacturer-sponsored garment instructions advise checking that the residue is gone before machine drying and repeating treatment if necessary, because remaining adhesive may become harder to remove after further dryer exposure (The Blue Print garment instructions).
If the spot remains slightly sticky but the textile appears unchanged, repeat the same mild treatment. Do not automatically increase the solvent strength, contact time, or scraping force.
Stop home treatment if you notice:
- Dye transfer, fading, or bleeding
- Pilling, snagging, or pulled fibers
- Stretching, puckering, or distortion
- A shiny or melted-looking surface
- Loss of a coating or finish
- A new rough, stiff, or fuzzy texture
- Residue spreading beyond the original patch
- A worsening ring or secondary stain
Seek professional cleaning when the garment is delicate, dry-clean-only, valuable, embellished, color-unstable, made from an uncertain fiber, or unchanged after several gentle attempts. Identify the residue and list any tape, alcohol, vinegar, soap, oil, commercial remover, laundering, drying, or heat already used.
No source considered here provides controlled comparative testing, validated concentrations, or a universal method for every adhesive and textile. The practical escalation ladder is therefore short: read the label and spot-test; lift dry residue with ordinary tape or cold when appropriate; use carefully tested alcohol or vinegar only if needed; clean up with mild dish soap; inspect and air-dry; and stop if the fabric changes.
Patience and repeated gentle treatment are preferable to force, high heat, or progressively stronger solvents. Delicate, valuable, embellished, color-unstable, and dry-clean-only garments belong with a professional cleaner.
Can you put clothing in the dryer after removing sticker residue?
Only after inspecting the garment and confirming that the adhesive and treatment traces appear to be gone. If the area remains tacky, stiff, discolored, or uncertain, air-dry it and reassess.
Washing does not necessarily show that all residue has been removed. Once the area appears clean and the fabric is unchanged, dry the garment according to its care label.
What is a conservative way to remove sticker residue from polyester?
Check the care label, then freeze or chill the residue and lift it gently with your fingers or a blunt plastic card. Follow with mild dish soap and a microfiber cloth or soft brush, using only the pressure needed.
Use water at a temperature permitted by the label, rinse, and air-dry for inspection. If a tacky film remains, consider a hidden-area-tested treatment or professional cleaning rather than jumping directly to acetone or heat.
Will rubbing alcohol or white vinegar damage clothing?
Either may affect some fabrics, dyes, prints, coatings, or finishes. Apply a small amount to a comparable hidden area with white material and stop if dye transfers or the garment’s color, texture, finish, or shape changes.
If the test remains stable, dab the chosen liquid onto the adhesive rather than saturating a broad area. Wait a few minutes, lift gently, then clean the area with mild dish soap and rinse. A successful test reduces risk but does not establish universal safety.
Is acetone safe for removing sticker glue from clothes?
Not as a general recommendation. The supplied sources do not establish acetone compatibility merely because a garment is described as cotton, denim, natural, or synthetic.
One user-generated discussion warns specifically about acetate, but that anecdotal warning is not an authoritative compatibility chart. If the garment contains possible acetate, has an unreadable label, or is otherwise uncertain, professional cleaning is more prudent than guessing.
Begin with dry lifting, freezing, mild dish soap, and a carefully spot-tested alcohol-or-vinegar treatment instead.
Should you use an iron on sticker residue that survived the dryer?
Usually not as a first or routine response. One personal account reports success after briefly heating residue under paper towels and scraping it gently, while commercial guidance advises avoiding heat until the adhesive is gone. Controlled comparisons have not resolved that conflict.
Skip ironing on heat-sensitive synthetics, unknown blends, delicate fabrics, coated materials, prints, and embellished clothing. Never iron a garment whose label prohibits it.
If the care label permits ironing and someone chooses to try the anecdotal fallback, use a fabric-appropriate setting rather than automatically using high heat, and avoid prints and embellishments. Another cold or carefully spot-tested treatment cycle remains the more conservative option.