 StainList
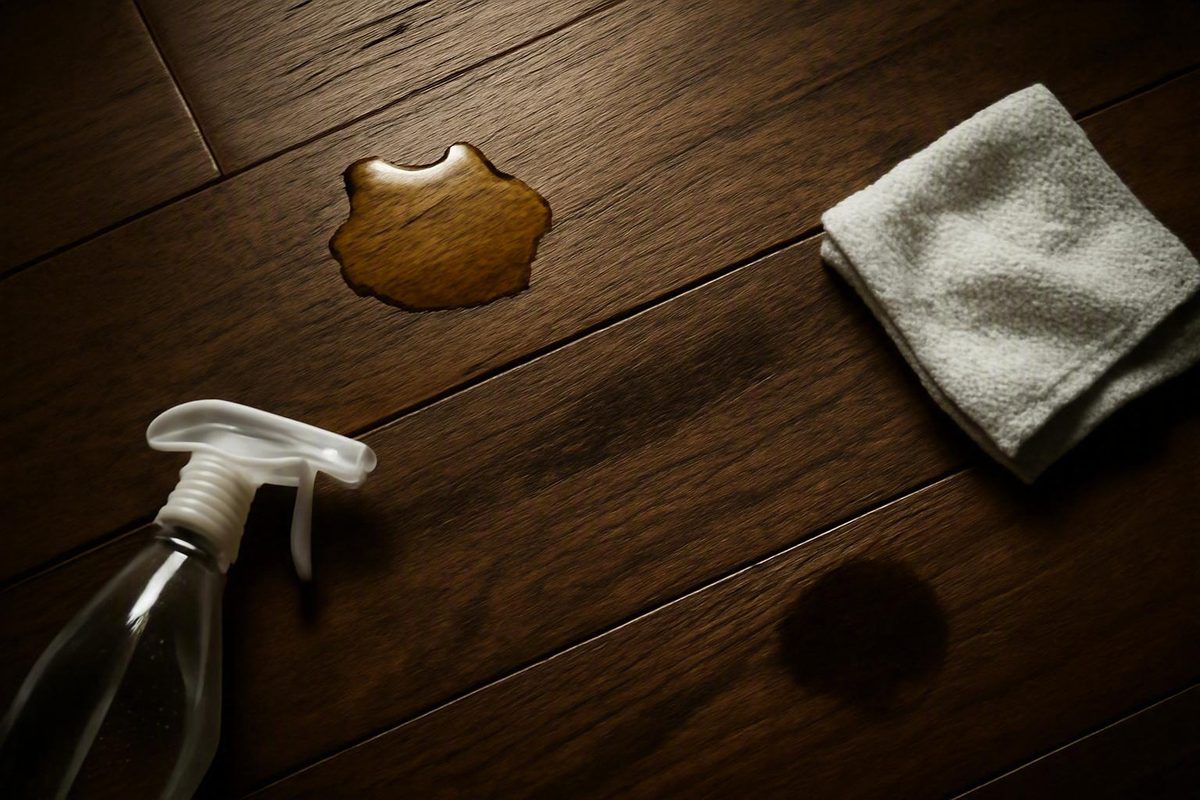
Getting urine stains out of hardwood floors is not one cleaning task. A fresh puddle on an intact finish, odor trapped in a seam, and an old black mark inside the wood require different responses.
The safest strategy is to identify the problem, start with the least aggressive compatible treatment, use very little moisture, and stop as soon as the floor or finish changes. Surface cleaning may remove residue without eliminating odor. An odor treatment may work without restoring color. Old discoloration may require refinishing or board replacement rather than repeated cleaning.
Comparative testing is limited. Much of the available guidance comes from flooring retailers, cleaning companies, product manufacturers, commercial advice sites, and homeowner reports rather than controlled studies. Product labels and the flooring or finish manufacturer’s current care instructions should therefore take priority over generic recipes.
First, identify the problem you are actually treating
Before applying anything, place the problem into one of four paths:
- Fresh wet accident: Liquid is still present. The priority is absorbing it before it reaches seams or worn areas.
- Dry surface residue: The accident has dried, but the mark appears to sit on an otherwise smooth, intact finish.
- Odor with little visible discoloration: The surface looks reasonably normal, but urine odor remains or returns.
- Old brown or black discoloration: The color may be within the wood rather than removable residue on top of it.
Species, finish or sealant, age, wear, and contact time can all affect penetration and treatment results, according to Robbins Flooring’s hardwood stain guidance.
Do not try to identify finish chemistry from appearance alone. Look for installation records, leftover product containers, receipts, retailer records, care manuals, or the flooring manufacturer’s online specifications. If you cannot determine the finish, stop before experimenting with vinegar, peroxide, wood bleach, prolonged enzyme treatment, sanding, or other abrasion.
Inspect the affected area under good light. Check the finish and boards for:
- Roughness or raised grain
- Soft, brittle, or weakened wood
- Swelling around the mark
- Cupped or curled board edges
- Buckling or lifting
- Open seams between boards
- Finish that appears worn through
- Damage or odor extending across several boards
A smooth, intact finish around a recent accident may support cautious surface cleaning. Rough or weakened wood suggests that cleaning alone will not repair the damage, a distinction also made in commercial flooring guidance on dark pet stains.
Do not assume every dark spot is urine. A musty odor, visible growth, recent water intrusion, persistent dampness, or deteriorating wood may indicate a separate moisture problem. Those signs call for investigation of the moisture source rather than repeated urine treatments.
It also helps to define what “worked” means. There are four separate outcomes:
- Surface cleaning: Removing residue from the finish
- Odor reduction: Reducing or eliminating the urine smell
- Color improvement: Lightening or concealing discoloration
- Physical repair: Correcting damaged finish, rough wood, warping, or weakened boards
Achieving one outcome does not guarantee the others. A floor may smell better while remaining dark, or look better after staining while contamination remains below the visible surface.
Decision box
- Recent accident on a smooth, intact sealed floor: Blot, use a finish-approved cleaner sparingly, and dry immediately.
- Odor with little discoloration: Consider a urine-specific enzyme cleaner only if its label explicitly permits use on that finish.
- Brown or black mark: Treat it as possible discoloration within the wood, not ordinary dirt.
- Warped, weakened, widespread, or persistently odorous area: Stop applying liquids and arrange a flooring assessment.
Safety and compatibility checks before any treatment
Gather supplies before you begin:
- Absorbent white cloths or plain white paper towels
- A separate clean, dry towel
- The selected cleaner and its current label
- Gloves and ventilation if the label requires them
- A barrier or closed door to keep children and pets away until the floor is dry
White cloths make transferred residue and changes in the floor’s color easier to see.
Instructions intended for intact sealed hardwood must not be generalized to unfinished, unsealed, waxed, oiled, or badly worn flooring. For example, some commercial hardwood cleaning cloths are specifically limited to sealed or finished wood and excluded from unfinished, unsealed, waxed, oiled, or worn surfaces, as stated in Clorox’s hardwood pet-stain instructions.
Spot-test every treatment first:
- Choose a very small, inconspicuous area with the same flooring and finish.
- Apply only the minimum amount needed for a realistic test.
- Observe the product’s stated contact time.
- Remove residue exactly as the label directs.
- Dry the spot completely.
- Compare its color, sheen, texture, and tackiness with the surrounding floor.
Stop if you see cloudiness, excessive lightening, color loss, finish removal, raised grain, or spreading discoloration. Also stop if the finish becomes tacky, soft, dull, or unusually slippery.
A successful spot test is only a compatibility screen. It does not prove that a cleaner will remove the visible stain, nor does it predict exactly how already discolored, worn, or exposed wood will react.
Control moisture throughout the process. Do not pour cleaner onto the floor, saturate a cloth, flood seams, or improvise a wet covering simply because an online recipe recommends one. Where the label permits, apply the cleaner to the cloth rather than directly to the boards.
Follow the current product label for permitted surfaces, quantity, contact time, ventilation, protective equipment, residue removal, and drying. Directions from one enzyme cleaner or floor cleaner cannot safely be transferred to another formulation. Use one treatment at a time; before changing methods, remove the first product’s residue as directed and allow the floor to dry.
If you rent, check the lease and obtain the landlord or property manager’s approval before bleaching, sanding, staining, refinishing, or replacing boards. These steps alter the flooring rather than merely cleaning it, and approval requirements vary.
Fresh urine: blot, clean sparingly, and dry completely
Respond to a fresh dog or cat accident in this order:
- Lay absorbent paper towels or a clean white cloth over the urine.
- Press gently to lift the liquid without rubbing.
- Replace the wet material and repeat until little moisture transfers.
- Inspect adjacent seams and board edges for liquid.
- Clean only after the free liquid has been removed.
- Dry the area with a separate clean towel.
Vigorous scrubbing may also wear the finish. Prompt blotting without rubbing is recommended in commercial flooring guidance for fresh pet accidents.
For an intact sealed floor, begin with the least aggressive cleaner expressly approved by the flooring or finish manufacturer. Put a small amount on a cloth rather than pouring it onto the floor. Use only enough to wipe the affected surface.
Remove cleaner residue exactly as the label directs. If the manufacturer permits a water follow-up, use a lightly dampened—not wet—cloth. Do not wet-mop the area. Dry it immediately with a clean towel.
Stop rather than continuing to wipe if:
- Liquid has entered open seams.
- The finish appears worn through.
- The wood starts to swell.
- The surface becomes rough.
- Color begins transferring to the cloth.
- The finish becomes cloudy, soft, or tacky.
Prompt treatment reduces the opportunity for liquid to penetrate, but it cannot guarantee that no odor or discoloration will appear later. Recheck the floor after it has dried completely.
First ten minutes checklist
- Keep people and pets out of the area.
- Blot; do not rub.
- Replace towels until transfer is minimal.
- Check seams and nearby boards.
- Use only a finish-approved cleaner, if needed.
- Apply cleaner to a cloth rather than pouring it.
- Remove residue according to the label.
- Towel-dry immediately.
- Stop if the wood or finish changes.
There is no universal homemade cleaner appropriate for every hardwood species and coating. When the floor-care instructions are unavailable, blotting and drying are safer than guessing with a reactive household treatment.
Lingering urine odor: use a hardwood-compatible enzyme cleaner cautiously
Odor removal and color restoration are separate goals. An odor treatment may reduce the smell while leaving a brown or black mark unchanged.
Consider a urine-specific enzyme cleaner only when its current label explicitly permits use on the particular hardwood finish. “Enzyme cleaner” is a product category, not a guarantee of wood compatibility. Formulations, application amounts, contact times, and residue-removal instructions differ.
For a compatible product:
- Perform the complete hidden-area test.
- Apply the minimum quantity directed by the label.
- Keep the cleaner out of seams and gaps.
- Observe the stated contact time.
- Remove residue exactly as directed.
- Allow the area to dry fully before judging the result.
Do not invent a shorter contact time if the product requires prolonged contact. Instead, ask the product manufacturer and the flooring or finish manufacturer whether the directions are compatible with a moisture-sensitive wood floor. Guidance on pet stains likewise advises choosing an enzyme product labeled for hardwood because some formulations can affect delicate finishes, while prolonged moisture can damage wood flooring (TenantCloud).
Do not simply cover it with fragrance or repeatedly soak the visible area.
Baking soda is sometimes proposed as an aid for surface moisture or odor, but the available guidance does not establish it as a treatment for discoloration embedded in wood. Use it only if the flooring manufacturer permits it, and do not grind or scrub the powder into the finish. If it cannot be removed gently, stop.
Escalate to a flooring professional when:
- Odor remains after a compatible treatment and complete drying.
- The odor spans several boards.
- The affected area includes open seams.
- The wood is rough, swollen, or weakened.
- The smell appears to come from beneath the floor.
- The accident was discovered after carpet or another covering was removed.
Why vinegar is not a universal hardwood remedy
Vinegar appears frequently in consumer and flooring articles, but the published recipes conflict substantially.
One flooring-manufacturer article proposes equal parts vinegar and water in its pet-urine guidance (Robbins Flooring).
A cleaning-product manufacturer instead proposes one-quarter cup of vinegar per gallon of water (Clorox).
These examples do not establish an independently validated dilution that is safe for every wood species, finish, or floor condition. A relatively dilute mixture is not interchangeable with an equal-parts recipe, and neither should override the floor manufacturer’s care instructions.
The available articles also do not establish that vinegar reliably reverses dark discoloration inside wood. Acidic cleaners may be incompatible with some finishes, and whether vinegar is acceptable depends on the coating, its condition, the permitted dilution, the application method, and the exposure.
Do not experiment with vinegar based only on generic online advice when the floor is:
- Unfinished or unsealed
- Waxed or oiled
- Badly worn
- Cracked or open at the seams
- Engineered with an unknown finish
- Of unknown construction or finish chemistry
If the flooring or finish manufacturer expressly permits a vinegar solution, follow that manufacturer’s exact dilution and method. Conduct a hidden-area test, minimize the amount of liquid, remove residue as directed, and dry the floor thoroughly.
Vinegar is therefore an optional, compatibility-dependent method—not the default answer to how to get urine stains out of hardwood floors.
Old brown or black stains: understand what peroxide can and cannot do
An old brown or black mark may be discoloration below the finish. Routine cleaning can remove surface residue without restoring the original wood color. At this stage, the problem is moving from cleaning toward color correction and restoration.
Ordinary 3% hydrogen peroxide should be understood as a bleaching treatment, not an everyday hardwood cleaner. Commercial guidance suggests that it may lighten some localized dark marks, while warning that it can discolor wood or damage the finish with excessive exposure (Zerorez).
Possible outcomes include:
- The dark mark lightens.
- Nothing visible changes.
- The surrounding wood becomes lighter.
- The finish clouds, dulls, or softens.
- The grain or texture changes.
- A dark patch becomes a pale patch.
- The treated spot requires color matching and resealing.
There is no universal peroxide dwell time supported for every wood-and-finish combination. Supplied commercial and anecdotal recommendations range from a few minutes to several hours, sometimes under a wet covering. That variation does not establish a finish-specific safe maximum and creates unresolved moisture and uneven-bleaching risks.
Consult the flooring or finish manufacturer—or a flooring professional—before placing peroxide on an unknown finish or bare wood. This is especially important for dark floors, aged wood, valuable flooring, porous or damaged boards, and engineered flooring whose construction and available wear layer have not been confirmed.
If you want to assess compatibility before that consultation, limit the DIY step to a tiny hidden-area test:
- Use only the ordinary low concentration identified above.
- Test an inconspicuous area with the same finish.
- Apply a very small amount.
- Observe closely for color, texture, or finish changes.
- Discontinue at the first adverse change.
- Remove residue according to the floor and product instructions.
- Let the test area dry completely.
Even if the hidden test appears acceptable, it does not authorize a particular application method or dwell time on the visible mark. Proceeding on the stain still requires exact manufacturer or professional guidance. Peroxide is an appearance-risk escalation, not a guaranteed stain-removal procedure.
Removing finish to bleach bare wood turns the job into a repair project. The exposed area must later be color-matched and resealed with a compatible coating. A local repair may remain visible because aged wood, stain color, finish chemistry, and sheen can be difficult to reproduce.
Anecdotal reports illustrate the variability but do not prove effectiveness. In one Houzz homeowner account involving old urine-stained oak, peroxide and several other treatments reportedly failed on longstanding stains, while another participant said peroxide helped a newer mark. Those experiences cannot predict the result on another floor.
Compare the treatment options from least to most invasive
The following table separates cleaning, deodorizing, bleaching, and repair. Start with the least invasive compatible option rather than choosing a method solely because it sounds stronger. The descriptions are conditional, not comparative performance ratings.
| Method | Appropriate problem | Compatibility requirement | Likely odor benefit | Likely color benefit | Moisture or finish risk | When to stop |
|---|---|---|---|---|---|---|
| Finish-approved hardwood cleaner | Recent surface contamination on an intact sealed floor | Explicit approval for the floor or finish | May help when the odor source is superficial | May remove residue but not discoloration within the wood | Risk is reduced, not eliminated, when used sparingly | Finish clouds, softens, becomes tacky, or loses color |
| Hardwood-labeled urine enzyme cleaner | Lingering odor without obvious structural damage | Label must permit use on the particular finish | Product-specific; may help when contamination is reachable | Not a guaranteed treatment for brown or black marks | Contact time and excess liquid may threaten seams or worn areas | Directions require incompatible wet contact, or odor persists after complete drying |
| Vinegar solution | Optional surface treatment only when permitted by the manufacturer | Exact dilution and method must come from flooring or finish guidance | Evidence is uncertain and recipes conflict | No established benefit for embedded dark discoloration | May alter an incompatible finish | Any dulling, cloudiness, tackiness, or color change |
| Baking soda | Possible surface moisture or odor aid when permitted | Must be removable gently and without wet scrubbing | May provide limited surface-level help | Not established for embedded black marks | Residue or forceful scrubbing may affect the finish | Residue cannot be removed gently or the sheen changes |
| Hydrogen peroxide | Cautious bleaching escalation for a localized dark mark | Manufacturer or professional guidance strongly preferred | Not its primary purpose | May lighten some marks but can bleach unevenly | Can affect wood color, texture, grain, and finish | Any excessive lightening, finish change, roughness, or spreading |
| Wood bleach | Specialist color-restoration step | Product-specific and finish-specific professional or manufacturer direction | Not primarily an odor treatment | May alter deep discoloration but can create a mismatch | Substantial appearance and handling risk | Do not begin without a compatible restoration plan |
| Sanding | Discoloration believed to be within removable surface material | Floor construction, remaining material, and finish system must be known | Does not establish that the deeper odor source is gone | Removes only discoloration within the depth sanded | Removes wood and finish; a patch may become obvious | Stain remains as material is removed, or floor construction is uncertain |
| Localized staining and resealing | Cosmetic repair after bleaching or sanding | New stain and coating must be compatible with the existing system | Does not prove the odor source is gone | May make a repaired area less conspicuous | Color and sheen mismatch can remain | The test repair will not blend acceptably |
| Individual-board replacement | Deep damage limited to a small number of boards | Installation must permit removal and suitable matching stock must be available | May help if contamination is limited to the removed boards | Replaces visibly damaged material | Adjacent boards may be damaged during removal; mismatch is possible | Damage extends below the boards or suitable material is unavailable |
Sanding is material removal, not cleaning. It can address only discoloration within the depth removed, and deeper staining may remain.
Individual planks can sometimes be replaced without removing the entire floor. Feasibility depends on the installation, board dimensions, species, age, milling profile, color, and finish match. A commercial home-improvement Q&A presents individual-board replacement as a possible alternative for deep damage limited to a few boards, but it does not document a completed repair and should not substitute for an on-site flooring assessment.
When cleaning should give way to refinishing or professional repair
Stop treatment immediately if you observe:
- Worsening or spreading discoloration
- A cloudy, soft, or tacky finish
- Raised grain or roughening
- Finish loss
- Excessive lightening
- Weak, soft, or deteriorated wood
- Swelling, cupping, or buckling
- A treatment mark expanding beyond the original stain
Do not keep sanding simply because discoloration remains. Deep staining can survive removal of the surface layer, while the sanded patch becomes lower, lighter, or otherwise more visible. Reapplying stain and finish may then produce an obvious difference in color or sheen.
A practical restoration ladder is:
- Professional assessment: Determine the floor construction, finish condition, damage depth, and likely odor source.
- Localized color and finish repair: Bleach, color-correct, stain, or reseal a small repair when matching is realistic.
- Broader refinishing: Sand and refinish a larger continuous area when spot blending would be conspicuous and the floor can tolerate sanding.
- Individual-plank replacement: Remove a few deeply affected boards when matching material and installation conditions permit.
- Below-floor inspection or remediation: Investigate underlayment or subfloor when recurring odor suggests deeper contamination.
A few badly affected boards may sometimes be replaced without replacing the entire floor, although matching older flooring can be difficult. If damage covers many boards or extends beneath them, the scope may expand after on-site inspection.
A darker stain may make remaining discoloration less conspicuous, but this is cosmetic concealment. It does not demonstrate that urine or its odor source has been removed. Likewise, sealing a surface does not by itself prove that deeper contamination has been resolved.
The old-oak homeowner case is a strictly anecdotal example: severe marks reportedly remained after several cleaning attempts and sanding, then became less noticeable after dark professional refinishing. The outcome illustrates concealment and restoration—not verified removal of the underlying discoloration.
Arrange a professional assessment when:
- The existing finish is unknown.
- The floor is engineered and its construction or wear layer is unknown.
- Damage crosses multiple boards.
- Odor returns after the surface dries.
- Urine staining is discovered beneath old carpet.
- A DIY treatment has failed or altered the finish.
- The wood is rough, weak, swollen, cupped, or buckled.
- Sanding or bleaching is being considered for a valuable floor.
- The smell appears to originate beneath the boards.
The least-aggressive-first action plan is straightforward: blot a fresh accident, use only a finish-approved cleaner with minimal moisture, and reserve a compatible labeled enzyme product for lingering odor. Treat old dark marks as possible discoloration within the wood rather than ordinary dirt. Peroxide bleaches, sanding removes material, and darker refinishing conceals; none is a risk-free cleaning shortcut.
If the finish is unknown, the wood changes during treatment, odor returns after drying, or the affected area spans several boards, stop experimenting and obtain a flooring assessment.
Can old black urine stains be completely removed from hardwood?
Sometimes their appearance can be improved, but complete removal cannot be promised. If discoloration extends into the wood, surface cleaning will not reach it. Bleaching may lighten it unevenly, sanding may not reach its full depth, and refinishing may conceal rather than remove what remains. Deep localized damage may be better addressed by replacing affected boards.
Will an enzyme cleaner remove both the urine smell and the dark stain?
Not necessarily. A hardwood-compatible urine enzyme cleaner may help with odor when used according to its label, but it is not a guaranteed color-restoration treatment. A black or brown mark may be discoloration within the wood and can remain even after odor improves.
Does 3% hydrogen peroxide damage or bleach hardwood floors?
It can. Commercial guidance identifies 3% hydrogen peroxide as a bleaching treatment and warns that it may discolor wood or affect the finish (Zerorez). A hidden test is only a compatibility screen; do not proceed on a visible stain without a floor-specific application method from the flooring or finish manufacturer or a qualified professional.
Can urine-damaged boards be replaced without replacing the entire floor?
Sometimes. Individual boards may be replaceable when damage is limited and the installation permits localized removal. The main challenges are finding material that matches the existing species, width, thickness, milling, age, color, and finish, and determining whether contamination extends below the boards.
How can I tell whether a dark spot is urine or a moisture or mold problem?
Consider the history and surrounding signs rather than relying on color alone. Urine may be associated with a characteristic odor or a known pet accident. A musty smell, visible growth, recent leaks, persistent dampness, or deteriorating wood points toward another moisture problem. When the source is uncertain—especially if the wood is soft or damaged—investigate moisture conditions before applying a urine cleaner.