 StainList
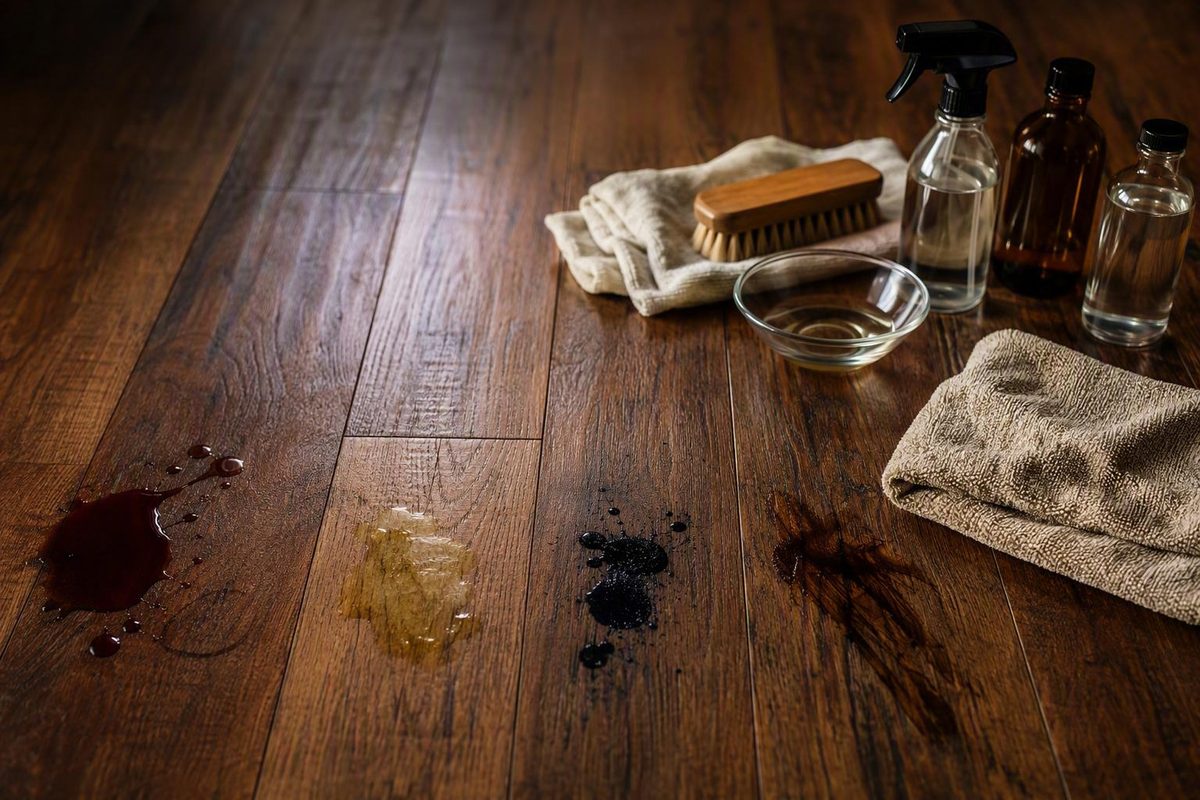
Learning how to remove stains from hardwood floors begins with a distinction that household-remedy lists often overlook: a visible mark may be residue sitting on the finish, damage within the finish, or discoloration that has penetrated the wood. Those are different problems and may require different responses.
Residue may come off with gentle cleaning. A cloudy, softened, or worn coating may need finish repair rather than more cleaner. A dark stain within the wood may require bleaching, sanding, refinishing, or board replacement. Applying a stronger product before identifying the problem can replace a small stain with a larger patch of dull finish or discolored wood.
Use this sequence:
- Remove fresh material without spreading it.
- Let the area dry.
- Identify the likely contaminant and inspect the finish.
- Check the floor or finish manufacturer’s care instructions.
- Test the least aggressive compatible treatment.
- Reassess only after the test has dried.
- Stop if the coating or wood begins to change unexpectedly.
This approach cannot guarantee complete stain removal. It can reduce the risk of damaging the floor while pursuing a mark that ordinary cleaning may not reach.
First response: blot, lift, and dry before the spill spreads
For a fresh spill, prompt but controlled removal is safer than frantic scrubbing.
Place a clean, absorbent cloth or paper towel over the liquid and press down. Lift it, move to a dry section, and repeat. Do not scrub the liquid across the boards or force it toward joints, cracks, baseboards, or gaps beneath appliances.
If the spill contains food, candle wax, adhesive, mud, or another solid component, gently lift the material with a plastic card, flexible plastic scraper, or spoon. Keep the edge nearly parallel to the floor. Avoid metal blades and forceful scraping because they can scratch the coating or remove finish along with the deposit.
Once the bulk of the material is gone:
- Wipe with a dry microfiber cloth.
- If residue remains, use a barely damp cloth rather than a wet one.
- Put a small amount of compatible cleaner on the cloth instead of pouring it onto the floor.
- Remove cleaner residue as directed by the product label.
- Dry the boards and seams immediately with a separate cloth.
Excess water can enter floor seams and contribute to swelling, warping, or permanent damage. Commercial hardwood-care guidance therefore recommends damp rather than wet cleaning, a pH-neutral cleaner formulated for hardwood, and nonabrasive tools that will not scratch or dull the finish (Stanley Steemer’s hardwood-floor cleaning precautions).
For ordinary food or drink residue, begin with a pH-neutral hardwood cleaner only if the floor or finish manufacturer permits it. Follow the cleaner’s label, including any directions for application and residue removal.
Do not begin with steam, steel wool, scouring pads, abrasive powder, harsh chemicals, or a mixture of household cleaners. Steam adds heat and moisture, while abrasive tools and harsh products can scratch, dull, or remove the protective coating.
After cleaning, allow the area to dry under normal room conditions. Judge the result only after the boards and seams are dry.
Diagnose the mark: residue, damaged finish, or stained wood?
Color is evidence, not proof. Diagnose the mark by considering its likely cause, age, odor, texture, location, and the condition of the coating around it.
Ask:
- What happened there? Possible causes include a plant pot, pet accident, leaking appliance, cooking oil, wet footwear, candle wax, marker, cleaning product, or unknown chemical.
- How long was it present? The longer liquid remains, the greater the opportunity for it to enter worn areas, scratches, or seams.
-
Does the mark have texture? Raised, sticky, greasy, or flaky material suggests residue or coating damage.
-
Has the sheen changed? A dull, glossy, cloudy, or rough patch may be damage within the finish rather than dirt on top of it.
- Are the boards deformed? Raised edges, cupping, swelling, or open seams point beyond an ordinary surface stain.
- Is the coating intact? Look for scratches, worn areas, flaking, bare wood, or cracks through which liquid could have entered.
Common categories include:
| Appearance or clue | Possible cause | Initial interpretation |
|---|---|---|
| White, pale, or cloudy mark | Moisture, heat, cleaner residue | Often near the surface or within the finish |
| Greasy sheen or dark translucent spot | Cooking oil, lotion, waxy product | Surface residue or absorbed oil |
| Dark brown or black mark with odor | Pet urine, old water exposure | Possible penetration below the coating |
| Hard, raised deposit | Candle wax, food, adhesive | Material may be mechanically removable |
| Colored or sharply defined mark | Ink, dye, paint, drink | May involve residue and colorant |
| Dark mark near metal or recurring moisture | Water, iron, tannin-related discoloration | Possible discoloration within the wood |
| Sticky, soft, or smeared coating | Cleaner or solvent damage | Finish alteration rather than removable dirt |
Manufacturer guidance describes white or cloudy moisture marks as potentially more superficial and dark water or urine marks as potentially deeper, but appearance alone cannot establish depth. Wood species, porosity, finish, floor age, and wear can all affect penetration and treatment results (Robbins’ guidance on assessing wood-floor stains).
A useful working distinction is:
- Residue on the coating: The mark has thickness, tackiness, grease, or removable color. Gentle lifting or cleaning produces visible transfer without changing the floor finish.
-
Discoloration in the coating: The surface remains relatively smooth, but its gloss, clarity, or color has changed. Cleaning produces little improvement.
-
Wood or structural damage: Boards are swollen, cupped, split, softened, or visibly bare.
Do not use color transfer as an improvised chemical-identification test.
If you do not know whether the floor has polyurethane, wax, hardwax oil, a factory-applied coating, or another finish, check installation records, purchase documents, leftover product containers, or the manufacturer’s care instructions.
Also distinguish accidental discoloration from the floor’s intentional stain. Stripping, bleaching, or sanding may remove the designed color and protective coating along with the unwanted mark.
Use a least-aggressive-first spot-test protocol
A spot test should reproduce the proposed application on a small area and be evaluated after drying. It is not a guarantee that the stain will disappear.
Before testing, read the flooring instructions, finish instructions if available, and the treatment product’s label. This is particularly important before using a solvent, acid, oxidizer, abrasive, heat source, adhesive remover, paint remover, stripper, or specialty wood bleach. If the label does not authorize the intended surface or the flooring instructions prohibit the treatment, do not proceed.
Use this protocol:
- Choose a representative hidden area. Select flooring with the same finish and similar wear, such as beneath movable furniture.
- Remove loose dust. Grit trapped beneath a cloth can scratch the finish.
- Use the minimum amount. Apply the product to a cloth or applicator instead of flooding the floor.
- Follow the product label. Do not copy a dwell time from an unrelated household-remedy article.
- Inspect frequently. Watch for clouding, softening, color transfer, swelling, tackiness, or gloss change.
- Remove residue as directed. Do not invent a neutralizing mixture.
- Dry the test area.
- Compare it after drying. Check color, sheen, texture, and coating integrity under more than one lighting angle.
- Proceed only if the result is acceptable. Treat the visible mark conservatively even after a successful compatibility test.
A compatibility test and a treatment-effect test are not the same. Testing a cleaner on an unstained hidden area can reveal whether it damages the finish. It cannot show whether the product will remove a particular stain. Bleaching and abrasion are intended to change color or remove material, so a hidden test can only help reveal the nature and degree of those changes—not guarantee a match on the stained area.
Escalate by mechanism and risk:
- Dry blotting, vacuuming, or gentle lifting
- Manufacturer-approved pH-neutral cleaning
- A contaminant-specific, finish-compatible treatment
- Bleaching or controlled abrasion
- Finish repair, sanding, refinishing, or board replacement
Repeated applications are additional chemical, moisture, heat, or abrasive exposure. If a mild treatment fails after the floor dries, reconsider the diagnosis instead of automatically repeating it.
Stop immediately if:
- The finish becomes sticky, cloudy, soft, wrinkled, or dull.
- Floor color transfers to the cloth.
- The surrounding wood lightens unexpectedly.
- The mark expands.
- Board edges swell or rise.
- Cupping develops.
- The surface becomes rough or fibrous.
- A thin decorative layer or underlying core becomes visible.
- The treatment creates an unacceptable color or sheen difference.
Chemical stripping and refinishing products may require ventilation, gloves, eye protection, and product-specific removal or disposal procedures. Sanding and stripping also remove the protective layer, after which refinishing is necessary. Follow the relevant product label rather than a generic recipe (Ayoub N&H’s overview of restoration methods and precautions).
Treat pale water marks without flooding or overheating the floor
A white ring or cloudy patch is commonly associated with moisture affecting the surface or finish. Dark brown or black discoloration may suggest deeper penetration, but color does not establish depth by itself.
First remove the moisture source. Move the damp rug, plant pot, wet footwear, leaking container, or other item. Blot visible moisture and let the floor dry fully. Ordinary air circulation may help, but do not immediately add heat or another wet treatment.
Once the area is dry:
- If the mark has faded, leave it alone and monitor it.
- If removable residue remains, use a soft cloth and a compatible hardwood cleaner.
- If the area is smooth but still cloudy, moisture may have altered the finish.
- If the mark is dark, follows the grain, or appears beneath worn coating, surface cleaning may not reach it.
Begin with a dry microfiber cloth. If necessary, apply a small amount of approved cleaner to a barely damp cloth, wipe gently, and dry immediately. Adding water to a water mark can increase moisture exposure without correcting finish clouding.
Moving low heat from a hair dryer is sometimes suggested for pale moisture marks, but retailer guidance does not establish compatibility with every coating. Consider heat only if the finish manufacturer permits it and a hidden-area test shows no unwanted change. Keep the dryer moving and stop if the coating develops a change in gloss, texture, odor, or tackiness (Massud & Sons’ water-mark treatment overview).
Toothpaste and baking soda also appear in generic instructions. Both act at least partly through abrasion. Rubbing can dull the coating, change its sheen, or cut through to the intentional stain below, so they should not be treated as established remedies for finished hardwood.
If a dried mark remains as clouding within the finish, further cleaning may accomplish nothing. The appropriate next step may be localized finish repair rather than a stronger cleaner. No universal dwell time or method can ensure that a white mark will disappear without changing the surrounding sheen.
Match grease, wax, and other surface residues to the contaminant
Oil does not behave like wax, and neither should be treated as a water stain. Match the response to the material while protecting the floor’s coating.
Grease and oil
Blot fresh grease before adding liquid. If there is a pool or thick deposit, lift it gently with a plastic card, then press a clean absorbent cloth onto the remaining film. Broad wiping can spread the oil.
If the floor’s care instructions permit mild dish soap, put a few drops on a damp cloth. Wipe the spot gently, remove soap residue with another barely damp cloth if the product directions allow, and dry immediately. Do not pour soapy water onto the floor.
This method is intended for surface grease on an intact finish. It is not a reliable treatment for a dark oil stain that has entered worn or bare wood.
Mineral spirits are sometimes recommended for oily marks, but they are a higher-risk, finish-dependent option. Generic retailer and manufacturer articles do not establish universal compatibility with polyurethane, wax, hardwax oil, factory coatings, or previous maintenance products. Use a solvent only if the flooring or finish manufacturer and the solvent label permit the intended application, and follow the label’s ventilation, handling, and disposal requirements.
Candle wax
Allow warm wax to cool instead of wiping it across the boards. To harden the deposit, place wrapped ice over it while preventing condensation from reaching the floor. Once the wax is brittle, hold a plastic card at a shallow angle and lift it in small sections.
Avoid metal blades and forceful scraping, which can scratch or remove the finish. Pick up loose crumbs with a soft cloth or a vacuum attachment designed not to scratch the floor.
Some flooring guidance suggests using a hair dryer to soften wax. Do not concentrate heat on one spot.
Food, drink, mud, and ordinary residue
Lift solids first, blot liquid, and use an approved pH-neutral hardwood cleaner sparingly. Dry the area afterward. If pigment remains once the residue is gone, stop treating the mark as ordinary dirt and reassess whether the coating or wood has become discolored.
Ink, paint, adhesive, rust, and unknown chemicals
Do not import a method intended for clothing, carpet, glass, or sealed countertops.
Identify the substance and consult the flooring, finish, or contaminant manufacturer before applying a solvent. For dried paint, determine whether it is resting on the finish or bonded to it before attempting mechanical removal. For an unknown chemical, isolate the area and do not combine cleaning products.
Aggressive rubbing, scouring powder, steel wool, or abrasive pads may remove a deposit while leaving a permanently dull or scratched patch. Retailer guidance similarly warns against excessive water, steam, steel wool, scouring pads, and routine use of sandpaper during stain cleaning (Buildworld’s stain-specific hardwood guide).
Handle pet urine as both a stain and an odor problem
For a fresh pet accident, blot rather than rub. Change cloth sections frequently, minimize liquid, clean with a product approved for the specific finished floor, and dry the boards and seams thoroughly.
One flooring manufacturer recommends equal parts distilled white vinegar and water for fresh urine. That is general commercial guidance, not evidence that the mixture is compatible with every floor. It should not override the instructions for the flooring or finish. The same manufacturer emphasizes blotting, hidden-area testing, and complete drying (Robbins’ pet-urine and wood-floor guidance).
An enzyme cleaner may be considered for odor only when its label specifically permits use on the type of finished wood floor involved. A product labeled for carpet, upholstery, tile, or washable fabric is not automatically suitable for hardwood. Apply only the label-directed amount, avoid saturating seams, and do not leave an unverified wet compress on the floor.
Persistent odor may indicate contamination:
- beneath worn or cracked finish,
- between boards,
- along an unsealed edge,
- in an underlayment or subfloor, or
- around a recurring location used by a pet.
Adding more liquid may increase moisture in the seams without contacting all affected material.
An old brown or black urine mark may also be discoloration within the wood rather than removable residue. Do not promise that vinegar, baking soda, or an enzyme product will remove it.
In one uncontrolled personal experiment on a single old dark floor stain, vinegar solutions and an enzymatic pet cleaner did not meaningfully lighten the mark. Peroxide and an oxalic-acid cleaning product produced some lightening but also affected the polyurethane topcoat (documented DIY comparison of treatments on one dark stain).
That experiment cannot establish what will happen on another floor. The stain’s origin, wood species, age, depth, intentional color, and original finish were not controlled. Its useful lesson is limited: popular remedies may fail, and treatments strong enough to lighten dark discoloration may also alter the coating.
Seek professional assessment when odor persists after cautious surface cleaning, blackening covers several boards, boards are swollen, or dampness returns. The solution may involve finish removal, subfloor investigation, board treatment, or replacement rather than another deodorizing product.
Understand what peroxide, oxalic acid, and abrasives actually do
Cleaning, bleaching, abrasion, and stripping are not interchangeable:
-
Cleaning removes material sitting on the surface.
-
Abrasion removes coating or wood to reach material below it.
- Stripping softens or dissolves a finish so it can be removed.
It may lighten dark discoloration, but it can also lighten surrounding wood, alter intentional floor color, or affect the finish. A successful bleaching reaction may therefore replace a dark mark with a conspicuous pale patch.
Oxalic-acid products are sometimes recommended for water-, iron-, or tannin-related discoloration. The available general flooring articles do not establish a universally safe concentration, dwell time, residue-removal procedure, or finish compatibility. A household cleanser containing oxalic acid is not automatically a wood-restoration product approved for finished flooring.
In one uncontrolled personal test, repeated applications of 3% hydrogen peroxide and an oxalic-acid cleanser produced some lightening on one old stain while affecting the polyurethane topcoat. Vinegar, vinegar combined with baking soda, and an enzymatic cleaner did not meaningfully lighten that same mark (results of the single-floor DIY treatment test).
Do not reproduce that experiment’s prolonged or repeated exposures as instructions. A single-floor personal test cannot establish general effectiveness or safety, and additional contact increases exposure for the finish, surrounding wood, seams, and intentional stain.
Baking soda, toothpaste, scouring powders, steel wool, abrasive pads, and sandpaper work at least partly by removing material mechanically. That may make a mark appear lighter while flattening the sheen or cutting through the protective layer. Sandpaper is not a cleaning tool; using it begins a restoration process.
Reserve peroxide, oxalic-acid products, solvents, strippers, and other strong chemicals for situations in which:
- The contaminant and proposed mechanism make sense.
- The product is labeled for the intended use and surface.
- The flooring or finish manufacturer permits it.
- A compatibility test has dried without unacceptable damage.
- You can follow the product label for ventilation, gloves, eye protection, residue removal, storage, and disposal.
- You accept that localized color or sheen may change.
If the only apparent route forward involves bleaching or removing finish, pause. A flooring professional can assess whether the probable improvement justifies the risk of a mismatched or enlarged repair.
Know when cleaning ends and restoration begins
Cleaning has reached its limit when removable residue is gone but the mark remains—or when the treatment starts changing the coating instead of the stain.
Stop repeated DIY treatment when:
- A compatible cleaner produces no further improvement after drying.
- The finish becomes dull, cloudy, sticky, or soft.
- Floor color transfers to the cloth.
- Surrounding wood begins to lighten.
- Scratches or bare wood become visible.
- The affected area grows after treatment.
- Board edges rise, swell, or cup.
- Odor persists despite surface cleaning.
Deep dark discoloration, widespread staining, finish loss, gouging, recurring moisture, swelling, cupping, or contamination across several boards warrants professional assessment. The same caution applies to valuable, historic, unusually thin, custom-stained, or previously refinished flooring.
Sanding is fundamentally different from cleaning. It removes the existing finish and some wood along with the stained material. The sanded area must then be prepared and refinished. If intentional floor stain is removed, color matching may also be necessary.
Solid and engineered hardwood have different constructions. Previous refinishing can reduce the remaining material further, and the available general guidance does not establish one safe wear-layer thickness for every product.
Before sanding engineered hardwood, identify the product, obtain its specifications, determine whether it has been sanded before, and have the remaining wear layer assessed. When the layer is too thin or the stain is too deep, replacing the affected board may be more appropriate.
Restoration guidance treats sanding as removal of finish and wood followed by refinishing, and it recommends professional attention for warping, deep damage, and difficult repairs (Ayoub N&H’s hardwood restoration overview).
Even when localized bleaching or sanding reduces a stain, the repair may remain visible. Removing the discoloration and producing a seamless match are separate tasks.
Board replacement may be more appropriate when:
- Contamination extends through the board.
- The wood is deformed or structurally damaged.
- Odor remains below the surface.
- Previous treatments have compromised the finish.
- An engineered wear layer cannot be sanded safely.
- The affected area is too extensive for a convincing spot repair.
If blackening, cupping, or dampness returns, investigate the source. Possible causes include a leaking appliance, plumbing problem, exterior water entry, damp subfloor, recurring pet accident, or moisture trapped beneath a mat or plant container. Treating only the visible stain allows the underlying problem to continue.
Prevention is less disruptive than restoration:
- Blot spills promptly.
- Use damp rather than wet routine cleaning.
- Sweep regularly or vacuum with a soft-brush attachment.
- Place entrance mats and rugs in spill-prone areas.
- Use furniture pads.
- Prevent wet footwear, plant containers, and pet bowls from trapping moisture.
- Follow the flooring manufacturer’s humidity recommendations.
- Repair worn finish before bare wood is exposed.
The safest route is diagnosis before treatment. Remove fresh material promptly, use little moisture, verify compatibility, spot-test, and reassess after the floor dries. A dark mark that remains after cautious cleaning may be discoloration within the finish or wood rather than removable dirt. At that point, moisture investigation, finish repair, sanding, refinishing, or board replacement may be more appropriate than repeated household remedies.
Frequently asked questions
Will vinegar remove a dark stain from a hardwood floor?
Not reliably. Vinegar may remove some surface grime, but it cannot be expected to reach discoloration that has penetrated beneath the finish. It is also not universally compatible with hardwood coatings.
In one uncontrolled test on a single old dark stain, a vinegar-and-water mixture removed some grime without meaningfully lightening the discoloration. Vinegar combined with baking soda also failed to remove it. That result does not prove vinegar will always fail, but it shows why vinegar should not be promised as a cure for dark water or urine stains.
Follow the flooring or finish manufacturer’s instructions. If cautious cleaning removes residue but not the dark mark, stop adding cleaner and assess whether the coating or wood requires restoration.
Can hydrogen peroxide leave a lighter patch or damage the finish?
Yes. Hydrogen peroxide may lighten dark discoloration, but it may also bleach surrounding wood, alter the floor’s intentional color, or affect its protective coating. The resulting pale patch may be more conspicuous than the original mark.
Do not assume a wet compress, long dwell time, or repeated application is safe. Use peroxide only when the relevant product label and flooring or finish instructions permit it, and stop if the finish clouds, softens, dulls, transfers to the cloth, or if surrounding wood lightens.
How can I tell whether a water stain is on the finish or inside the wood?
Color alone cannot determine depth, but several clues can help.
A white or cloudy mark on an intact, smooth coating is more likely to involve the surface or finish. A dark brown or black mark that follows the grain, enters seams, appears around scratches, or occurs where the coating is worn may have penetrated farther. Swelling, cupping, recurring dampness, or persistent odor strengthens the case for a deeper problem.
Let the floor dry, remove ordinary residue with a compatible cleaner, and inspect the area under angled light. A changed sheen or texture suggests finish damage. A mark that remains below an intact-looking coating after surface residue is gone may require professional assessment.
Can engineered hardwood be sanded to remove a deep stain?
Sometimes, but not automatically. Engineered hardwood has a real-wood wear layer over a constructed core, and that upper layer may be too thin for sanding. Previous refinishing may reduce the remaining layer further.
Identify the flooring product, obtain its wear-layer specifications, determine whether it has been sanded before, and have the remaining layer assessed. Do not rely on a universal sanding depth. If sanding could expose the core, board replacement may be safer.
What signs mean I should call a flooring professional?
Arrange an assessment when you find:
- Deep or widespread black discoloration
- Persistent urine or musty odor
- Swelling, cupping, buckling, or raised board edges
- Recurring moisture or a spreading mark
- Missing, flaking, sticky, or extensively worn finish
- Gouges or exposed bare wood
- No improvement after cautious compatible cleaning
- A color or sheen change caused by treatment
- A likely need for bleaching, stripping, or sanding
- Engineered flooring with an unknown or thin wear layer
- A valuable, historic, custom-stained, or previously refinished floor
These signs suggest that the problem may involve the coating, wood, seams, subfloor, or moisture source—not merely removable surface residue.