 StainList
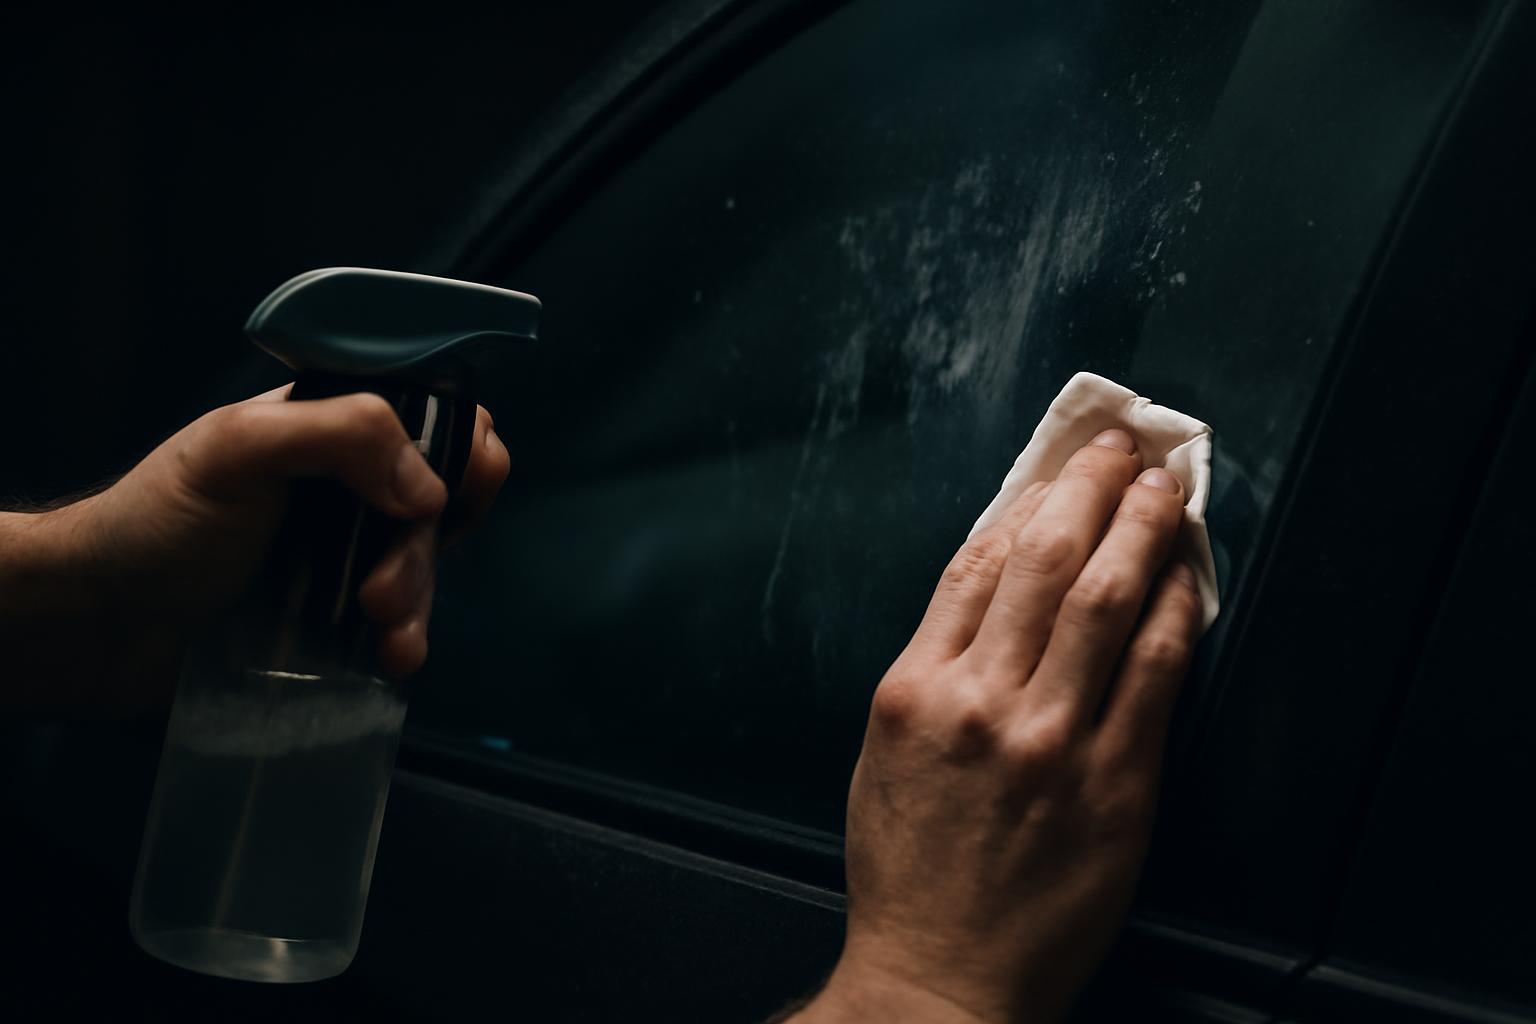
If you need to know how to remove adhesive from tinted windows, the most cautious answer is also the least exciting one: start mild, keep liquid controlled, use soft tools, and stop early if the film looks stressed.
Across the limited sources available, the same low-risk pattern shows up again and again: microfiber, warm soapy water, very gentle handling, and only then a carefully spot-tested solvent if the residue is still there. Some guides and forum users also report success with brief low heat and small amounts of isopropyl alcohol applied to the cloth rather than the tint, but that should be read as common anecdotal practice, not as a universally validated-safe protocol for every film.
That distinction matters. The source base here is mostly a mix of forum reports, installer or tint-shop blog guidance, and product marketing—not manufacturer-approved testing across all dyed, metalized, carbon, ceramic, and factory-tinted glass combinations. So this guide is best read as a cautious synthesis of what limited third-party sources tend to agree on, not as a guarantee.
This article focuses on intact automotive tint that you want to keep. It is not a guide to stripping old film, removing adhesive after full tint removal, or rescuing already failing tint. If the film is bubbling, peeling, wrinkled, under warranty, or unknown in age and quality, the safest move is often to stop experimenting and ask a pro.
Why Tinted Windows Require Special Adhesive Removal Care
The main reason tinted glass cannot be treated like ordinary bare glass is simple: with many aftermarket car tints, the surface you are touching is a thin plastic film on the inside of the window, not the glass itself.
Some forum and installer-type sources describe common aftermarket tint as a Mylar or polyester-type plastic film, sometimes around 1–2 mil thick. That should not be treated as a universal spec for every product on the market, but it does help explain why tint can be far easier to damage than bare glass.
That film is vulnerable in a few predictable ways:
- Scratching: pressure, dirty towels, abrasive scrubbers, hard card edges, fingernails, and metal blades can mark or score it.
- Bubbling or distortion: too much heat or aggressive chemical exposure may stress the film or its adhesive.
- Edge lift: excess liquid can seep under an edge and start peeling.
- Haze or surface damage: the wrong cleaner can dull or discolor the film or coating.
One of the clearest cross-source warnings is to avoid ammonia on tint. Even though isolated forum users say they have used ammonia cleaners anyway, installer-style guidance repeatedly treats ammonia as risky for certain films. The same caution applies, even more strongly, to acetone and other harsh solvents.
The adhesive itself is another variable. Residue can come from:
- stickers
- parking permits
- toll tags or transponders
- tape
- labels
- suction accessories with adhesive pads
- leftover glue from previous film or decals
Those adhesives do not all behave the same way. Some soften with warmth. Some smear. Some ball up and roll away. Some barely respond until a solvent is introduced. That is one reason there is no single magic remover that can be safely promised for every case.
Rear glass deserves extra care. Many rear windows include defroster lines, and multiple sources warn that scraping or careless pressure can damage them. Even if the tint survives, damaging a defroster line can leave you with a costlier problem than the original residue.
Tint type matters too. Common categories mentioned in the source material include:
- dyed film
- metalized film
- carbon tint
- ceramic tint
- factory privacy glass, sometimes with added film
The evidence does not show that all of these react identically to the same cleaner or solvent. Older tint, cheap tint, sun-baked tint, and unknown tint all deserve more caution than new film with known care instructions.
Because of that, the strongest rule in the whole topic is also the simplest:
Test every method on a small, inconspicuous area first.
In practice, that means:
- Start with the softest tool.
- Start with the mildest cleaner.
- Keep liquid light and controlled.
- Treat any use of heat as brief and cautious, not risk-free.
- Stop if the film starts to look hazy, distorted, soft, lifted, or bubbled.
If there is one mistake most likely to ruin tint, it is not usually “not enough chemical.” It is too much force.
Tools and Household Items You’ll Need
Because the evidence is limited and tint can be expensive to replace, a household-first approach makes sense here: use the mildest, most controllable tools first before jumping to strong removers.
A practical kit looks like this:
-
Microfiber cloths These are the most commonly suggested wiping tool for intact tint. Have several, because a cloth loaded with softened glue starts smearing it around instead of removing it.
-
Warm water with a little mild dish soap This is the gentlest widely repeated first liquid to try.
-
Spray bottle Useful for applying a small amount of soapy water without flooding the film.
-
Plastic card or soft plastic scraper Safer than metal if you need a little help lifting softened residue.
-
Ammonia-free glass cleaner Useful for final cleanup and, in at least one forum example, as part of the removal process when sprayed onto a microfiber towel rather than directly onto the tint.
-
Hair dryer on low, if you choose to use heat Some guides suggest low heat as a gentler option than a heat gun. That is not a guarantee of safety, so treat it as optional and cautious: brief passes, moving constantly, stop at the first sign of trouble.
-
Isopropyl alcohol, used sparingly if needed Common household rubbing alcohol is often sold around 70% to 91%. Some online advice mentions higher strengths, but stronger does not equal universally safer, and no source here proves a single concentration is safe on all tint films.
Useful extras:
- cotton pads for tiny spots
- nitrile gloves if using alcohol
- a dry microfiber for final buffing
- a towel under the work area to catch runoff
A few “don’t assume” notes matter:
- Do not assume any cleaner labeled for glass is automatically safe for tint.
- Do not assume a household razor trick for bare glass transfers to intact film.
- Do not assume a commercial adhesive remover is tint-safe just because it works on stickers elsewhere.
A cautious order of operations is:
- microfiber
- warm soapy water
- optional brief low heat, if you use heat at all
- ammonia-free cleaner on the towel
- very small amount of spot-tested isopropyl alcohol on the towel
That order will not solve every baked-on adhesive patch, but it reflects the best-supported mild-first pattern in the source material.
Step-by-Step: Safest Method Using Heat and Soapy Water
For fresh residue or a light adhesive film, the least risky approach described across the sources is some combination of gentle softening, mild cleaner, microfiber wiping, and patience.
Treat the steps below as a cautious workflow, not a validated universal protocol.
1. Warm the adhesive gently
Some third-party guides suggest using a hair dryer on low to make adhesive more pliable. If you use this step, keep the dryer moving and avoid concentrating heat in one spot.
A few online guides mention very short warming periods—sometimes on the order of a minute or two—but there is no clearly validated safe time that applies to every tint film. The better rule is:
- use brief, low heat
- keep it moving
- stop and inspect often
Good signs:
- the residue feels softer
- adhesive starts transferring more easily to the cloth
Bad signs:
- the tint feels hot
- the film looks hazy or distorted
- an edge starts to move
- bubbling appears
If any of that happens, stop and let the area cool.
2. Apply warm soapy water
Spray a small amount of warm water mixed with mild dish soap onto the residue, or onto the cloth if you are near a tint edge.
Some guides suggest letting it sit briefly before wiping. That short dwell can help, but exact soak times in the source base are not firmly validated, so it is better to think in terms of a short wait rather than a precise rule.
The goal is to soften the residue enough that you do not need pressure.
3. Wipe gently with microfiber
Blot and wipe lightly. Do not scrub hard.
A careful pattern is:
- blot
- short gentle wipe
- rotate to a clean section of cloth
- repeat
If the residue is moving, rolling, or transferring, you are making progress. If it is just smearing wider, stop and switch to a clean part of the towel.
4. Use a plastic card only if needed
If wiping alone is not enough, a plastic card or soft plastic scraper can help. Keep pressure light and the area slightly damp while you work.
The card should be helping loosen already-softened residue—not digging at the tint.
Avoid this step entirely on intact tint if you feel yourself getting impatient. Mechanical damage is often how the trouble starts.
5. Repeat in short cycles
Forum examples and installer-style articles alike describe adhesive removal as a repetitive process, especially once residue has partly softened.
That usually means:
- soften
- wipe
- inspect
- repeat
Fresh residue may come off quickly. Older residue may not. What matters more than speed is that you are not escalating force.
6. Finish with ammonia-free cleaner
Once the sticky feel is gone, wipe the area with an ammonia-free glass cleaner and a clean microfiber to remove remaining soap film and check for haze.
A practical example
One useful, but limited, example comes from a forum user who had adhesive left by a toll pass on the inside of a tinted windshield. In that anecdote, the residue reportedly came off using Invisible Glass on a microfiber towel with repeated gentle wiping, and the user did not report tint damage afterward.
That is worth noting as a real-world example of a mild approach working. It is not enough to treat that product as universally safe or specially recommended for every tint.
Best uses for this method
This mild first-pass approach makes the most sense for:
- fresh sticker residue
- tape glue
- permit residue
- small adhesive smears
- light toll-tag adhesive
- residue near trim where solvent runoff would be risky
If the residue mostly loosens but leaves a stubborn film behind, that is where some sources move to a carefully controlled solvent step.
Using Mild Solvents Like Isopropyl Alcohol Safely
If gentle wiping and soapy water stall out, isopropyl alcohol is one of the more commonly mentioned household solvents in the source material. But it is important to describe it accurately:
It is commonly suggested, not universally validated-safe.
That means it belongs in the “possible escalation step” category, not the “default answer” category.
When to use it
Consider rubbing alcohol only when:
- the residue is still present after milder steps
- you are dealing with a small, stubborn patch
- the tint looks healthy and stable
- you can test first in a hidden area
Avoid it as a first move on:
- bubbling tint
- peeling tint
- old, brittle, unknown film
- warranty-sensitive installations
- large areas that would require soaking
What strength to use
Common household rubbing alcohol is often sold around 70% to 91%, and that is what many DIY users are most likely to have.
Some online advice mentions 99% isopropyl alcohol, especially in bare-glass or post-removal contexts, but higher concentration is also more volatile and more flammable. Its mention online should not be read as proof that it is safe for intact tint.
How to apply it
The most cautious workflow repeated in the sources is:
- Test first in a hidden area.
- Put a small amount on the cloth, not directly on the window.
- Blot the residue.
- Wipe lightly.
- Change towel sections often.
That last point matters. One recurring tip in solvent-removal advice is that once the towel is loaded with dissolved adhesive, it stops lifting cleanly and starts moving glue around.
Why cloth application is the safer way to think about it
Applying solvent to the towel instead of spraying the glass helps you keep the process controlled:
- less runoff
- less chance of liquid reaching a tint edge
- less overall saturation of the film
- more precise targeting of the adhesive only
That lines up with the repeated caution in the sources about edge seepage.
Safety notes
Rubbing alcohol is flammable. Use it with:
- ventilation
- no smoking
- no open flame
- no active heat source aimed at the area
If you are also using a hair dryer, use the two steps sequentially, not at once. Warm first, then let the area cool down before any solvent use.
What results to expect
Anecdotal reports and some how-to guides suggest alcohol can loosen sticker glue or residual adhesive without obvious tint damage when it is used sparingly and without scraping.
What the evidence does not show is that alcohol is safe on every ceramic, carbon, dyed, or older film. That uncertainty is why the test spot matters so much.
Aftercare
Once the adhesive is gone:
- Wipe the area with a damp microfiber or mild soapy water.
- Follow with an ammonia-free glass cleaner.
- Dry and inspect from different angles.
If you notice haze, do not automatically assume the tint is ruined. It may be leftover residue or solvent film. Clean again gently before deciding.
When to stop
Stop using alcohol if you notice:
- dullness
- whitening
- softening
- edge movement
- wrinkling
- a need for repeated soaking
At that point, it is no longer a small controlled cleanup.
Chemicals and Tools to Strictly Avoid on Tinted Windows
A lot of bad adhesive-removal advice comes from techniques meant for bare glass, painted panels, or full tint removal. Those contexts do not transfer cleanly to an intact tinted window you are trying to preserve.
Ammonia-based cleaners
Ammonia is one of the most consistently warned-against products in tint-related guidance. While isolated users say they have used ammonia cleaners, the broader message from tint-oriented sources is still caution.
For intact tint, ammonia-free is the safer assumption.
Acetone and other harsh solvents
Strong solvents do show up in online discussions—acetone, lacquer thinner, lighter fluid, brake cleaner, denatured alcohol, and similar products.
That does not make them good advice for intact tint.
The same source set that mentions them also attaches obvious warnings:
- they can damage plastics
- they can affect rubber and trim
- they may harm nearby paint
- they are easy to misuse
- they are not well validated for intact tint film
For a finished tinted window, these belong in the avoid category.
Razor blades and metal scrapers
Razor blades are common in guides for bare glass after tint removal. That is exactly why they are so often misapplied to intact tint.
On film, a blade can:
- scratch the surface
- score a line that later peels
- nick an edge
- damage rear defroster lines
If you want to preserve the tint, skip metal.
Goo Gone and WD-40 as default solutions
This is where the evidence is mixed.
Some users recommend these products. Goo Gone markets some products for automotive glass. But none of that adds up to proof that either is universally safe on tinted film.
Several forum discussions specifically warn that Goo Gone, WD-40, thinner, alcohol, or other chemicals may damage cheap, old, or unknown tint, even if someone else had success with them.
So the cautious conclusion is:
- do not treat Goo Gone or WD-40 as first-line answers
- do not treat marketing claims for glass as proof for tint film
- if someone chooses to try them anyway, a hidden test spot is essential
Excess heat
Heat is one of the easiest ways to turn a residue problem into a tint problem.
Even guides that suggest hair dryers also warn that too much heat can bubble or warp film. A heat gun held close and stationary is far riskier than a hair dryer used briefly and carefully.
If your process depends on “more heat, longer heat, closer heat,” the risk is rising.
Abrasive methods
Also avoid:
- abrasive scrubbers
- clay-bar suggestions on the tint surface
- fingernail scraping
Clay-bar advice appears in some forum threads, but later commenters warn it can mar plastic film, especially cheap tint. Fingernails are also mentioned as a mechanical-damage risk.
A practical rule
If a method sounds like it belongs in paint stripping, bodywork, or bare-glass tint removal, it probably does not belong on an intact tinted window you are trying to save.
Handling Rear Windows and Stubborn or Set Residue
Rear glass and older residue are where a careful DIY job becomes much easier to get wrong.
Protecting rear defroster lines
Multiple sources warn that rear defroster lines can be damaged during adhesive or tint work. There is not much rigorous step-by-step validation here, so the safest approach is to reduce both scraping and pressure as much as possible.
If you are cleaning on or near a rear defroster grid:
- use blotting and gentle wiping
- avoid dragging hard edges across the lines
- keep tools soft
- minimize repeated scraping motions
Many experienced users prefer wiping parallel to the lines rather than across them, but the more important point is the broader one: do not treat the rear window like ordinary flat glass.
Dealing with old, baked-on residue
Old adhesive behaves differently from fresh sticker glue. Heat exposure, time, and sun can make it tougher and smearier.
For that kind of residue, the limited sources generally point to a patient cycle:
- brief gentle warmth, if you use heat
- warm soapy water
- gentle wipe
- small, spot-tested amount of alcohol on the cloth if needed
- repeat
What you should not expect is one quick pass.
Older residue can require several rounds, and results vary by adhesive type.
In cold weather
One installer-style source notes that removal is harder in cold weather because adhesive stays firmer and softens less readily.
That does not mean “use hotter heat.” It means:
- work in a warmer environment if possible
- let the car interior warm up first
- if you use a hair dryer, use gentle warmth for slightly longer passes rather than high heat
The risk of overheating the film does not disappear just because the day is cold.
When combining heat and alcohol
For stubborn residue, some people use both methods—but safely means one after the other, not together.
A cautious sequence is:
- warm gently
- stop the heat
- let the area settle
- use a lightly alcohol-damp cloth
- wipe
- allow solvent to dissipate before using heat again
That protects both the tint and your safety.
Signs you should stop
DIY is no longer the smart choice if you notice:
- bubbling
- whitening
- haze that does not clean off
- edge lift
- wrinkling
- snagging on defroster lines
- residue spread over a large area
Professional help becomes especially sensible when:
- the patch is large
- the film is expensive
- the film may be under warranty
- the tint type is unknown
- the residue crosses several defroster lines
- previous attempts already involved multiple chemicals
Post-Removal Cleaning and Prevention Tips
Once the tackiness is gone, the job is not finished. Final cleanup is what determines whether the glass looks clear or cloudy.
Rinse away residue fully
After any soap, cleaner, or solvent step, wipe again with a fresh damp microfiber or ammonia-free glass cleaner, then dry with a clean microfiber towel.
This helps remove:
- soap film
- loosened adhesive
- solvent traces
- oily haze from stronger removers
Skipping this step is how a window can look fine at first and smeary later.
Dry thoroughly and inspect
Inspect the area from different angles and, if possible, in daylight.
Look for:
- remaining tackiness
- haze
- streaks
- edge lift
- fine scratches
If you find a small remaining patch, repeat the mildest step that was helping, not the harshest possible one.
If you used an oily product
If someone has already used an oily remover, a useful general cleanup principle from grease-removal practice applies: remove excess oil first, then wash.
On nearby trim or hard surfaces, that can mean blotting or absorbing the excess before doing your final soapy cleanup. That principle is general rather than tint-specific, but it is still better than flooding an oily area and spreading the mess wider.
Preventing future adhesive residue
The easiest residue to remove is the one you never create.
Safer habits include:
- using suction mounts or static-cling mounts instead of direct adhesive when possible
- placing stickers in a non-tinted area if local rules allow
- removing stickers while warm, not cold
- cleaning leftover residue early before it bakes in
A commonly suggested forum trick for stickers is the sun plus water plus black plastic bag approach, intended to warm and soften the adhesive before peeling. That is an anecdotal softening method, not a validated standard, but the underlying idea is sensible: a warm sticker usually separates more cleanly than a cold one.
Peeling matters
A lot of “adhesive removal” problems really start with rough sticker removal.
If you tear a sticker off cold tint in one yank, you often split the adhesive and leave more of it behind. A slower peel after gentle warming tends to leave less cleanup.
When DIY Fails: Signs to Call a Professional
Sometimes the best answer to how to remove adhesive from tinted windows is not another product. It is stopping before a small residue patch turns into a new tint bill.
The area is large or extremely stubborn
If you are dealing with a wide adhesive field or a patch that still will not move after patient mild cleaning, the risk starts to outweigh the savings.
The tint already has bubbles, peeling, or age damage
Existing damage changes everything. Moisture, rubbing, and chemical exposure can worsen weak film quickly.
You are concerned about warranty issues
Some forum discussions explicitly raise warranty concerns. If the tint is professionally installed and might still be covered, DIY experimentation can create a later argument over who caused the damage.
The film is premium, valuable, or unknown
Carbon and ceramic films may be more durable than some cheap dyed films in some contexts, but the source base here does not prove universal chemical safety for them. Unknown film is even trickier.
The residue is on rear defroster glass
Rear glass is where one mistake can affect both appearance and function. If the residue sits directly over multiple defroster lines, a professional is often the cheaper choice.
You have already tried several products
Once a window has been through soap, glass cleaner, alcohol, Goo Gone, WD-40, or random forum chemistry, the situation gets harder to read. Continuing the experiment often adds risk without adding clarity.
The practical bottom line is this:
Start with the mildest, most controlled method. Treat heat and alcohol as possible, patch-tested escalation steps, not guaranteed-safe defaults. And if the film is valuable, fragile, warrantied, or already stressed, hand the job to someone who works on tint every day.
Is Goo Gone safe for adhesive on tinted windows?
Not universally.
Goo Gone markets some products for automotive glass, and some online users recommend Goo Gone-type removers for adhesive. But that is not the same as proof that they are safe on tinted film.
The source base here is mixed:
- some people say it works
- some specifically worry about tint damage
- several forum users warn against using it on cheap, old, or unknown tint
- product marketing mentions glass, but not a clear blanket approval for intact tint film
So the cautious answer is: not a first choice. If someone decides to try it anyway, the product should be treated as a high-caution test case, used minimally, kept away from edges, and cleaned off thoroughly.
Can I use a razor blade to scrape residue off tint?
No—not on intact tint you want to keep.
Razor blades belong to bare-glass and post-tint-removal contexts. On intact film, they can scratch the surface, create lift points, or damage rear defroster lines.
If gentle wiping is not enough, the safer mechanical option is a plastic card or plastic scraper with very light pressure. If even that feels risky or ineffective, it is usually better to pause and rethink the method than to escalate to metal.
Does rubbing alcohol damage ceramic or carbon tint?
It might, which is why the test spot matters.
The source material supports only a cautious statement here: rubbing alcohol is commonly suggested for stubborn residue, but the evidence does not prove that ceramic, carbon, dyed, and other films all react the same way.
So the practical answer is:
- do not assume premium film is chemically immune
- do not assume unknown film is safe
- test first
- use very little
- apply it to the cloth, not the window
- clean the area afterward
How long to heat adhesive without risking tint bubbles?
There is no strong universal answer.
Some online guides mention brief low-heat passes, sometimes around a minute or two, but those numbers are better treated as anecdotal starting points, not as guaranteed-safe thresholds.
The safest rule is:
- keep heat low
- keep it moving
- use short passes
- stop and inspect often
If the tint looks stressed in any way, stop immediately.
What if residue is near tint edges or defroster lines?
That is the highest-risk situation.
Near tint edges:
- use less liquid
- apply cleaner to the cloth instead of soaking the glass
- avoid pushing residue toward the edge
- stop if the edge starts to move
Near rear defroster lines:
- reduce scraping as much as possible
- use soft cloth work first
- avoid dragging hard edges across the grid
- stop if you feel snagging or see line damage risk
If the residue sits right on a film edge or crosses multiple defroster lines, that is one of the strongest cases for professional help.