 StainList
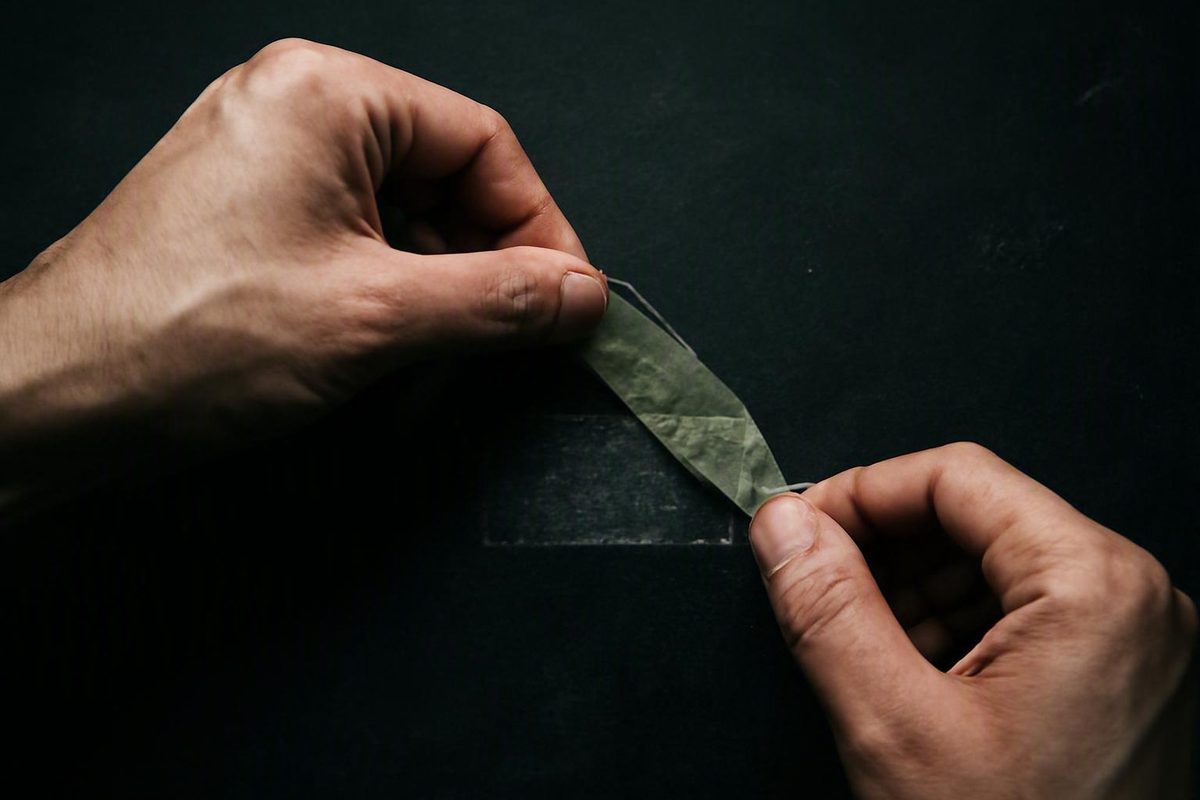
To remove double adhesive tape without making the underlying damage worse, do not begin with a strong solvent or sharp blade. First identify the surface and its finish, then determine whether you are dealing with intact tape, torn foam, exposed adhesive, or damage that has already occurred.
A conservative sequence is:
- Identify the surface, finish, tape construction, and adhesive condition.
- Test the proposed method in a hidden area.
- Detach the tape carrier with controlled peeling and, only where compatible, gentle moving warmth.
- Treat leftover adhesive as a separate problem, beginning with the mildest suitable method.
- Stop if the surface changes.
No method can guarantee damage-free or trace-free removal.
Compatibility advice is therefore best treated as a cautious starting point, not proof that a method will be safe on every product or finish.
Check the surface and tape before trying to remove either
Start by classifying the material beneath the tape:
- Painted drywall or another painted wall
- Bare or painted plaster
- Wallpaper
- Glass
- Bare, painted, plated, or coated metal
- Glazed tile and adjacent grout
- Plastic, acrylic, vinyl, or an unidentified polymer
- Sealed or varnished wood
- Unfinished wood
- Fabric
- Stone, cardboard, or another absorbent material
- Electronics, screens, or vehicle components
The visible finish may be more vulnerable than the base material. Bare metal and painted metal require different treatment, for example, while sealed wood behaves differently from unfinished wood. Decorative, tinted, laminated, mirrored, coated, or otherwise unidentified glass should not be treated as ordinary uncoated glass.
Next, identify what remains:
- Intact film tape: A thin carrier is still present.
- Foam mounting tape: A thick, compressible carrier may split through its center.
- Carrier fragments: Pieces of film, cloth, paper, or foam remain.
- Exposed adhesive: The carrier is gone, leaving a tacky or hardened film.
- Surface damage: Paint, wallpaper, veneer, or another finish has lifted.
These conditions call for different actions. Scraping a thin adhesive film as though it were a removable carrier, meanwhile, can scratch or abrade the finish.
Tape construction also matters. Removable film tape, heavy-duty mounting tape, foam tape, carpet tape, craft tape, and specialty products are designed for different uses, so their removal behavior should not be assumed to be interchangeable. A manufacturer overview distinguishes these categories but does not establish one removal procedure for all of them (XFasten’s double-sided tape guide).
Assess the adhesive’s condition:
- Fresh and tacky adhesive may stretch or transfer.
- Old, dry adhesive may crack into small pieces.
- Softened or smeared adhesive may have received too much heat or an incompatible cleaner.
- Hardened residue may require repeated mild treatment rather than more force.
One commercial guide suggests that some recently applied, still-tacky tape may release with a quick pull, but it qualifies that advice for dried tape and painted walls. Slow, controlled removal is the more cautious default for old tape, strong mounting tape, or a fragile finish (EchoTape’s residue-removal guidance).
Before applying heat, water, alcohol, vinegar, oil, lubricant, citrus cleaner, or a commercial adhesive remover, test it in an inconspicuous area. Let the test spot cool or dry completely, then inspect it under good light for:
- Color or sheen changes
- Clouding or whitening
- Softening or tackiness
- Warping
- Paint or finish transfer
- Raised grain
- Darkening
- Swelling, blistering, or lifting
Use the smallest practical amount and monitor the working area continuously.
The lowest-risk method for removing intact tape
If the surface appears stable, separate the removal process into stages instead of combining heat, scraping, and solvent at once.
- Clear the work area. Remove nearby objects and protect the floor or worktop from debris.
- Support anything held by the tape. Do not allow a frame, mirror, trim piece, panel, or other object to hang from a partly separated bond.
- Test the method. Check the proposed tool and any warmth in a hidden area.
- Find a loose corner. Use a fingernail where practical. Otherwise, try a rounded plastic scraper, an old plastic card, or a smooth wooden tool.
- Work in small sections. Do not attempt to release the entire strip with one forceful pull.
If the material and its manufacturer’s instructions permit heat, use a moving hair dryer on low or medium rather than starting with a heat gun. The aim is to make the bond easier to peel, not to melt the adhesive or heat the surface aggressively.
Move the dryer continuously. Lift an edge with a plastic or wooden tool, then peel gradually. Commercial supplier guidance recommends this combination of moderate warmth, a nonmetal tool, and work in small sections, while also requiring an inconspicuous-area test (Stylus Tapes’ double-sided tape removal guide).
With heat applied as needed, gradually remove the tape at a 45-degree angle How To Quickly And Easily Remove Double Sided Tape | Stylus Tapes. Keep the pull low and close to the surface rather than sharply outward.
If necessary, direct mild moving warmth toward the newly exposed bond line. Advance a short distance, pause, and continue. If the tape tears, start again from a new edge rather than yanking the remaining section.
Stop heating if the adhesive:
- Becomes runny
- Stretches into long strings
- Smears beyond the tape edge
- Transfers heavily to the tool
- Begins pulling the surface finish
Heat is conditional. Avoid or minimize it on wallpaper, thin or unidentified plastic, vinyl, electronics, delicate coatings, and any material whose care instructions warn against heat.
After the carrier comes off, pause. Let the area return to room temperature and inspect it before applying any cleaner. Sticky adhesive, foam debris, discoloration, and missing finish are different problems.
Painted walls, plaster, and wallpaper need minimal force and moisture
Walls may appear robust even when their surface layer is weak. Paint can have poor adhesion, plaster may be friable, and wallpaper can separate at its face, backing, or seams.
For a painted wall, begin with careful hand peeling and a rounded plastic card. Guidance conflicts over heat: one commercial source recommends controlled hair-dryer warmth on painted walls, while another advises avoiding heat on painted surfaces. Because the supplied guidance does not resolve that conflict, use warmth only after a hidden-area test and stop at the first change in the coating (Ram Board’s residue guide; Gorilla Glue’s residue guide).
If the test remains unchanged, use only enough moving warmth to encourage release. Pull the tape back slowly at a low angle.
Stop if paint appears on the tape, card, or cloth. More heat, liquid, scraping, or solvent may enlarge the bare area. At that point, the problem is no longer adhesive alone.
For plaster, avoid metal blades and aggressive pressure. Do not soak the wall. Commercial plaster guidance describes plaster as rough and delicate, warns that blades may scratch it or remove paint, and recommends gradual warming and peeling (Adhesive Tapes’ plaster-wall guide).
If residue remains on stable, moisture-tolerant plaster, try a cloth only lightly dampened with warm soapy water. Dab or wipe gently instead of saturating the area. Diluted vinegar and baking-soda treatments appear in commercial guidance, but their compatibility with paint, sealers, and particular plaster finishes is uncertain. Treat them as optional, spot-tested alternatives rather than standard remedies.
Do not apply cooking oil, WD-40, or another oily product to bare or absorbent plaster. Oils and lubricants can leave a grease mark that is harder to correct than the adhesive.
For wallpaper, prioritize dry removal:
- Check the wallpaper maker’s care instructions if available.
- Lift the tape by hand where possible.
- Work slowly and avoid pulling across a seam.
- Do not scrape with a hard edge.
- Avoid solvent and saturation.
- Stop if ink, coating, or paper fibers begin to lift.
Commercial guidance disagrees about whether even a damp soapy cloth is suitable for wallpaper. Because papers, inks, coatings, and adhesives vary, dry peeling is the cautious starting point. If the wallpaper manufacturer permits damp cleaning, test an almost-dry cloth in a hidden area and keep moisture away from seams.
Finally, identify whether the remaining mark is actually glue. A light patch may be missing paint, a fuzzy area may be torn wallpaper, and a chalky spot may be exposed plaster. Additional cleaner cannot replace a missing finish.
Glass, metal, and tile can tolerate more—but still require testing
Hard, nonporous surfaces often permit more cleaning options than paper or unfinished wood, but coatings and decorative finishes can still scratch, haze, or discolor.
For glass:
- Remove loose tape by hand.
- Lift the edge with a plastic card or plastic scraper.
- Peel gradually while keeping the pull close to the surface.
- Treat exposed residue only after the carrier is gone.
- Wipe away the chosen cleaner and dry the glass.
Do not assume the pane is ordinary uncoated glass. If it is tinted, laminated, mirrored, coated, decorated, damaged, or otherwise unidentified, follow the glass or window manufacturer’s care instructions.
A metal razor is not a general-purpose tape-removal tool. The supplied evidence does not establish a reliable household method for verifying which glass or coating can tolerate one, so a plastic tool is the appropriate default.
For metal, begin with dry peeling and a plastic scraper. Gentle moving warmth may be considered only if the coating and nearby components tolerate it. Bare metal may accept a wider range of cleaners than painted, plated, anodized, polished, or clear-coated metal.
If residue persists, apply a small amount of a compatible cleaner to a cloth rather than directly to the object. Possible options include rubbing alcohol, citrus cleaner, lubricant, or a labeled adhesive remover, but each requires a hidden-area test. Keep liquid away from seams, joints, openings, and attached components.
For glazed tile, use a mild-to-strong progression:
- Plastic card or scraper
- Mild moving warmth, if the tile and installation permit it
- A lightly dampened soapy cloth
- A spot-tested cleaner labeled for the tile finish
Treat grout as a separate material. Apply cleaner with a cloth or swab rather than flooding the joint.
Hardness does not guarantee finish durability. Decorative glass, plated hardware, painted metal, and high-gloss tile can still scratch, dull, or lose sheen. Remove the cleaning film by a method compatible with the surface, then dry the area thoroughly.
Plastic, wood, porous materials, and electronics require conservative treatment
These materials require restraint because heat, moisture, oil, and solvent may produce irreversible changes.
For plastic, begin with dry peeling and a plastic tool. Use little or no heat on thin, unidentified, or heat-sensitive plastic. Stop at the first sign of:
- Softening
- Whitening
- Clouding
- Rippling
- Warping
- Surface tackiness
- Color transfer
Do not assume rubbing alcohol, citrus cleaner, vinegar, or petroleum-based products are safe for every plastic. Formulations and surface treatments differ, and the available compatibility advice is inconsistent.
Avoid acetone on unknown plastics. User-generated reports include severe damage to polycarbonate, while broader commercial guidance warns that acetone may weaken, cloud, or deform plastic. The report is not a universal compatibility test, but it supports excluding acetone as a general plastic cleaner (Chief Delphi’s double-sided tape discussion).
For sealed wood, test low warmth and minimal moisture in a hidden area. Once the test has dried, look for changes in color, sheen, grain texture, or finish transfer. Work with the grain using a soft cloth or smooth plastic tool, and keep liquid away from joints, veneer edges, and cracks.
For unfinished wood, avoid soaking. Favor careful mechanical lifting with minimal pressure. If the object is valuable or its finish is uncertain, do not continue escalating household treatments.
For fabric and other absorbent materials, do not transfer instructions intended for glass or metal. Check the care label or material-specific instructions. Begin by lifting loose carrier material without spreading the adhesive.
For electronics and screens, do not improvise from household hard-surface guidance. Heat and cleaners may affect plastics, coatings, seals, and nearby components, and the supplied evidence does not establish definitive compatibility for displays, batteries, cables, or electronic assemblies. Follow the device manufacturer’s service or cleaning instructions instead.
The same restraint applies to antiques, specialty finishes, vehicle components, valuable objects, and unidentified coatings. The available evidence is not sufficient to prescribe definitive chemical compatibility for them.
Remove sticky residue with a mild-to-strong escalation ladder
Once the film or foam carrier has been removed, treat the remaining adhesive as a separate cleanup stage. Use one method at a time.
1. Begin mechanically
Try to roll loose adhesive with a clean fingertip, lift it with a plastic card, or dab it with the adhesive face of the removed tape. Stop if this pulls paint, fibers, or finish.
Do not press detached tape onto a delicate surface unless the finish has already tolerated a very gentle adhesion test.
2. Try warm soapy water on moisture-tolerant surfaces
Lightly dampen a soft cloth rather than pouring or spraying water onto the area. Hold it briefly against the residue, then wipe with minimal pressure. Repeat using a clean section of cloth.
Do not flood wallpaper, wall seams, plaster, wood joints, electronics, grout, cardboard, fabric, or another porous material. Warm soapy water is mild only where both the substrate and its finish tolerate moisture.
3. Choose one compatible treatment
If soap fails, select one spot-tested cleaner. Put a small amount on a cloth or swab rather than saturating the surface. This limits migration and makes changes easier to detect.
4. Consider rubbing alcohol conditionally
Rubbing alcohol may loosen some adhesive residues, but it may also dull, discolor, dry, or soften certain paints, plastics, wood finishes, and high-gloss coatings. Patch-test it and use gentle contact. It is flammable, so follow the product’s ventilation and ignition warnings (Crown Adhesive Tape’s rubbing-alcohol guidance).
Afterward, remove the dissolved adhesive and remaining cleaner according to the surface’s care instructions. Do not assume that every material should be rinsed with water.
5. Treat vinegar, oil, WD-40, citrus cleaner, and commercial remover as conditional options
These products appear frequently in vendor guidance, but compatibility recommendations are inconsistent. A product may loosen one adhesive while staining, dulling, or softening the material beneath it.
Use citrus cleaner only when its label confirms compatibility with the particular surface. “Citrus-based” does not establish that a product is harmless to every paint, plastic, or finish.
For a commercial adhesive remover, require the label to name the affected material. Follow its application, dwell-time, ventilation, protective-equipment, and cleanup directions. A specialty remover is not automatically safer than a household method.
6. Avoid acetone as a routine solution
Acetone and acetone-containing nail-polish remover are aggressive options that can strip paint, dull varnish, and damage plastic. Do not use them on painted walls, varnished wood, unknown plastics, or unidentified coatings. Manufacturer residue guidance also warns against acetone on painted, plastic, and varnished surfaces, although that source addresses duct-tape residue rather than every double-sided adhesive (Gorilla Glue’s residue guide).
Prefer repeated gentle passes to hard scraping or prolonged soaking. Use only one cleaner at a time, remove it as directed, and let the area dry before reassessing.
Troubleshoot foam mounting tape, aged adhesive, and smearing
This can leave foam on both the mounted object and the supporting surface.
Support the object first. Use a rounded plastic card or smooth wooden tool to separate the foam gradually. Work across a small section rather than levering the object sharply away.
Do not assume a residue cleaner will penetrate an intact foam carrier evenly. Remove as much foam as practical before treating the exposed adhesive. If the foam tears, start from another edge instead of digging through it with a metal blade.
When old tape tears into small pieces, use the same lift-and-peel sequence repeatedly. If the surface has passed a heat test, rewarm only a short section and maintain steady tension. Patience is preferable to trying to pull the entire strip free.
When adhesive becomes gooey or smears, stop heating and let the area cool. Once cool, try rolling or lifting the adhesive mechanically before considering a cleaner.
If the mounted object cannot be supported while the bond is separated, do not continue pulling it away. Secure the object before attempting further removal.
Before escalating, identify what remains:
- Sticky and translucent: likely adhesive residue
- Spongy or crumbly: likely foam carrier
- Colored like the wall or object: possibly transferred finish
- Smooth but lighter, darker, or duller: possibly discoloration or a sheen change
- Fibrous or paper-like: possibly torn wallpaper or paper facing
Apply cleaner only to actual adhesive. Cleaner cannot restore missing paint, rebuild foam, or reverse a changed finish.
The available guidance does not establish one validated procedure for every acrylic, heavy-duty, foam, automotive, or electronics-grade tape. When the construction or surrounding material is uncertain, stop escalating and consult the relevant product instructions.
Know the safety rules and when to stop
Stop immediately if you observe:
- Paint, varnish, plating, or another finish transferring
- Wallpaper lifting, blistering, stretching, or tearing
- Plaster crumbling or becoming soft
- Plastic whitening, clouding, softening, or warping
- Veneer separating or wood grain swelling
- Discoloration or a growing dull patch
- Glass chipping, cracking, or showing existing damage
- Rapidly worsening adhesive smearing
- Liquid moving toward an opening or attached component
- A mounted object becoming difficult to support
Continuing after a surface starts to deteriorate can turn a residue problem into a repair problem.
When using a solvent or commercial remover, follow the product label. Commercial removal guidance calls for ventilation and the protective equipment specified for the cleaning chemical, including gloves or eye protection where directed (Stylus Tapes’ residue-removal guide).
Rubbing alcohol is flammable. Keep it away from flames and sparks, and use it in a ventilated area as directed by the product guidance (Crown Adhesive Tape’s rubbing-alcohol guidance). Do not use an open flame or uncontrolled high heat for tape removal.
Metal blades create scratch and injury risks and should not be the default tool. Use a rounded plastic card, plastic scraper, or suitable wooden tool wherever possible.
Use one product, remove it according to its directions, and allow the surface to dry before deciding whether another method is needed. This also makes it easier to identify which treatment is affecting the finish.
For valuable objects, specialty materials, uncertain coatings, installed glass, electronics, or vehicle components, the supplied evidence does not support detailed compatibility judgments. Follow the relevant manufacturer’s instructions rather than continuing to experiment.
Clean the surface and reduce the chance of future residue
Cleanup is part of removal.
After soap or another water-based treatment, wipe away the cleaner with a minimally damp cloth if the surface allows it. Avoid oversaturation and dry the area completely.
If oil or WD-40 was used on a compatible nonporous surface, remove the oily film with mild soapy water and dry the area. Do not paint or install new tape over a slick residue.
After rubbing alcohol or a commercial remover, follow the cleaner label and the surface manufacturer’s care instructions. A water rinse is not appropriate for every wood finish, wallpaper, electronic device, or porous material.
Inspect the dry area under strong, angled light. Look and feel for:
- Remaining tackiness
- Foam fragments
- A greasy or slippery film
- A dull or softened finish
- Raised grain
- Residue along seams or grout lines
Do not apply new tape until the surface is clean, dry, stable, and compatible with the replacement product.
For future applications, choose tape intended for the specific surface, load, environment, and duration of use. Stronger is not automatically better: a heavy-duty mounting tape may be unnecessary for a lightweight temporary decoration and more difficult to remove later.
Apply tape only to a clean, dry, compatible surface and follow the tape manufacturer’s installation and removal instructions. Tape age, application pressure, environmental heat, adhesive formulation, and finish condition may still affect the result, so preparation cannot guarantee residue-free removal.
The practical principle is restrained escalation: identify the surface and tape, test a hidden spot, detach the carrier with the gentlest compatible method, and treat residue separately. Stop at the first sign of deterioration. Repeated mild passes are preferable to stronger heat, sharper tools, or unverified solvents, particularly on paint, plaster, wallpaper, plastic, unfinished wood, electronics, and valuable objects.
Can I use a hair dryer to remove double-sided tape from a painted wall?
Only conditionally. Guidance is inconsistent about heat on painted walls, so first test low, moving warmth in a hidden area. Let the paint cool and inspect it for softening, discoloration, sheen changes, or finish transfer.
If the test remains unchanged, warm a small section and peel slowly at a low angle. Do not hold the dryer in one place. Stop immediately if paint transfers to the tape, card, or cloth.
Will rubbing alcohol remove double-sided tape residue?
It may loosen some adhesive residue, but the result depends on both the adhesive and the finish. Test it in an inconspicuous area, apply a small amount to a cloth rather than pouring it onto the surface, and wipe gently.
Do not assume it is compatible with paint, plastic, varnished wood, or high-gloss coatings. Follow its ventilation and ignition warnings, then remove the remaining cleaner according to the surface’s care instructions.
Is acetone safe for removing double-sided tape from plastic or paint?
Not as a general method. Acetone can strip or soften paint, dull finishes, and damage plastics. Nail-polish remover may contain acetone or other ingredients that affect the surface.
Do not use it on unknown plastic, painted walls, varnished wood, or an unidentified coating. If milder compatible methods fail, consult the product or surface manufacturer instead of assuming acetone is safe.
How do I remove thick foam mounting tape that keeps tearing?
Support the mounted object, then separate the foam gradually with a rounded plastic card or smooth wooden tool. Work across the bond in small sections instead of pulling the object sharply away.
If the surface has passed a heat test, mild moving warmth may help. Stop if the foam or adhesive begins to smear. Remove as much foam as practical before applying residue cleaner, then treat each exposed adhesive layer according to the material beneath it.
Can removed double-sided tape be reused?
Check the instructions for the exact tape product. The supplied evidence does not support a universal rule for all double-sided tapes.
Do not assume a removed strip retains its original performance if it is stretched, dirty, torn, coated with fibers or oil, or missing part of its adhesive. Where bond failure could damage property or cause injury, use a product whose manufacturer explicitly approves the intended application and reuse condition.