 StainList
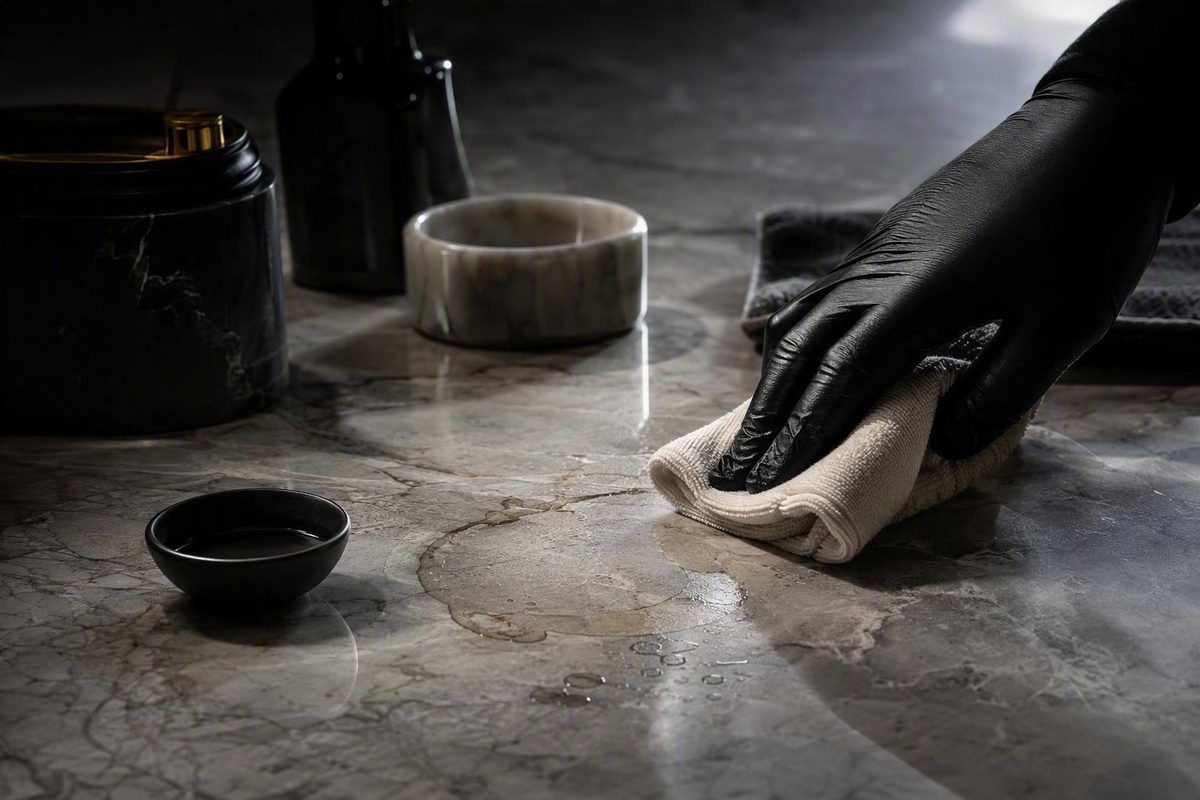
First identify the mark—then treat your marble safely.
Quick answer: start with drying, diagnosis, and gentle cleaning
When you notice a water-related mark on marble, use this sequence:
- Blot up standing water without rubbing.
- Towel-dry the surface.
- If the area looks darker or wet, stop adding cleaner and let it dry fully.
- Reassess the dry marble in strong side lighting.
- If the mark appears superficial and the sheen and texture remain unchanged, wipe gently with a soft microfiber cloth dampened with warm water and a small amount of pH-neutral stone cleaner or mild dish soap.
- Rinse sparingly with a separate, well-wrung cloth.
- Dry completely with a clean, soft towel.
- If the mark remains, determine whether it is mineral buildup, absorbed discoloration, or etching before trying another treatment.
“Water stain” is an imprecise label. A mark associated with a wet glass, faucet, shower, soap dispenser, or spill could be:
- Temporary moisture darkening
- Soap film or cleaner residue
- Hard-water mineral buildup
- Discoloration absorbed into the stone
- Etching that has altered the surface
These conditions do not respond to the same treatment. A dark patch caused by pooled water may fade as the stone dries, while a dull etched ring cannot be washed away because the finish itself has changed. Stone-care guidance similarly distinguishes temporary moisture darkening from dull marks associated with etching or prolonged water exposure (Seacoast Stone’s marble-stain guide).
Do not immediately reach for vinegar, lemon juice, an acidic descaler, bleach, glass cleaner, or abrasive cleaning powder. Marble is calcite-rich and vulnerable to acidic cleaners, while harsh chemicals and abrasives can discolor, scratch, etch, or dull the surface (Superior Selected Stone’s marble-care precautions).
Also avoid steel wool, razor blades, putty knives, and similar scraping tools. Even when such tools can move a deposit, they can scratch or gouge the marble or affect the sealer (J. Francis Company’s marble and granite guidance).
Before doing anything beyond routine gentle cleaning, test the complete method in an inconspicuous location. An area under an appliance, behind a faucet, or beneath an overhang may reveal an unwanted change in color or gloss before the treatment is used on a visible section.
Detailed marble-treatment evidence is limited. Much of the available guidance comes from stone suppliers, restoration businesses, product sellers, and personal accounts rather than independent comparative testing. That makes conservative diagnosis, product-label compliance, and early professional escalation especially important.
Diagnose the mark: moisture, minerals, absorbed stain, or etching?
Before deciding how to remove water stains from marble, inspect the mark using five observations:
- Color: Is it darker or lighter than the surrounding stone?
- Sheen: Is it equally glossy, or does it look cloudy or dull?
- Texture: Does it feel smooth, rough, chalky, raised, or crusty?
- Location: Is it beside a faucet, under a glass, around a soap dispenser, or in a recently washed area?
- Drying behavior: Does it shrink or fade as the marble dries?
Treat these clues as a decision tree, not as conclusive household tests.
| What you observe | Likely condition | Appropriate first response |
|---|---|---|
| Dark, wet-looking patch that changes while drying | Temporary retained moisture | Blot, dry, and wait |
| Superficial film with no change in underlying texture or sheen | Soap or cleaner residue | Gentle pH-neutral cleaning |
| White, dull, raised, or crusty material in a repeatedly wet area | Hard-water mineral buildup | Gentle cleaning, then a compatible marble treatment or professional assessment |
| Discoloration that appears to be within the stone | Absorbed stain | Identify the absorbed substance before considering a poultice |
| Pale, cloudy, dull, rough, or less glossy area | Etching or finish damage | Finish-specific polishing or professional refinishing |
Temporary moisture
Temporary moisture usually appears darker than the surrounding marble and may resemble a wet patch beneath the surface. It commonly develops after water pools, after the stone has been washed heavily, or after a wet poultice has been applied.
Blot and towel-dry the area, then let it dry naturally. Do not keep washing it to see whether it improves.
There is no universal drying deadline. Judge the area only after its appearance has stopped changing.
Surface residue or soap film
A superficial residue generally sits on the surface without changing the marble’s underlying texture or finish. It may look streaky, hazy, or smeared rather than deeply discolored.
Begin with gentle cleaning, not a poultice. A poultice is intended for material absorbed into porous stone and adds unnecessary moisture when the problem is only residue.
Hard-water mineral buildup
Hard water contains dissolved minerals, particularly calcium and magnesium. Repeated wetting and evaporation can leave white, dull, or crusty material around faucets, drains, sink edges, shower fittings, and soap dispensers.
Appearance alone is not decisive, however.
Absorbed discoloration
An absorbed stain is discoloration within the stone rather than material sitting above it. It is often darker than the surrounding marble, but color alone is not proof: retained moisture can also look dark.
Consider what occupied the area. Water may have carried coffee, cosmetics, soap, oil, plant residue, dye, rust, or another substance into the marble. Identifying that substance matters because a poultice’s liquid component must be selected for the material absorbed.
Etching
Etching is an alteration of the marble surface. It often appears pale, cloudy, dull, or chalky and may feel smooth or rough.
Many apparent glass rings are not deposits from plain water. An acidic drink, citrus residue, wine, carbonated beverage, cosmetic, or cleaner associated with the glass or container may have reacted with the marble. Reports on marble restoration distinguish absorbed stains from light or dull etches and caution that many apparent water spots are actually surface damage (Brownstone Cyclone’s stain-versus-etch discussion).
The treatment logic is straightforward:
- Drying addresses retained moisture.
- Gentle cleaning removes surface film.
- A properly selected poultice draws out identified absorbed material.
- Polishing or honing addresses a surface altered by etching.
If the clues conflict, restrict care to blotting, drying, and mild pH-neutral cleaning until the mark can be assessed. Conservative uncertainty is safer than treating a dull etch as dirt and repeatedly scrubbing the finish.
Safest first-line cleaning method for a superficial water mark
For a superficial mark with no evident change in sheen or texture, gather:
- Two or more clean microfiber cloths
- Warm water
- A pH-neutral cleaner labeled for natural stone, or a few drops of mild dish soap
- A separate soft towel
- Optionally, a very soft-bristle brush for textured or difficult-to-reach areas
Then proceed as follows:
- Remove loose grit first. Dust or lift away crumbs without dragging them across the marble. Grit trapped beneath a wet cloth can scratch.
- Prepare a minimal cleaning solution. Dilute a pH-neutral stone cleaner according to its label, or add only a few drops of mild dish soap to warm water.
- Dampen the cloth rather than soaking the marble. Wring it out well.
- Wipe gently. Use light, overlapping passes rather than bearing down on the mark.
- Avoid prolonged flooding. Keep excess water away from seams, cracks, joints, unsealed edges, fixture openings, and countertop cutouts.
- Rinse sparingly. Wipe with a separate cloth dampened with clean water and wrung out thoroughly.
- Dry immediately and completely. Use a clean, soft towel instead of letting droplets evaporate on the surface.
Drying is part of the diagnosis as well as the cleanup. It reduces the chance of creating another watermark and prevents fresh moisture from hiding the condition of the original mark.
A soft-bristle brush may be used with light pressure on a suitable surface, particularly around fixture contours or in textured areas. Avoid stiff brushes, scouring pads, powdered cleaners, and vigorous spot scrubbing. On polished marble, abrasion may leave a patch that reflects light differently.
Once dry, examine the area from several angles in strong side lighting:
- If the mark is gone, stop. A stronger treatment offers no benefit.
- If it remains dark, let it dry fully before classifying it as an absorbed stain.
- If it is clean but dull, move to the etching section. Repeated washing will not restore lost gloss.
- If it is raised or crusty, move to the mineral-deposit section. Do not pry it off.
- If cleaning changes the color, sheen, or texture, stop and arrange an assessment.
Do not use a fixed drying period to decide that a dark mark is permanent. If the area is still changing, it is too early to diagnose the remaining discoloration.
Treat temporary moisture and hard-water mineral buildup differently
A dark wet patch and a white faucet crust may both be called water stains, but their treatment paths are nearly opposite.
For a dark, wet-looking patch
Blot any remaining liquid, towel-dry the surface, and stop adding water or cleaner. Let the marble dry naturally until its appearance stabilizes.
Wet cleaning and poulticing can temporarily make marble look darker. An area that appears worse immediately after treatment is therefore not necessarily permanently stained. Do not judge the result—or repeat the treatment—while the stone still looks wet.
Move glasses, bottles, mats, soap dispensers, and trays so the area remains uncovered while it dries. If the dark patch fades completely, no stain treatment is needed.
If stable discoloration remains after the marble is fully dry, consider whether the water carried another substance into the stone. Only then should the mark be evaluated as a possible absorbed stain.
For white, raised, or crusty deposits
White or off-white crust concentrated around a faucet or another repeatedly wet area is consistent with hard-water mineral buildup, although appearance alone cannot confirm the diagnosis.
Start conservatively:
- Remove loose dust.
- Apply a pH-neutral natural-stone cleaner with a soft cloth.
- If the surface and finish tolerate it, work gently with a very soft-bristle brush.
- Keep pressure light.
- Rinse with a well-wrung cloth.
- Dry thoroughly.
- Reassess before repeating.
Persistent mineral crust presents a difficult DIY tradeoff. Some commercial and contractor guidance suggests baking-soda paste or careful scraping, but the same material also acknowledges risks from scraping tools, and other marble-care guidance warns against abrasive treatment. The available evidence does not establish one independently validated household method that is universally safe for every marble type, finish, sealer, and deposit.
Do not improvise with vinegar, lemon juice, conventional acidic limescale remover, a blade, a putty knife, steel wool, or forceful baking-soda scrubbing. These methods may remove some deposit while also changing the underlying finish.
If gentle cleaning leaves persistent crust, choose only a product explicitly labeled for use on calcite-based marble and compatible with the specific finish. Follow its label exactly and test it out of sight first.
Consult a stone-care professional when deposits are extensive, the marble is becoming dull, the buildup crosses a seam or fixture edge, or removal would require substantial pressure. The purpose of escalation is to avoid converting a surface-deposit problem into permanent finish damage.
Use a poultice only for a confirmed absorbed stain
A poultice combines a stain-specific liquid with a white absorbent material to form a thick paste. As the mixture dries, it draws dissolved or suspended staining material from the stone into the absorbent layer.
Its limits are essential:
- A poultice does not repair a pale etch.
- It does not restore lost gloss.
- It does not re-level a rough surface.
- It is not the first treatment for raised mineral crust.
- It is not a universal remedy for every dark patch.
Before choosing the liquid component, reasonably identify what was absorbed. Water itself may evaporate, while oil, coffee, cosmetics, dye, rust, or organic matter may require different chemistry. If the source is unknown, do not improvise with a strong household chemical.
White absorbent materials used in general stone-poultice guidance include:
- Commercial poultice powder
- Whiting
- Diatomaceous earth
- Talc
- Kaolin
- White paper towels
- White cotton
General poultice framework
Specific commercial directions take precedence, but a general application framework is:
- Spot-test first. Test both the selected liquid and the complete poultice in an inconspicuous location.
- Pre-clean gently. Remove surface soil using the first-line method.
- Prepare a thick, non-running paste. It should hold its shape rather than flow across the marble.
- Apply a layer about 1/4 inch thick.
- Extend it roughly 1/2 to 1 inch beyond the visible discoloration.
- Cover it initially with plastic as the applicable directions specify.
- Allow approximately 24–48 hours for it to work and dry.
- Remove the dry material gently with a wood or plastic spatula, not metal.
- Rinse sparingly and buff dry with a soft cloth.
- Wait for residual moisture darkening to disappear before evaluating the result.
Those dimensions and drying periods are consistent with general stone-poultice instructions, although the correct liquid still depends on the stain source (M3 Technologies’ stone-poultice procedure).
Commercial formulations differ. Some require plastic to remain in place for a specified interval and then be removed so the paste can finish drying; others arrive premixed. Do not substitute a generic schedule for the manufacturer’s directions.
The Natural Stone Institute’s instructional video describes a white absorbent paste, a roughly 1/4- to 1/2-inch layer, plastic covering, and a 24- to 48-hour working period. It also advises contacting a stone supplier, installer, contractor, or restoration specialist when stain selection or treatment is uncertain (Natural Stone Institute poultice video).
Difficult stains may require repeated applications, but complete removal is not guaranteed. Do not repeat automatically while the marble remains dark from the previous wet treatment. Let it dry, compare the result, and stop if the color, sheen, or texture deteriorates.
Poulticing may affect the sealer in the treated area. Once the marble is completely dry, ask the sealer manufacturer, installer, or stone professional whether the area needs further evaluation.
A caution about hydrogen peroxide
Hydrogen peroxide appears in some stain-specific stone-poultice guidance, but it is not a general treatment for a water ring. Guidance conflicts over its use, and peroxide may lighten or discolor darker marble (Seacoast Stone’s peroxide caution).
If an identified stain and a stone-specific procedure call for peroxide, follow the stated formulation, handling precautions, ventilation instructions, and spot-testing requirements. Do not saturate an unidentified dark patch, cloudy ring, or mineral crust simply because peroxide is available at home.
Likewise, an anecdotal homemade baking-soda poultice should not be treated as proof that baking soda removes hard-water deposits. One published DIY account involved a persistent dirt stain on honed interior marble rather than a controlled test of mineral crust (The Grit and Polish’s homemade-poultice account).
If the ring is dull, treat it as possible etching—not dirt
If a clean mark is pale, cloudy, chalky, rough, smooth but dull, or noticeably less glossy than the surrounding marble, treat it as possible etching.
Etching is chemical alteration of the marble surface. There is no layer of dirt waiting to be dissolved or drawn out. Ordinary cleaning cannot repair it, and a poultice cannot restore the missing sheen.
Possibilities include an acidic beverage, citrus residue, wine, carbonated liquid, cosmetic product, or acidic cleaner. The base of the glass or bottle defines the ring, making the damage resemble a conventional watermark.
Limited DIY option for faint etching on polished marble
A marble-specific polishing powder intended for light etch removal on polished marble may sometimes diminish a faint, smooth mark. Before trying one:
- Confirm that the surface is genuine marble rather than engineered stone or another material.
- Confirm that the product is intended for the particular marble and its polished finish.
- Read the complete label and technical directions.
- Test in an inconspicuous location.
- Treat only a small area initially.
- Stop if the color, texture, or sheen changes unexpectedly.
This is restoration, not cleaning. Some products marketed as marble “polish” contain waxes or oils that temporarily conceal a mark rather than correcting the altered surface (MarbleBLU’s water-ring guide).
Do not use polishing powder as a general treatment for honed marble. Honed finishes are intentionally matte or satin-like, and isolated polishing may create a shiny patch that is harder to blend than the original etch.
When professional refinishing is the safer choice
Arrange professional assessment for:
- Honed marble
- Deep or rough etching
- Widespread dullness
- Scratches combined with etching
- An uncertain finish
- Highly visible areas where sheen must remain uniform
- Valuable tables, slabs, tiles, or installations
- Damage crossing seams, edges, inlays, or repaired sections
- A DIY test that creates uneven gloss
A stone refinisher may use progressively graded abrasives to hone or re-level the affected surface and then restore a finish intended to match the surrounding marble.
Stop DIY polishing immediately if it enlarges the dull area, changes the color, makes the texture rougher, creates a shinier halo, or increases the contrast with the surrounding finish.
Methods to avoid and signs that it is time to stop
Popular household remedies can make a small marble mark larger or more permanent.
Do not use these as standard marble water-stain remedies
- Vinegar: Its acidity can etch marble.
- Lemon juice: It is also acidic and unsuitable as a marble cleaner.
- Acidic descalers: They may attack the stone along with the mineral deposit.
- Abrasive cleaning powders: They can change the sheen and leave fine scratches.
- Harsh scrubbers: Scouring pads and stiff brushes may dull polished surfaces.
- Bleach: It is not a routine water-mark treatment and may affect the stone, finish, surrounding materials, or sealer.
- General-purpose glass cleaner: Its formulation may not be compatible with marble.
- Steel wool: It may scratch or alter the finish.
- Razor blades and putty knives: They can scratch, gouge, catch an edge, or affect sealer.
- Aggressive baking-soda scrubbing: The powder may behave abrasively when rubbed against polished marble.
Commercial marble-care guidance consistently warns against acidic cleaners, harsh chemicals, and abrasive tools because absorbed stains and etched surfaces require different treatment paths (Superior Selected Stone’s cleaner and tool guidance).
The risk is not merely that a remedy will fail. Acid may remove some mineral material while dulling the marble beneath it, and an abrasive or blade may move crust while leaving scratches or gloss variation. Contractor guidance that suggests scraping also acknowledges the possibility of gouging, scratching, or affecting sealer, which is why such tools should not be treated as standard DIY recommendations (J. Francis Company’s hard-water guidance).
Treat ammonia as disputed, not routine
One commercial marble supplier suggests a few drops of ammonia with 00-grade steel wool for persistent water marks. The method does not provide a supported concentration, quantity, dwell time, or finish-specific procedure, while other marble-care guidance warns against ammonia-based cleaners and abrasive tools (Modul Marble’s stain-removal guide).
Those gaps matter. Ammonia and steel wool should therefore not be presented as a preferred household treatment.
Treat hydrogen peroxide as stain-specific
Hydrogen peroxide occupies a narrower middle ground. It appears in some poultice instructions for identified absorbed stains, but other guidance recommends avoiding it, and darker marble may be lightened or discolored.
The practical conclusion is not that peroxide always works or must never be used. It belongs only in a compatible, stain-specific procedure—not as a universal response to dark patches, cloudy rings, or mineral deposits.
Stop immediately if you see:
- New discoloration
- Darkening that continues to spread after the area has dried
- Fine scratches or swirl marks
- Reduced gloss
- Increasing roughness
- A growing dull patch
- A shiny halo around the treated area
- Crust that moves only under substantial force
- Damage developing at a seam, edge, repair, or inlay
Seek professional assessment when the diagnosis remains uncertain, the affected area is extensive, the marble is honed or valuable, the damage is deep or rough, or conservative attempts have not improved the mark.
Professional help is not a promise that every stain or etch will disappear.
Prevent future water rings, moisture marks, and mineral deposits
Prevention should focus on reducing exposure rather than repeatedly sealing or polishing the marble.
Control standing water
Blot spills and pooled water promptly. Do not leave wet glasses, bottles, soap dispensers, toothbrush cups, plant pots, cosmetics, or toiletries directly on marble.
Use:
- Coasters under drinks
- Trays beneath soaps and toiletries
- Mats where splashing is frequent
- Liftable faucet-area accessories
- Protective feet beneath decorative objects
Lift and clean beneath these items regularly. A tray that continually traps water can recreate the problem it was intended to prevent.
Dry frequently wet areas
Dry marble around faucets, sinks, shower controls, soap dispensers, and drains after use. Pay particular attention to seams and fixture bases where moisture and residue collect.
For routine care, use a pH-neutral natural-stone cleaner or a few drops of mild dish soap in warm water. Follow with a light rinse and complete drying rather than allowing cleaner or tap water to evaporate on the surface.
Where mineral deposits recur, reducing mineral exposure may help. Distilled water can be practical for small repeated tasks, such as filling a countertop appliance or wiping a limited area. An appropriate water-softening strategy may reduce the incoming mineral load more broadly. Neither approach removes deposits that already exist.
Understand what sealer can and cannot do
A compatible penetrating sealer may slow absorption and reduce staining risk. Contractor guidance likewise notes that sealants can help reduce staining without providing complete protection.
After poulticing or another wet stain treatment, allow the marble to dry fully before assessing the treated area. Ask the sealer manufacturer, installer, or stone professional whether evaluation or renewal is appropriate; do not automatically reseal immediately after treatment.
For broader surface-specific stain-removal information, Stain List is a practical reference covering common fabrics and hard surfaces. Marble still requires its own diagnosis because a technique suitable for another material may damage calcite-based stone.
Frequently asked questions
How long should a dark water spot on marble take to dry?
There is no reliable universal drying time. Marble type, slab or tile thickness, finish, sealer condition, ventilation, temperature, the amount of water, and the route by which moisture entered can all affect drying.
Blot and towel-dry the area, remove objects covering it, and allow it to dry naturally until its appearance stops changing. Wet cleaning or poulticing may itself cause temporary darkening, so do not judge the result immediately after treatment.
If the patch continues to fade, keep waiting instead of adding more cleaner. If stable discoloration remains after the area is fully dry, investigate whether water carried another substance into the marble. Persistent moisture near a seam or an uncertain source warrants professional assessment.
Can I use baking soda to remove water stains from marble?
Baking soda is not universally safe or effective for marble water marks. It appears in some DIY poultices and mineral-deposit methods, but those uses are not interchangeable.
A baking-soda poultice has been reported for an absorbed dirt stain on honed marble. That does not prove that baking-soda paste removes hard-water crust or safely treats polished marble. When scrubbed, the powder may behave as an abrasive and alter the sheen.
Do not apply it automatically to a dull ring because an etch cannot be scrubbed or poulticed away. If a stone professional or product manufacturer specifies baking soda for an identified stain, test the complete method and avoid aggressive rubbing.
Is hydrogen peroxide safe for marble water stains?
Not as a general-purpose treatment. Hydrogen peroxide appears in some stain-specific poultice guidance, but suitability depends on the substance absorbed, the marble’s color, the finish, and the formulation. It may lighten or discolor darker marble.
Do not pour peroxide onto an unidentified dark patch, cloudy ring, or mineral crust. First let the moisture dry and determine whether the problem is absorption, residue, minerals, or etching. If a compatible stone-care procedure specifically calls for peroxide for an identified absorbed stain, follow its application and safety instructions and spot-test first.
Will vinegar remove hard-water deposits from marble?
Vinegar may dissolve some mineral material, but it should not be used on marble. Its acidity can etch the stone beneath the deposit, so removing part of the crust may reveal or create a larger dull patch.
Begin with pH-neutral cleaning and light work with a soft cloth or suitable soft brush. For persistent deposits, use only a product explicitly labeled as compatible with calcite-based marble and the relevant finish, or consult a stone professional.
Does sealing marble prevent water rings and etching?
No. A compatible sealer may slow absorption and reduce the chance that liquids will penetrate and discolor the stone. It does not make marble waterproof or stain-proof.
Sealer also does not prevent acid etching because etching occurs at the exposed surface. Coasters, prompt blotting, pH-neutral cleaning, and thorough drying remain necessary even on sealed marble. After poulticing, wait until the area is completely dry before determining whether the sealer needs evaluation or renewal.
The safest approach is condition-specific
Safe marble care depends on distinguishing four different problems:
- Let dark retained moisture dry.
- Clean superficial residue gently.
- Reserve a properly selected poultice for an identified absorbed stain.
- Treat dull or rough etching as a finish-restoration problem.
Stop whenever the sheen, color, or texture begins to change.