 StainList
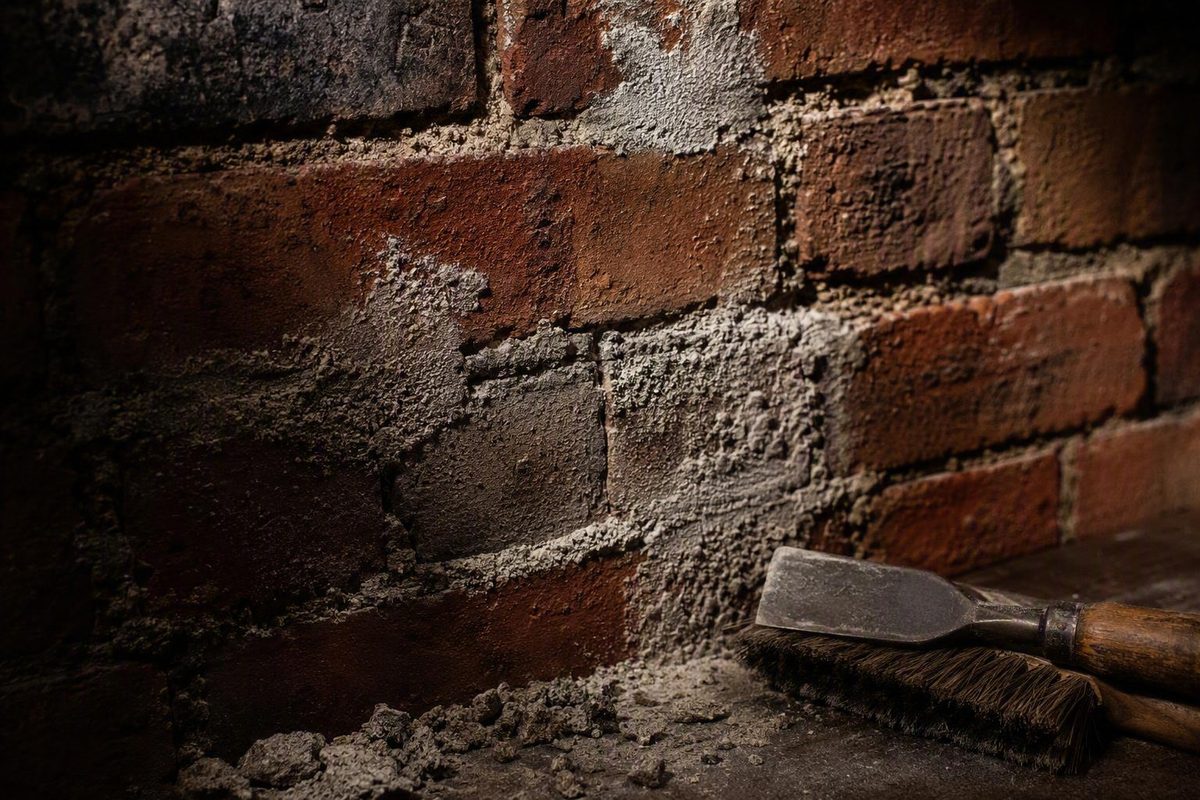
Learning how to remove mortar from brick starts with diagnosis, not acid. A fresh smear, thin haze, cured projection, thick deposit on a loose reclaimed brick, and mortar inside a joint are different problems. Treating them alike can turn cosmetic residue into scratched, bleached, or eroded masonry.
Use the least aggressive compatible method first. Test it in a concealed area, let the brick dry completely, and inspect the result before escalating. Soft, historic, coated, damaged, or unidentified masonry requires an especially conservative approach.
Identify What Is on the Brick Before Trying to Remove It
Start with four observations:
- Is the deposit a thin film or a raised mass? A film may respond to dry wiping or gentle washing. A lump usually needs careful mechanical reduction first.
- Is it fresh or cured? Fresh mortar may brush away after it firms. Fully cured material is more strongly bonded.
- Is the brick installed or loose? An installed wall includes vulnerable joints and adjacent finishes. A loose salvage brick can be supported and worked separately, although it may break.
- Is it ordinary unsealed clay brick or a sensitive surface? Soft historic brick, glazed or painted brick, sealed units, and stone-faced products cannot be assumed to tolerate the same treatment.
A fresh smear is recently placed mortar on the brick face. Do not wipe it reflexively while it is wet because that can spread cement-rich slurry into the brick. Instead, let it become firm enough that brushing will not smear the face or deform the intended joint. The exact timing changes with mortar composition, weather, humidity, and the work itself.
Mortar haze is a thin white or cloudy film left on the face, often after an overly wet sponge carries mortar slurry across porous brick. It has little or no noticeable thickness.
A cured projection or lump stands proud of the brick. Cleaner alone is a poor first response to a thick mass. If a test shows that the brick permits it, carefully reduce the projection with a low-angle wooden or plastic scraper, then address any residual film.
White residue is not automatically mortar haze. Efflorescence, lime run, hard-water residue, rust, and other mineral deposits can look similar but may require different treatment. Do not keep applying acid merely because the deposit is white.
This guide concerns residue on brick faces. Mortar inside a bed or head joint is part of the masonry assembly.
Before proceeding, identify sensitive masonry:
- Soft, weathered, highly porous, or historic brick
- Flaking, chipped, cracked, or spalled brick
- Painted, glazed, sealed, or polished units
- Thin brick or stone-faced products
- Brick with damaged or unstable mortar joints
- Valuable masonry or material of unknown composition
These conditions increase the chance that cleaning will remove color, texture, coatings, or the brick’s fired face.
| Condition | First suitable approach | Escalation or limit |
|---|---|---|
| Fresh smear | Let it firm, then use a soft dry brush | Use a damp sponge only if necessary; avoid smearing joints |
| Light haze | Dry cloth or soft brush, then clean water and nylon brushing | Test a compatible mild or labeled masonry cleaner |
| Cured face residue | Low-angle wooden or plastic scraping | Use a compatible labeled masonry cleaner if film remains |
| Thick mortar on loose salvage brick | Supported, controlled mechanical reduction | Expect breakage; consider commercial salvage processing |
| Mortar inside joints | Assess as repointing or masonry repair | Outside the scope of surface cleaning |
Inspect, Protect, and Test Before Cleaning
Examine the brick in dry, even light. Look for cracks, flaking, powdering, spalling, loose joint mortar, previous coatings, and areas where the surface is already missing.
Find the current instructions for the brick, mortar, and proposed cleaner. Manufacturer restrictions take priority over generic online recipes. Confirm:
- Approved masonry types and prohibited surfaces
- Dilution and application method
- Dwell time and suitable temperature range
- Required personal protective equipment
- Pre-wetting and rinsing instructions
- Protection and runoff-control requirements
Make a test patch containing the same brick type, residue, joints, orientation, and exposure as the visible work. Manufacturer-hosted guidance for new masonry describes a test area of approximately four square feet, although a smaller concealed patch is usually more practical for a household spot repair. The same guidance warns that cleaning chemicals must not be altered or mixed with bleach or other chemicals because doing so may release hazardous gases. Review the SPEC MIX testing and chemical-safety guidance.
Treat the patch exactly as you intend to treat the wall, including dilution, dwell time, agitation, and rinsing. Then let it dry fully. Wet brick can conceal bleaching, darkening, streaking, etching, metallic staining, and texture changes. Depending on the location, weather, and absorption, a treated wall may take longer than a day to dry. Solutions Built discusses drying time and pre-wetting in its mortar-cleaning procedure.
Protect windows, doors, frames, metal fixtures, painted surfaces, paving, soil, and plants. Control rinse water according to the product label instead of allowing it to travel across unprotected surfaces.
For chemical treatment, use the protective equipment required by the current label. Depending on the product, that may include suitable gloves, eye protection, protective clothing, and ventilation. Keep clean rinse water immediately accessible, and do not begin if splashes or runoff cannot be controlled. Commercial brick-cleaning guidance likewise advises reviewing the label and protecting people and nearby landscaping before using a cleaner. See the general safety precautions in this brick-cleaning guide.
Stop the test or full treatment if you see:
- Lightening, darkening, or color transfer
- Etching, streaks, scratches, or exposed aggregate
- Brick-colored powder on the brush or cloth
- Flaking, spalling, or loss of the fired face
- Rapid or uneven cleaner absorption
- Erosion or discoloration of adjacent joints
- Metallic staining
- Any other permanent texture change
A residue that remains is often preferable to irreversible surface loss.
Remove Fresh Smears With Timing and Gentle Hand Tools
Fresh mortar is easier to remove than fully cured mortar, but cleaning it too soon creates a different problem. A wet sponge can spread cement-rich slurry over the brick and into its pores, enlarging a small smear into a cloudy halo.
Wait until the mortar is firm enough that a brush does not drag it across the face or deform the finished joint. There is no universal safe interval. Mortar type, mix consistency, temperature, humidity, wind, brick absorption, and joint depth all affect timing.
Use this sequence:
- Start dry. Brush lightly with a soft-fiber or nylon brush. Direct loose crumbs away from the joints rather than into them.
- Inspect the surface. Look for scratching, powder, color transfer, or distortion of the joint.
- Use minimal water if needed. Follow with a clean, water-dampened sponge. Do not flood the wall or wipe repeatedly across joint edges.
- Lift small raised deposits cautiously. Hold a wooden stick or plastic scraper at a low angle and work away from the joint. Do not drive the edge into the brick.
- Inspect after every pass. More force is not the automatic next step.
A smooth or soft brick may mark even under a plastic scraper. If the face begins to scratch, flake, powder, or change color, stop. Do not sacrifice the brick’s surface to remove the last shadow of mortar.
Metal putty knives, chisels, and wire brushes are not the default tools for installed brick. Metal edges can gouge softer units or slip into joints, while wire brushes may scratch smooth or soft brick. Begin with nonmetallic tools unless the brick manufacturer or a qualified masonry professional recommends otherwise.
Prompt but controlled cleanup reduces the need for stronger chemicals once the mortar has hardened. That does not mean there is one guaranteed cleaning window: the correct moment is when the residue releases without smearing and the intended joint remains intact.
Treat Thin Mortar Haze From Mildest to Strongest
Thin haze calls for a staged approach. Complete one stage, let the test area dry, and inspect it before moving to the next.
Start with dry removal
Use dry cheesecloth, a soft towel, or a soft brush to lift loose haze. Refold or replace the cloth as it loads with powder so that you do not redistribute the residue. This is especially useful indoors, where minimizing water helps prevent drips and deep wetting.
Do not bear down hard. If dry wiping creates powder from the brick rather than removing residue, stop.
Move to water and gentle agitation
If dry treatment is insufficient, use clean water and a soft nylon or densely packed fiber brush. Dampen the test area rather than saturating the wall, agitate gently, and rinse away loosened residue with controlled amounts of water.
Avoid prolonged scrubbing in one spot.
After rinsing, let the test area dry completely and compare its color, sheen, and texture with untreated brick. Do not judge compatibility while the brick is darkened by water.
Consider vinegar only for compatible light haze
Diluted white vinegar is a limited option for light haze on successfully tested, standard unsealed clay brick. One thin-brick supplier publishes a household method using one part vinegar to four parts warm water, a five-minute dwell, gentle nylon brushing, rinsing, and drying. This is one supplier’s method—not a universal formula or a solution for thick mortar. See the supplier’s vinegar method and surface exclusions.
Do not use vinegar on limestone, marble, travertine, sealed or polished brick, stone-faced material, or another acid-sensitive surface unless the applicable manufacturer explicitly approves it. Painted, glazed, and decorative surfaces also require product-specific confirmation.
Keep the tested solution off sound mortar joints as much as practical. Work on cool masonry out of direct sun, never let the solution dry on the surface, and rinse thoroughly. Allow the patch to dry before treating a wider area.
Vinegar is not dependable for thick or deeply bonded mortar. Repeatedly extending the dwell time or strengthening the mixture converts a mild trial into uncontrolled acid treatment.
Baking soda paste is sometimes suggested for indoor or sensitive surfaces, but the supplied evidence does not establish it as an effective treatment for cured mortar. Do not present it as a proven solution for hardened deposits.
If the white mark persists, reconsider the diagnosis. Repeated acid treatment without identifying the residue can enlarge discoloration or damage the face while leaving the underlying cause untouched.
Escalate Cured Residue to a Compatible Masonry Cleaner Carefully
For cured face residue, first reduce any raised material mechanically, provided your test shows that the brick tolerates it. Use a wooden or plastic edge at a low angle, take thin increments, and keep the tool away from joint edges. The objective is to remove the projection without planing the brick face.
If a bonded film remains, select a purpose-made mortar remover or masonry cleaner whose current label explicitly covers the brick, mortar, coating status, and residue involved. A formulated cleaner is not interchangeable with raw muriatic acid, and “commercial” does not mean harmless or universally compatible.
Follow this general sequence only where it agrees with the cleaner and masonry manufacturers:
- Protect the work area. Cover vulnerable glass, frames, metals, finishes, paving, plants, and soil. Arrange runoff control.
- Pre-wet the masonry thoroughly. Even dampness limits immediate absorption and helps distribute cleaner more consistently. It does not make an incompatible cleaner safe.
- Apply according to the current label. Use the specified tool, dilution, temperature range, and protective equipment.
- Work in small sections. Keep the active area manageable so the product cannot dry.
- Observe the labeled dwell time. Do not strengthen the cleaner or extend contact because progress seems slow.
- Agitate gently. Use a soft, nonmetallic masonry brush and concentrate on the brick face.
- Rinse thoroughly before drying. Control the rinse water and prevent it from crossing unprotected materials.
Commercial procedures support pre-wetting, applying cleaner while the brick remains damp, gentle fiber-brush agitation, and thorough rinsing, but product-specific instructions must control the details. See an example of this general cleaning sequence.
Published recommendations differ on concentration, dwell time, application direction, temperature, and rinse technique. That variation is precisely why one universal recipe is inappropriate.
Keep acidic cleaner focused on the residue and minimize its contact with sound mortar joints. Acids dissolve cementitious material, so careless application can weaken, discolor, recess, or roughen the joints you are trying to preserve.
Do not work on hot masonry, in direct sun, during freezing or near-freezing conditions, or where ventilation, rinsing, and runoff control are inadequate. If you cannot contain splashes and wastewater, the job is not ready for chemical cleaning.
Why raw muriatic acid is not the default DIY method
Muriatic acid is hydrochloric acid. Older advice describes diluted applications for hardened mortar, but even that procedure acknowledges that the acid attacks mortar joints and can attack brick. It can also cause burns and creates handling and rinsing hazards. Fine Homebuilding’s older procedure describes both its use and its risks.
Raw acid may etch, bleach, streak, burn, or create metallic stains on masonry. It can also attack metals and damage nearby finishes or plants. Increasing concentration, extending dwell time, or repeating applications magnifies those risks.
Repeated chemical treatments are not harmless. Stop if the residue remains but the brick lightens, darkens, roughens, powders, flakes, absorbs unevenly, or loses surface material—or if the joints begin to change.
Indoor brick requires extra restraint. Favor dry methods, minimal water, and low abrasion. If fumes, splashes, rinsing, and wastewater cannot be safely managed without affecting occupants or finishes, use a qualified masonry-cleaning professional.
Handle Thick Mortar on Loose Reclaimed Bricks Separately
Removing thick old mortar from individual reclaimed bricks is a salvage operation, not a wall-cleaning procedure. The brick can be positioned and supported independently, but the deposit may be strongly bonded and the unit may already be weakened.
First assess the relative hardness of the brick and mortar. Some old mortar releases readily; in other cases, it is bonded strongly enough that the brick chips before the deposit separates.
Support each brick on a stable, non-damaging surface. Start with hand tools and remove mortar in controlled increments, working from thick projections toward thinner remnants. Avoid levering against a face or edge. Preserve the bed, face, and arrises rather than trying to make every unit look new.
Community contributors report using chipping hammers, angle grinders, or tapping tools to process salvage brick, but those reports are anecdotal rather than comparative safety evidence. The same discussion notes that results depend on the relative hardness of the mortar and brick and that some units will break. Review the community experiences with reclaimed-brick cleaning.
Do not rely on promised production rates. Cleaning time varies with deposit thickness, bond, access, brick condition, tool choice, and the standard required for reuse.
Expect some loss. Reject a unit if it:
- Cracks through the body
- Splits or delaminates
- Loses substantial face material
- Develops deep gouges
- Sheds large areas of its fired skin
- No longer appears sound enough for its intended use
Wire attachments can also scratch brick and may leave fragments that later rust and stain the masonry. Follow the tool and abrasive manufacturers’ instructions rather than improvising, or refer the work to a professional. This masonry-cleaning guidance summarizes the risks of powered removal and wire fragments.
Professional or commercial salvage processing is the better choice when there are many bricks, the units are historic or valuable, the mortar is strongly bonded, or consistent reusable results matter.
Avoid High-Risk Shortcuts and Know When to Stop
Several shortcuts promise speed but remove more than mortar.
Abrasive blasting can etch brick faces and mortar joints. Once the fired surface has been stripped or roughened, cleaning cannot restore it. Manufacturer-hosted guidance for new masonry recommends a compatible proprietary cleaner instead of raw muriatic acid or sandblasting because incorrect cleaning can cause irreversible appearance damage. See the SPEC MIX warning about muriatic acid and sandblasting.
Wire brushes are a poor general choice. They may scratch smooth or soft brick, and vigorous brushing can abrade older masonry. Use a soft nylon or densely packed fiber brush as the general default.
Pressure washing is not the normal first step. Excessive pressure, a narrow nozzle, close distance, poor angle, or weak joints can erode mortar or remove the brick face.
Published pressure recommendations conflict. One commercial cleaning guide says many brick manufacturers recommend staying below 800 PSI for routine cleaning, but it explicitly presents that figure as general guidance rather than a universal limit. Review the guide’s pressure-washing caveats.
Another commercial service guide gives a higher general range of 1,000–1,500 PSI along with nozzle and distance suggestions, while also warning that older, softer, historic, or damaged brick may not tolerate those settings. The discrepancy demonstrates why no fixed PSI can be assumed safe for every wall. Compare the higher commercial pressure range and its limitations.
Brick hardness, fired-face condition, mortar strength, nozzle pattern, distance, angle, flow rate, and operator movement all matter. Follow the brick manufacturer’s guidance and use the lowest effective pressure only after a successful dried test. Fragile or historic masonry may not be suitable for pressure washing at all.
Avoid:
- Improvised acid recipes
- Stronger-than-label concentrations
- Extended dwell times
- Letting cleaner dry on masonry
- Mixing cleaner with bleach or another product
- Repeated scrubbing of one visible patch
- Grinding installed brick faces
- Forceful chiseling near joints
Damage can accumulate gradually. Several seemingly mild passes may produce an over-cleaned patch that becomes obvious only after the wall dries. Stop chasing perfect uniformity if the masonry has begun to change.
Immediate stop-work checklist
Stop immediately if you notice:
- New light or dark patches
- A roughened, polished, or etched texture
- Exposed aggregate
- Flaking or missing face material
- Brick-colored powder on the brush
- Crumbling or recessed joints
- Persistent metallic discoloration
- Unexpected fumes or heat
- Runoff escaping the containment area
Hire a masonry-cleaning or restoration professional for historic, soft, weathered, damaged, highly porous, painted, glazed, sealed, polished, valuable, or unidentified brick. Professional assessment is also warranted for unstable joints, widespread hardened deposits, strongly bonded salvage mortar, work at height, or a residue you cannot identify confidently.
Prevent Mortar Haze During Bricklaying and Repointing
Prevention depends on controlled placement, moisture, and timing.
Use a suitably firm, workable mortar rather than an overly wet mix that readily spreads across porous brick. Mortar must still meet the project specification; do not casually alter the designed mix. The goal is controlled workability, not an improvised dry formulation.
Do not use a wet sponge as the primary tooling method. It can create a cement- and lime-rich slurry and carry it beyond the joint. Community discussion of haze after tuckpointing describes this failure mode and instead emphasizes firmer mortar, deliberate placement, and tooling after the mortar firms. See the repointing discussion about wet-sponged mortar haze.
Use a pointing trowel to place mortar deliberately, especially around chipped or irregular brick. Slightly overfilling and then tooling at the correct stage is generally more controlled than broad wiping across the face.
Let the mortar firm enough that tooling shapes the joint cleanly without drawing wet material onto surrounding brick. Remove accidental residue while it is still manageable, but not so early that the brush or sponge smears the joint.
For new construction, published cleaning windows vary with mortar strength, brick absorption, cleaner, temperature, and curing conditions. Do not adopt one cure period as universal. Follow current instructions from the mortar, brick, and cleaner manufacturers and verify the complete process on a representative test panel.
The practical rule is simple: careful placement and properly timed tooling reduce the need for acid, high pressure, and aggressive mechanical removal later.
Frequently Asked Questions
Will vinegar remove mortar from brick?
Vinegar may reduce light mortar haze on some standard, unsealed clay brick after a successful test. Use only a surface-compatible method such as the supplier procedure described above, and rinse and dry the test area before judging the result.
Vinegar is not a dependable treatment for thick or deeply cured mortar. Do not use it on limestone, marble, travertine, sealed or polished brick, stone-faced products, or other acid-sensitive materials unless their manufacturer approves it. Stop if the dried test patch changes color or texture.
Can I use muriatic acid to remove hardened mortar?
Muriatic acid dissolves cementitious mortar, but it is not the preferred DIY starting point. It can injure the user, attack mortar joints and metals, damage plants and finishes, and etch, bleach, streak, or stain brick.
Use a purpose-made masonry cleaner explicitly compatible with the materials and follow its current label. If raw acid appears necessary—or if the brick is soft, historic, coated, damaged, or indoors—refer the job to a masonry-cleaning professional rather than improvising a dilution or dwell time.
Can I pressure-wash mortar off brick?
Do not use pressure washing as the first response to mortar. It may loosen some surface residue, but it can also erode joints or strip the brick face.
There is no universal safe PSI. Suitability depends on the brick and joint condition, nozzle, distance, angle, water flow, and operator technique. Follow the brick manufacturer’s limits, begin with the lowest effective pressure only after a dried test, and avoid pressure washing fragile, weathered, or historic masonry.
How can I tell mortar haze from another white deposit?
Mortar haze is usually a thin, cloudy film associated with recent laying or repointing, especially where wet wiping spread slurry over the face. A raised or gritty projection is more likely cured mortar residue.
If the history, texture, or recurrence does not fit mortar haze, pause and identify the deposit rather than repeatedly applying acid.
When should I hire a masonry-cleaning professional?
Hire a qualified masonry-cleaning or restoration professional when the brick is historic, soft, weathered, damaged, highly porous, painted, glazed, sealed, polished, valuable, or unidentified. Do the same for unstable joints, widespread hardened residue, strongly bonded deposits, indoor chemical work without adequate containment, and work at height.
Professional help is also appropriate whenever a test patch bleaches, etches, powders, flakes, exposes aggregate, loses its fired face, or damages adjacent joints.
The safest escalation rule is straightforward: identify the deposit and brick, protect the area, test the method, let the patch dry, and begin with brushing or cautious nonmetallic scraping. Use a compatible labeled masonry cleaner only if gentler methods fail. Raw acid, aggressive pressure, and powered abrasion can turn removable residue into permanent masonry damage; historic, fragile, extensive, elevated, or uncertain work belongs with a masonry-restoration professional.