 StainList
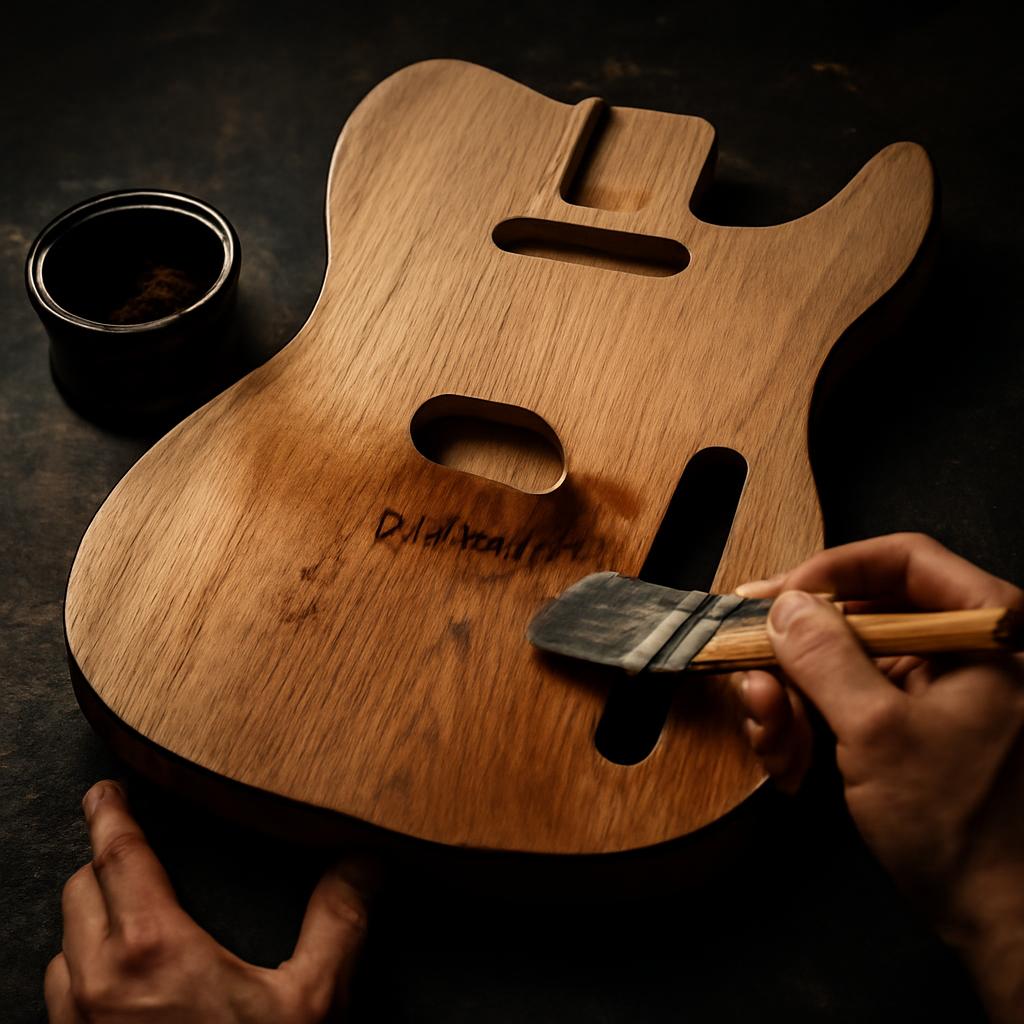
If you’re figuring out how to stain alder for guitar body work at home, the hard part usually is not getting color onto the wood. It’s getting color onto the wood evenly.
Across the alder-specific evidence here, the recurring problems are blotchiness, color shift, and uncertainty about what to put over the dye afterward. The recurring solutions are much more conservative than a lot of generic “guitar finishing” advice: stop sanding around 220 to 320 grit, raise the grain with water, test on scrap first, and treat forum wisdom as builder experience, not a universal law of finishing (Unofficial Warmoth Forum, Dakota Hardwoods, TDPRI).
Just as important, you do not need a spray booth to get a good result. In alder build threads, builders report successful wipe-on color using products like Keda, ColorTone, and other aniline dyes, applied with rags directly to bare wood, then protected with wipe-on polyurethane or Tru-Oil after the color dried. One alder build report topcoated after 24 hours; a more general guitar staining guide suggests waiting 2 days before further finishing, which is a good reminder that dry times depend on both the product and the schedule you choose (Reddit r/Luthier, The Guitar Fabrik).
Because much of the alder-specific evidence comes from forum threads and builder reports rather than technical data sheets, the safest way to use this guide is as a low-risk workflow:
- prep the wood conservatively,
- test the exact dye and topcoat stack on scrap,
- use conditioner only if the tests show you need it,
- build color in thin coats,
- topcoat only after the dye is fully dry and your test piece behaves.
That approach won’t make every piece of alder behave the same.
Related: How to Clean Artificial Grass: Complete Step-by-Step Guide.
Why Alder is Tricky to Stain on Guitar Bodies
Alder is tricky because two apparently conflicting descriptions of it are both useful in practice.
On the one hand, alder is usually treated by guitar builders as a fine-grained, not-open-pored wood that does not normally need grain filler for a smooth gloss finish (Unofficial Warmoth Forum, TDPRI). On the other hand, Dakota Hardwoods describes alder as a wood that can stain unevenly and benefits from conditioner because it is prone to blotching (Dakota Hardwoods).
Those ideas are not really contradictory. In guitar-finishing terms, alder is usually smooth enough that you don’t need to fill big pores the way you would on ash or oak. But it can still absorb color unevenly enough to make a wipe-on stain or dye look splotchy.
Three alder traits show up repeatedly in the evidence:
- Uneven absorption from subtle grain and runout. In one r/Luthier thread, a builder specifically pointed to runout and alder’s inconsistent uptake as the reason wipe-on color can go splotchy (Reddit r/Luthier).
- A warm or yellow base tone. That same thread warned that purple on alder may read browner than expected because the wood itself starts warm.
- Blotch-prone behavior more like poplar than maple. In a TDPRI burst discussion, builders explicitly compared alder’s dye absorption to poplar, not figured maple, which is exactly why scrap testing matters so much here.
That leads to one of the most useful mental shifts for beginners: do not assume alder will reward an aggressive one-coat stain approach. The alder-specific discussions consistently lean toward testing first and building color gradually.
The same fine grain that makes alder easy to smooth also affects finishing choices. Several guitar builders say trying to force grain filler into alder can be unnecessary or can even look worse than leaving the wood alone, especially if the goal is simply a clean transparent color under gloss.
That is also why builders in the Warmoth and Harmony Central discussions often steer newcomers toward aniline dyes rather than heavier consumer wiping stains. That recommendation is best understood as recurring builder preference, not a lab-tested rule: the argument is that thin dye solutions give you more control on alder than a heavier stain that wants to grab hard in some areas and lightly in others (Harmony Central).
So the practical way to beat alder’s reputation is straightforward:
- stop sanding at a stain-friendly grit,
- raise the grain with water,
- test the exact color and clear schedule,
- add conditioner only if the tests show blotching,
- wipe on thin dye coats,
- topcoat only after the color is fully dry.
Tools and Materials for Staining Alder Guitar Bodies
For a no-spray home setup, the evidence points to a pretty short list.
The most commonly recommended colorants for alder are aniline dyes such as Keda, ColorTone, and TransTint/Transtint, mixed in water or alcohol depending on the system and the builder’s preference (StewMac). In the Warmoth thread, one experienced poster specifically preferred alcohol dyes for alder because of their lower surface tension; in other alder examples, builders got good results from water-based dye schedules after raising the grain first.
If you already own a hardware-store wiping stain, that does not mean you must throw it away. It does mean you should treat alder as a wood that needs a test board first. In the Warmoth and Harmony Central discussions, the repeated caution is that alder can blotch badly with conventional stains unless you condition it or get lucky with the particular piece (Harmony Central).
A practical kit looks like this:
-
Sandpaper that ends around 220 to 320 grit before color.
-
Clean rags for applying dye (StewMac).
- A vacuum with soft brush or tack cloth for dust removal, especially in cavities and corners.
- Masking tape and paper if you plan a burst or need to isolate one area while working on another.
- A pre-stain conditioner or washcoat if testing shows classic alder blotching. Dakota describes conditioner as a partial sealer that promotes more even absorption, and one alder builder reported using General Finishes water-based reducer before dye stain on alder.
For topcoats, the no-spray options that recur in the evidence are:
- Tru-Oil if you want a thinner hand-rubbed finish. Examples in the evidence range from 8 coats to 15 coats depending on how much build the user wanted (TDPRI).
- A Danish-oil-style mix if you want an oil feel more than a glossy film, though the support here is much more anecdotal than the poly and Tru-Oil paths (TDPRI).
Check compatibility and ventilation before you commit
This is one place where testing the whole stack matters, not just the color.
The alder-specific evidence includes three important warnings:
- one Reddit builder worried that shellac could smear hand-applied dye on alder;
- another alder builder in that same thread went straight from dried dye to wipe-on poly successfully after 24 hours;
- and a general guitar staining guide warns that water-based stains and water-based varnishes can react together, which is not alder-specific but is still a good reminder to test your exact finish schedule before committing to the guitar body.
Dakota also advises applying finishes with the ventilation and dry-time discipline the product requires.
So before you color the body, do one full sample: wood prep, conditioner or no conditioner, dye mix, drying window, and the first clear coat.
Sanding and Grain Raising Prep for Alder
Prep matters so much on alder because uneven prep often looks like uneven staining.
The alder-specific advice is notably conservative: stop around 220 grit, or at most 320 grit, before color.
That matters because generic guitar-finishing advice sometimes pushes sanding much finer. For alder, the repeated guitar-specific guidance goes the other way.
A safe prep sequence is:
- inspect the body in raking light,
- remove machine marks and scratches,
- sand evenly through the grits,
- stop at 220 if you want a little more dye uptake,
- stop at 320 only if the surface is already very clean and consistent.
The useful takeaway is not “never sand.” It is “don’t automatically oversand a body that already arrived clean.”
After sanding, raise the grain with water, not naphtha. Wipe the body with a damp cloth, let it dry, then knock back the raised fibers very lightly with your final grit.
That step matters even more if you intend to use a water-based dye, because the dye itself will raise loose grain if you did not pre-raise it.
Then clean thoroughly. Dakota specifically recommends a vacuum with soft brush or a tack cloth, with special attention to grooves and corners. On a guitar body, that means:
- neck pocket,
- pickup routes,
- control cavity lip,
- forearm contour,
- tummy cut,
- edge transitions.
Two avoidable prep mistakes cause a lot of alder staining trouble:
- sanding too fine before color,
- leaving sanding dust in cavities, corners, or end-grain areas.
Using Pre-Stain Conditioner to Prevent Blotching
A pre-stain conditioner does not guarantee a perfect result, but it is one of the few tools in the evidence that is directly aimed at alder’s main weakness: uneven absorption.
Dakota Hardwoods describes pre-stain conditioner or washcoat as a product that partially seals the surface, reducing blotchiness and helping the stain go on more uniformly. That lines up with the recurring guitar-forum advice that alder often benefits from some kind of pre-treatment before darker stains.
There is also one alder-specific builder example: in the Reddit r/Luthier thread, a user reported sanding alder to 220 grit, using General Finishes water-based reducer before dye stain, and then topcoating with Tru-Oil.
So the cautious answer to “does conditioner fix alder?” is:
- sometimes it helps a lot,
- sometimes it is unnecessary,
- and the only reliable way to know is to test your exact schedule on scrap.
That last point matters because the same evidence pack also includes successful alder dye jobs done without conditioner or sealer first. In the Reddit Keda example, the builder dyed alder directly on bare wood and topcoated after drying. Harmony Central also includes successful alder experiences both with and without pre-treatment.
A practical beginner rule is:
- if you want a dark brown, walnut, or black result, lean toward testing a conditioner first, because dark colors exaggerate end-grain and blotching problems on alder;
- if you want a transparent dye schedule built in several light coats, bare wood may be fine if your sample looks good.
The key is not to treat conditioner as mandatory dogma. Treat it as the first adjustment to try if the scrap sample tells you alder is grabbing color unevenly.
Step-by-Step Dye Application on Bare Alder
This is the most defensible no-spray workflow supported by the evidence.
1. Mix the dye and make a real test piece
Use the manufacturer’s own mixing instructions as your baseline, then adjust only after you see how the dye behaves on alder. In the alder evidence, builders report using Keda mixed in warm or hot water and ColorTone stain mixed in water for wipe-on use.
StewMac’s blue-guitar example gives one specific ColorTone mix: 1-3/4 ounces of stain in a pint jar filled 2-1/2 inches deep with water. That is useful as an example of wipe-on strength, but not as a universal alder formula.
Your test piece should answer four things:
- does the color shift on alder’s warm base,
- does the body need conditioner,
- how fast does your mix dry,
- what does the topcoat do to the color.
2. Work on bare, clean wood unless your tests say otherwise
A successful alder Keda example used no sealer first and went directly onto sanded alder. In the TDPRI burst thread, builders also warned that sealing before staining can complicate absorption if your goal is direct wood coloring rather than tinting the finish itself.
3. Stain the cavities first
StewMac’s sequence is practical and worth copying: do the pickup and control cavities first, then the visible faces. It gets the awkward areas finished before you’re worrying about keeping the front and back perfectly consistent.
4. Load the rag, squeeze it out, and wipe in controlled passes
StewMac recommends getting the rag thoroughly damp with stain, squeezing it out, then wiping in lengthwise strokes. Harmony Central users likewise emphasize applying color a little at a time on alder for better control, and The Guitar Fabrik warns against over-wetting the surface.
That is a good summary of alder technique: damp rag, not dripping rag.
5. Build color in multiple light coats
One of the easiest mistakes on alder is expecting one heavy application to solve everything. The successful Reddit alder example reached its final look with multiple layers of purple, blue, and red rather than one wipe-on pass.
For drying between color coats, the evidence is mixed:
- StewMac’s wipe-on stain example lets color dry 1 to 2 hours before the next stage;
- The Guitar Fabrik suggests about 1 hour between stain applications in a general guide;
- the Reddit alder build waited 24 hours before topcoating.
The safest synthesis is simple: recoat only after the surface looks dry, and leave far more time before the first clear coat than between dye coats.
6. Don’t sand between dye coats unless you are correcting the result
The Guitar Fabrik’s guide says not to sand between stain coats unless you need to adjust color, and the alder discussions fit that pattern: sanding is treated as a correction step or a deliberate sand-back technique, not as something you automatically do after every coat.
7. Use masking for bursts or staged coloring
StewMac’s process uses masking tape and paper to protect areas while another section is reworked. On alder, that is especially useful if you are:
- doing a burst by hand,
- staining one face differently,
- or trying to keep an already-good section untouched.
8. If you want more grain contrast, use a sand-back approach instead of filler
One alder builder in the Reddit thread used black dye, then sanded it back to emphasize the grain rather than trying to force pore filler into tight alder.
Creating Sunburst or Custom Colors on Alder
Custom transparent colors on alder are possible.
The biggest reason is alder’s warm base tone. In the Reddit alder dye thread, a builder specifically warned that purple may drift browner on alder because of the wood’s yellow cast. That is why the same thread is useful: the successful result did not rely on a single purple recipe. The builder layered purple, blue, and red to get where they wanted to go.
The lesson is broader than purple.
For a hand-rubbed burst, the most alder-relevant sequence in the evidence comes from TDPRI:
- apply a dark brown base,
- sand it back,
- wipe on amber,
- blend in red,
- then work black or dark brown around the edges with an alcohol-dampened rag for blending.
That same TDPRI discussion also makes an important expectation-setting point: a hand-rubbed burst will usually look more organic and less mechanically smooth than a factory sprayed burst. That is not a flaw; it is part of the style.
If you want more contrast from plain alder, two approaches are supported:
- a dark dye sand-back on alder before the main color;
- a first-coat stain, block-sand, second-coat stain method like the StewMac process, which is demonstrated on maple but clearly shows the principle of leaving darker color in more receptive figure before restaining.
Because StewMac’s visual example is on a maple top rather than all-alder, the safe takeaway is the principle, not a promise that alder will react the same way. Alder absorbs color more erratically than maple in the forum evidence, so test first.
And if your test burst looks muddy, that does not mean you failed. It may simply mean that the particular alder body is better suited to:
- a simpler transparent color,
- a lighter stain schedule,
- or a tinted clear finish instead of a wood-stained burst.
Topcoats and Sealing After Staining Alder
Once the dye looks right, it still needs protection.
The evidence is careful but consistent on that point. In the TDPRI “no lacquer” thread, builders warned that a raw stained body can absorb perspiration and body oils, and that stain can wear off or transfer without a protective finish. Dakota likewise recommends a protective topcoat such as polyurethane or lacquer on stained alder woodworking projects. So while the exact product is optional, the broader idea of sealing and protecting the color is strongly supported.
Do you need shellac before poly?
Not necessarily.
This is one of the places where the evidence shows real disagreement:
- the TDPRI burst thread includes stain schedules that use shellac or vinyl sealer before clear coats;
- one alder builder on Reddit worried that shellac might smear the dye;
- another alder builder in that same thread skipped sealer entirely, let the dye dry 24 hours, and went straight to wipe-on poly successfully.
The safest synthesis is not “always use shellac” or “never use shellac.” It is:
- shellac is optional,
- direct topcoating over fully dried dye is documented in at least one alder build,
- and your exact dye-plus-clear schedule should be tested on scrap before you do the body.
Wipe-on poly
Wipe-on polyurethane is a realistic DIY option if you want a tougher film and more gloss. The tradeoff, according to experienced posters in the Warmoth thread, is that wipe-on poly is harder to level than spray lacquer when you want a truly flat, deep gloss.
That same discussion also warns against using slurry methods with polyurethane, because poly does not remelt into itself the way nitrocellulose lacquer does. On alder, that matters less than on open-pored woods anyway, because you usually do not need filler to begin with.
Tru-Oil
Tru-Oil is the most common no-spray alternative in the evidence for people who want a hand-rubbed feel. Harmony Central users note that Tru-Oil can darken alder slightly and bring out the grain, though not as dramatically as it may on some other woods.
In the TDPRI thread, examples range from 8 coats to 15 coats, depending on how much build and gloss the user wanted. Those are not manufacturer instructions; they are user schedules. But they do show the general pattern: Tru-Oil is usually applied in many thin coats, not one or two heavy ones.
Dry time before topcoat
The evidence here is mixed enough that it should be stated cautiously.
- One alder dye build went to clear after 24 hours.
- A general guitar staining guide advises waiting 2 days before further finishing.
- Dakota lists stain dry times more broadly in the 4 to 24 hour range, depending on product and conditions.
In practice, that commonly lands somewhere in the 24 to 48 hour range in the cited examples.
After the clear is fully built and cured, you can wet sand and polish if you want more gloss. The abrasive schedules in the evidence vary widely—from roughly 800 to 1500 grit in one alder plan to 1000 to 2500 grit in an oil-finish example—so the exact grit ladder matters less than waiting for full cure and avoiding a sand-through.
Troubleshooting and Testing Blotchy Alder Stains
The most useful troubleshooting advice for alder comes before the guitar body is stained: test first.
In the TDPRI burst thread, that advice is nearly stated as a rule: experiment on scraps of your wood with your products. Dakota makes the same point more generally for alder because each piece can absorb stain differently.
If the body is already blotchy, the response depends on the severity.
If it looks uneven while still wet
Do not panic too early. Let it dry fully before you decide the job is ruined. Only judge alder color after it is dry.
If the blotching is mild
Treat any fix as a test-first move, not a guarantee. Forum builders sometimes try to unify transparent dye with another very light pass, but that advice is anecdotal and works best when the original problem was simply uneven application rather than deep grabby spots in the wood.
If your sample shows that another light coat helps, proceed. If not, sanding back is the safer correction.
If the blotching is obvious
Sand back and reset the process. The evidence supports the pieces of that repair workflow even if it does not give a single official “recovery protocol”:
- sand-back techniques are common,
- conditioner can be added on the next attempt,
- and darker first coats are sometimes deliberately sanded back for control.
If the color keeps pooling or going dark in spots
Both the general guitar-staining guide and alder-specific forum advice warn against flooding the surface. Use a dampened rag, keep moving, and do not let wet dye sit in one area longer than necessary.
If dark colors look worst on your alder
That is not unusual. In the TDPRI “no lacquer” thread, builders specifically warn that darker stains exaggerate alder’s blotchiness and end-grain darkening. If walnut or black is fighting you, your next test should usually change one variable at a time:
- lighter mix,
- thinner coat,
- conditioner first,
- or dye instead of heavier stain.
If you were planning to solve everything with grain filler
That is probably the wrong fix for alder. Multiple guitar-finishing discussions say alder generally does not need grain filler for gloss, and some builders warn that filler can look bad on tight-grained alder.
A conservative alder workflow still looks like the same short checklist:
- test on scrap,
- prep to 220 to 320 grit,
- raise the grain with water,
- use conditioner only if needed,
- apply thin dye coats,
- let the color dry fully,
- then protect it with a compatible clear finish.
Does alder need grain filler before staining for guitars?
Usually no. The guitar-specific discussions consistently describe alder as a wood that does not need pore filling for a smooth gloss finish. Some builders go further and warn that filler can look worse than the bare wood on tight-grained alder. If you want more contrast, a dark dye sand-back is the more alder-friendly move.
Water-based or alcohol dye for alder guitar bodies?
Either can work, but they have different tradeoffs. Water-based dye is documented in successful alder builds using Keda and ColorTone. In the Warmoth thread, one contributor preferred alcohol dyes on alder because of their lower surface tension, while TDPRI posters note that water raises grain more and therefore needs prep for it. For most DIY builders, the best choice is the one you can test successfully with your planned topcoat.
Can you stain alder evenly without a spray gun?
Yes. Several alder examples in the evidence use rag-applied dye or stain with no spray setup at all. The recurring no-spray workflow is: prep to roughly 220 to 320 grit, optionally use conditioner, apply dye in thin rag coats to bare wood, then topcoat after the color is fully dry.
Tru-Oil vs wipe-on poly after alder stain?
The evidence supports both, but for different goals. Tru-Oil is the common hand-rubbed option, with user examples ranging from 8 to 15 coats depending on the desired build and gloss. Wipe-on poly gives a harder, glossier film, but experienced Warmoth posters describe it as more demanding to level cleanly than spray lacquer. So the choice is less about “better” and more about the look and feel you want.
Safe sanding grit before staining alder?
The alder-specific guidance clusters around 220 grit to 320 grit max before color. Going much finer is repeatedly discouraged in the alder discussions because it can reduce stain uptake or complicate adhesion later. If you are unsure, 220 grit, followed by a water grain-raise and a test piece, is the safest starting point.