 StainList
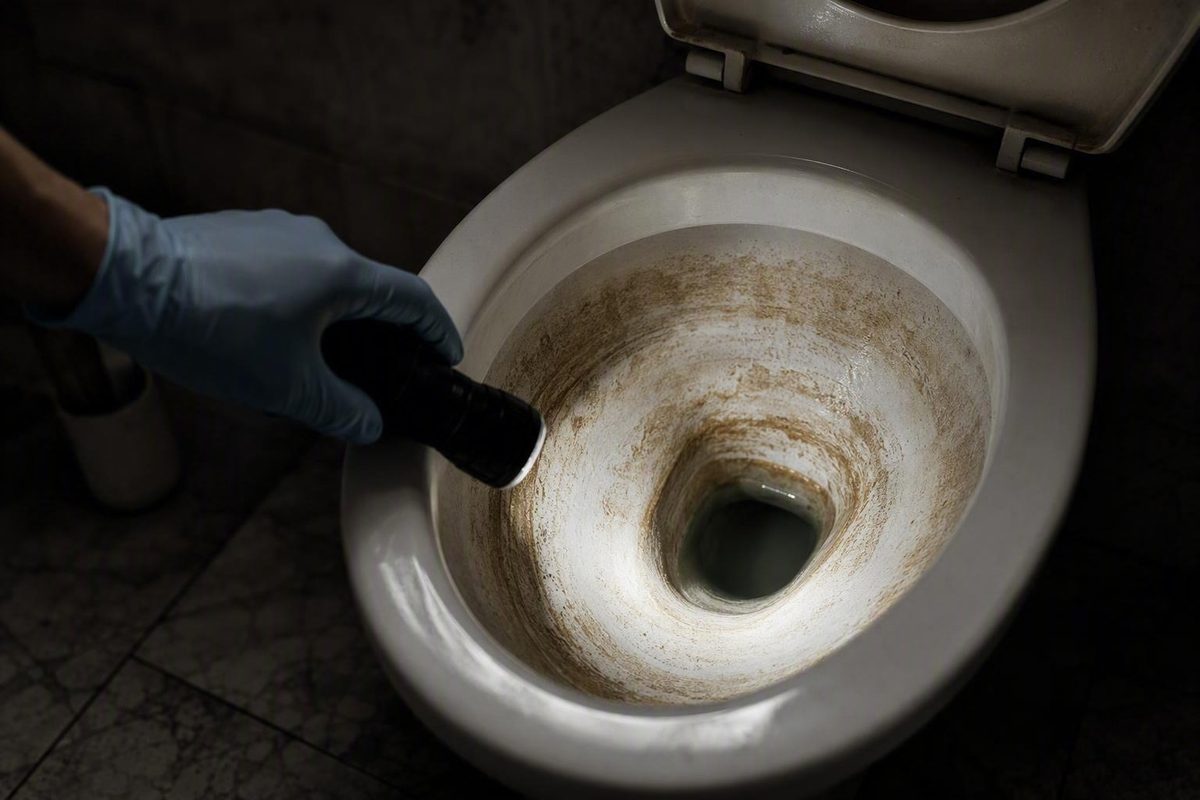
Limescale in a toilet is safest to remove when you treat it as a diagnosis and compatibility problem—not simply as a stain that needs a stronger cleaner.
First confirm that the deposit behaves like mineral scale. Then identify where it sits and check what the toilet’s surface and components can tolerate. Make sure no incompatible cleaner remains, expose the deposit where possible, apply one suitable acidic treatment, allow the permitted contact time, brush gently, flush, and inspect.
That order matters because not every white, brown, yellow, or pink mark is limescale. A toilet may also combine glazed ceramic, a special coating, decorative finishes, plastic valves, rubber seals, and metal fittings. A treatment suitable for the bowl is not automatically suitable for the seat, hinges, flush hardware, or cistern.
First, decide whether the deposit is probably limescale
Limescale is a hard, chalky mineral deposit associated with hard water. It consists largely of calcium carbonate, while hard water contains dissolved minerals including calcium and magnesium. Repeated exposure to mineral-rich water can leave residue that gradually develops into an ingrained crust. A cleaning-product manufacturer’s guide explains this relationship between hard water, calcium carbonate, and toilet deposits.
Look for material that is:
- Hard rather than slimy or easily smeared
- Rough, gritty, chalky, or crusted
- Firmly attached to the bowl
- Resistant to routine brushing
- Concentrated along the standing-water line
- Built up beneath the water or under the rim
- Clustered around visible flush outlets
- Recurring after cleaning, particularly where hard water is present
A persistent waterline ring is a common presentation. So is a rough layer beneath the normal water level or a crust around the places where flush water enters the bowl. Deposits may also occur in trapways, under-rim channels, and cistern areas, although concealed buildup is harder to confirm safely. A retailer’s guide identifies waterlines, under-rim channels, flush outlets, trapways, and cistern components as possible accumulation points. Its overview also lists hardened texture and reduced flow among the signs that may accompany buildup.
Do not diagnose by color alone. Vendor guides describe mineral deposits as white, grey, pink, reddish brown, or brown. A brown ring may contain limescale, but brown does not prove that it does. The same caution applies to orange, yellow, red, and pink marks.
Yellowish-brown material may involve urine scale rather than ordinary water-derived limescale alone. A toilet manufacturer describes urine scale as forming when urine comes into contact with existing limescale. Its descaling guide distinguishes this deposit from tap-water limescale.
Other possibilities include iron-related or rust-colored staining, ingrained grime, and pink residue with a microbial component. The useful practical question is therefore not “What exact compound is this?” but “Does this mark behave like a hard mineral deposit?”
Use this diagnostic checklist:
- Texture: Is it hard, rough, chalky, or crusted rather than soft, greasy, or easily smeared?
- Location: Is it at the waterline, below the water, under the rim, or around a flush outlet?
- Persistence: Does it resist normal brushing?
- Recurrence: Does a similar hard film return where mineral-rich water is a known issue?
- Treatment response: Does a toilet-compatible descaling treatment soften or reduce the hard layer?
The final check is not permission to test several chemicals. Use only a treatment allowed by the toilet manufacturer and only one cleaner at a time.
After treatment, distinguish the deposit from the discoloration. Reassess its texture and position instead of repeatedly applying acid on the assumption that every visible trace is more limescale.
Do the chemical and surface-safety check before cleaning
Never mix bleach with vinegar, citric acid, an acidic descaler, or another acid cleaner. A water-treatment vendor’s toilet-cleaning guidance specifically warns against mixing bleach with vinegar or other acid cleaners. Review that bleach-and-acid warning before beginning.
More broadly, do not combine cleaning products unless a product label explicitly instructs you to do so. The specific bleach-and-acid combination presents a harmful-gas hazard; the one-cleaner rule also prevents less obvious incompatibilities between formulations.
If bleach, a bleach-containing toilet gel, a tablet, or another cleaner was used recently, read that product’s label and follow its directions for flushing or rinsing. If you cannot establish that the previous product has been cleared as directed, postpone the treatment rather than trying to neutralize it yourself.
Before starting:
- Ventilate the bathroom.
- Wear gloves and eye protection.
- Keep children and pets away from the work area.
- Use one cleaner only.
- Read the cleaner’s complete label.
- Check the toilet manufacturer’s care instructions.
- Avoid splashing cleaner onto nearby materials of unknown compatibility.
- Make sure you can flush or rinse the product exactly as directed.
Ventilation, gloves, eye protection, nearby-surface protection, and using one cleaner at a time are also included in retailer safety guidance for toilet descaling. The same guidance emphasizes following product directions.
The manufacturer check is essential. “Toilet surface” may refer to standard glazed ceramic, a special easy-clean coating, a colored or decorative finish, exposed metal, plastic trim, seals, valves, or other internal parts. Permission to use a product in a glazed bowl does not establish that it is safe on every other part of the toilet.
Check the toilet instructions and cleaner label before using:
- Vinegar, citric acid, or another acidic product
- A commercial acidic gel, liquid, powder, or tablet
- Abrasive pads, stiff tools, or pumice
- Extended or overnight contact
- Paper to hold cleaner against a vertical surface
- Any treatment inside the cistern
Some commercial guides specify “undiluted white vinegar,” but the available guidance does not establish one universally safe vinegar concentration for every toilet finish. Do not interpret “undiluted” as permission to use any stronger product sold as cleaning vinegar. Use only the vinegar type and strength permitted by the toilet manufacturer, or choose a labeled toilet descaler whose directions expressly cover the surface.
Commercial product instructions control the amount, application method, protective equipment, compatible surface, and contact time.
A deposit that resists an approved household treatment needs reassessment or professional attention—not an unsupported jump to more hazardous chemistry.
Stop treatment if:
- The glaze becomes dull or changes color
- A coating or decorative finish changes
- Scratches appear
- A tool begins to drag or catch on the surface
- A seal, valve, or fitting leaks or behaves differently
- The product label prohibits the application
- The toilet manufacturer’s instructions conflict with this guide
The product label and toilet manufacturer’s instructions take priority over general cleaning advice.
Prepare the bowl so the cleaner can reach the scale
Preparation is about direct contact. If most of the scale is below the waterline, adding a small amount of cleaner to a full bowl may treat the water more than the crust.
First identify the treatment zone:
- Waterline
- Exposed bowl surface
- Submerged bowl
- U-bend or visible trapway
- Under-rim surface
- Visible flush outlet
- Cistern or internal component
Flush away loose debris. If both the cleaner instructions and toilet guidance permit it, lower the bowl water enough to expose more of the deposit. Dry the exposed area only when the selected product calls for a dry application surface.
There is no single water-lowering procedure established as suitable for every toilet design. Follow the instructions for your model. Do not dismantle components, force a valve or flushing mechanism, or probe an inaccessible passage merely to lower the water level.
Location determines how contact can be maintained. An exposed bowl surface can normally be wetted directly. A vertical under-rim deposit may require a permitted method of holding vinegar against it.
Use this core workflow:
- Expose as much of the deposit as the approved procedure permits.
- Apply one compatible cleaner.
- Wait for the contact period permitted for that product and surface.
- Brush gently after the deposit has had time to soften.
- Flush or rinse as directed.
- Inspect for both deposit reduction and surface change.
- Repeat only if appropriate—when progress is visible, the finish remains unchanged, and repeat treatment is permitted.
Do not begin by forcefully scraping dry scale. The purpose of acidic contact is to soften or loosen the mineral layer so that less mechanical force is needed.
Match the treatment to light, established, or thick buildup
There is no validated household severity scale for toilet limescale in the available evidence. The following levels are practical escalation categories, not precise chemical classifications.
Light film or waterline ring
A light deposit is thin and only mildly rough.
- Lower the water enough to expose the ring if necessary, safe, and permitted.
- Apply a manufacturer-compatible white-vinegar product at the allowed strength, or use another approved descaler.
- Give it meaningful wet contact instead of brushing it away immediately.
- Brush with a compatible toilet brush.
- Flush and inspect.
When permitted, a second compatible cycle is preferable to immediately introducing an abrasive.
Established scale
An established deposit is clearly rough, ingrained, or resistant to ordinary brushing. Cleaning-product and water-treatment vendors commonly recommend approximately three to four hours of white-vinegar contact before brushing and flushing. This is vendor guidance rather than a universal safe duration, and it remains subordinate to the cleaner label and toilet care instructions. One manufacturer guide specifies three to four hours and notes that established scale is difficult to remove by scrubbing alone.
Apply the permitted vinegar product directly to the exposed hard layer and keep it confined to a compatible area. Do not add another cleaner. After the allowed contact period, brush gently, flush, and inspect. If the deposit is thinner or softer and the finish is unchanged, another permitted cycle may be reasonable.
Thick or layered deposits
Some commercial guides suggest several hours or overnight contact for heavy buildup, but this does not establish that overnight acid exposure is safe for every finish or toilet component. Use extended contact only when the toilet manufacturer and the selected treatment both permit it.
After soaking:
- Remove any paper or other permitted contact material.
- Brush the softened deposit without excessive pressure.
- Flush or rinse according to the product directions.
- Inspect for progress and surface change.
- Repeat only if each cycle is reducing the deposit and the method remains permitted.
Longer compatible contact is generally a more cautious first escalation than forceful dry scraping. The aim is to soften established scale before increasing mechanical action.
Do not assume that combining vinegar and baking soda creates a superior descaler. The available vendor sources do not provide comparative testing showing that the combination removes toilet limescale better than a properly applied acidic treatment. Visible fizz alone does not establish improved removal.
Consider a labeled commercial descaler when:
- A permitted vinegar treatment has not softened the deposit sufficiently
- The product explicitly identifies the toilet surface as an approved use
- The toilet manufacturer permits that cleaner type
- You prefer a formulated product with specific application directions
Never transfer one product’s dwell time to another. For example, one manufacturer-marketed foaming powder directs users to leave its product in the bowl for five minutes before flushing, while some vinegar guidance allows hours. The five-minute instruction applies to that particular foaming formulation, not to toilet descalers generally.
Do not repeat treatment indefinitely. If properly applied, compatible cycles stop making progress, reconsider the diagnosis or seek advice. The material may not be limescale, may be inaccessible, or may need professional assessment. Stronger acids and longer exposure are not automatically better.
Treat the waterline, under-rim scale, jets, and cistern differently
The safest application method depends on where the deposit is located.
Waterline and exposed bowl
Use the standard sequence:
- Lower the water if necessary and permitted.
- Apply one compatible acidic treatment directly to the hard ring.
- Maintain contact for the allowed period.
- Brush gently.
- Flush and inspect.
Cover the mineral crust rather than unnecessarily flooding unrelated toilet parts. This concentrates contact while limiting exposure elsewhere.
Submerged bowl or U-bend
Expose as much of the deposit as the toilet’s approved procedure permits. Direct contact is more useful than heavily diluting cleaner in standing water.
Do not dismantle the toilet or use an unsupported water-removal trick. If a deposit extends into a trapway or beyond safe reach, treat only the accessible portion. Do not reach into concealed passages with sharp tools.
Under the rim
A vertical deposit is difficult to soak because liquid runs down. If the toilet manufacturer permits vinegar and prolonged wet contact, vinegar-soaked kitchen or toilet paper can be pressed against the affected area.
Keep the paper wet during the permitted treatment period and replace it before it dries. A toilet manufacturer’s guide describes remedy-soaked paper for below-rim deposits and advises replacing it before it dries.
Do not assume that the paper method is safe with a commercial gel, powder, or descaler. Holding a formulated chemical against a surface may extend its exposure beyond the labeled application. Use paper with a commercial cleaner only when the label expressly permits both the method and contact time.
Visible rim outlets or jets
Limit household work to visible, accessible surfaces. Once an approved treatment has softened material around an outlet, use a compatible brush or manufacturer-approved non-scratch tool around the opening.
Do not force chemicals into channels that cannot be seen or reliably rinsed.
Weak flushing is a reason to investigate—not proof that hidden limescale is responsible.
Cistern
Treat the cistern as a component-compatibility problem, not as an extension of the ceramic bowl. It may contain rubber seals, plastic valves, metal fittings, coatings, and moving parts. General bowl-cleaning guidance does not establish that a cleaner is safe for all of those materials or for prolonged contact.
Do not put vinegar, gel, powder, tablets, or descaler in the cistern unless:
- The cleaner label explicitly permits cistern use
- The toilet manufacturer permits that chemical and application
- The specified dosage and contact time can be followed
- No other tablet or cleaner is already present
Visible sediment can be noted without immediately treating it chemically. If cistern deposits recur, a component begins leaking, or flushing changes, ask the toilet manufacturer or a qualified plumber to assess the system.
The same boundary applies to inaccessible jets, internal channels, and trapways: do not compensate for poor access by using stronger chemistry.
Escalate cautiously when soaking and brushing are not enough
Use this escalation order:
- Repeat a compatible soak if the deposit is visibly softening or shrinking.
- Consider a labeled descaler approved for the surface.
- Add mechanical action only when the toilet manufacturer permits the tool.
- Seek manufacturer or professional guidance when compatibility or access is uncertain.
After acidic treatment has softened the scale, a stiffer toilet brush or approved non-scratch tool may remove material left behind by an ordinary brush. “Non-scratch” is a product description, however, not a guarantee for every glaze or coating. Use minimal pressure and stop if the finish changes.
Pumice is a conditional last-stage option, not a default tool. Claims that wet pumice cannot scratch porcelain are too broad. Safety depends on the glaze, any coating, the stone, the pressure used, and the toilet manufacturer’s restrictions.
If—and only if—the toilet manufacturer permits pumice:
- Confirm that the surface is compatible and not coated.
- Wet both the pumice and bowl thoroughly.
- Test a small, inconspicuous area.
- Apply very light pressure.
- Keep the contact area wet.
- Work only on softened deposits.
- Inspect frequently instead of completing a large area at once.
A water-treatment vendor’s guide similarly advises wetting both surfaces, applying light pressure, testing a small area when uncertain, and avoiding pumice on coated toilets. Its precautions should still be treated as conditional guidance rather than a universal guarantee.
Stop using pumice immediately if you notice:
- Scratching or dulling
- A color or finish change
- Increased drag or roughness
- Contact with the toilet surface rather than only the deposit
- Any uncertainty about whether the toilet has a coating
Do not answer a failed soak by automatically selecting a stronger acid or doubling the contact time.
Seek professional or manufacturer assessment when:
- Repeated compatible treatments stop making progress
- The deposit is inside inaccessible channels
- Flushing remains weak
- A cistern component leaks or behaves differently
- The glaze or finish appears damaged
- You cannot identify the toilet material or coating
- Safe application and rinsing are not possible
Troubleshoot what remains after descaling
A successful descaling treatment may remove the hard crust without removing every trace of color. That does not necessarily mean the treatment failed.
After flushing and rinsing as directed, inspect the area with good lighting and use a compatible brush to assess whether it remains raised and rough. If the surface appears smooth but a colored mark remains, separate the stain question from the scale question. More acid is not justified solely because the bowl is not yet uniform in color.
Ask:
- Is the remaining mark raised, hard, or chalky?
- Is it flat and smooth?
- Does it follow the former edge of the deposit?
- Is it a streak from the rim rather than a waterline crust?
- Does it return as a soft film rather than a hard layer?
Yellow-brown material may involve urine scale where urine has contacted existing limescale. Brown or reddish discoloration may involve other water constituents or an unrelated stain. Pink coloration may reflect trapped compounds or biological residue and should not automatically be labeled mineral scale.
If no part of a supposedly hard deposit changes after a correctly applied, compatible acidic treatment, reconsider the diagnosis. Confirm that the cleaner was suitable, the hard layer was exposed, and the allowed contact time was followed. Do not jump from “no response” to stronger improvised chemistry.
Weak flushing also requires a broader diagnosis. Possibilities include:
- Mineral buildup around rim outlets or inside channels
- A separate blockage
- An incorrect water level
- A faulty valve or flushing mechanism
- Another plumbing problem
Commercial guides associate scale around rim outlets with reduced water flow, but that symptom is not specific to limescale. A water-treatment vendor’s guide lists both rough deposits around rim jets and reduced flush flow as possible signs of buildup.
Do not assume that weak flushing means the toilet requires more acid or must be replaced. Inspection may instead identify an accessible deposit, removable blockage, repairable mechanism, or problem requiring professional descaling.
Arrange further assessment if you find:
- Persistent weak flow after accessible deposits are removed
- Mineral material in inaccessible internal channels
- Recurring sediment in the cistern
- New leaks or altered component movement
- Scratched, dulled, or discolored glaze
- No progress after permitted repeat treatment
Reduce recurrence without promising permanent prevention
New mineral film is generally easier to remove than a thick, layered deposit. Inspecting known problem areas during normal cleaning allows you to act before a substantial crust develops.
Check:
- The waterline
- The lowest visible part of the bowl
- Beneath the rim
- Visible flush outlets
- Any location where a hard deposit previously formed
Use the least aggressive compatible method that removes the new film. Do not introduce stronger products merely because a milder method was needed in the past.
There is no evidence-based universal weekly or monthly descaling schedule for every home. Recurrence varies with local water conditions, toilet use, standing-water patterns, and the toilet’s care requirements.
Set a practical schedule from your own observations:
- Remove the existing deposit.
- Note the date.
- Inspect the same areas during normal cleaning.
- Record how long it takes for a visible hard film to return.
- Plan the next compatible treatment shortly before substantial buildup normally appears.
- Adjust the interval if water use or recurrence changes.
Whole-home water treatment is an optional broader intervention where mineral deposits affect several fixtures. Water-softener vendors argue that reducing calcium and magnesium in the supplied water can reduce scale formation, but their guidance is commercially interested and should not be read as a promise of permanent prevention, guaranteed savings, or a particular payback period. Consider local water conditions, installation and maintenance requirements, and independent professional advice.
Keep routine bowl maintenance separate from cistern additives. Do not leave tablets or acidic products in the tank without explicit compatibility guidance covering its seals, valves, plastics, coatings, and metals.
The governing principle is to remove new deposits early, use one compatible product at a time, and reserve stronger chemistry or mechanical action for a justified, manufacturer-approved escalation.
How long should vinegar stay on toilet limescale?
For established deposits, vendor guides commonly recommend approximately three to four hours before brushing and flushing. Some extend the suggested contact period to several hours or overnight for heavy buildup. One water-treatment vendor gives a three-to-four-hour range and suggests longer contact for severe deposits.
These are source-specific ranges, not universal safe times. The permitted period depends on the toilet finish, deposit location, vinegar product, and manufacturer instructions. Do not assume that a stronger cleaning vinegar can be used at full strength, and do not use overnight contact unless the toilet’s care guidance allows it.
Can I mix vinegar and bleach when cleaning a toilet?
No. Never mix vinegar, citric acid, or another acid cleaner with bleach or a bleach-containing toilet product. Do not add acid while incompatible cleaner residue may remain.
Follow the previous product’s label for flushing or rinsing. If you cannot establish that the product has been cleared, postpone the next treatment. Do not attempt to combine or neutralize cleaners yourself.
Is a pumice stone safe for removing toilet limescale?
Not universally. Pumice may scratch or dull some glazes and should not be used on a coated toilet unless the manufacturer explicitly permits it.
If approved, wet both the stone and bowl, test a small inconspicuous area, apply light pressure, and keep the contact area wet. Stop at the first sign of scratching, dulling, color change, or increased drag. Try compatible soaking and brushing before considering pumice.
Can I put vinegar or a descaling tablet in the toilet cistern?
Only if both the cleaner label and toilet manufacturer explicitly permit that use. A cistern contains seals, valves, plastics, coatings, and metal fittings that may not tolerate the same treatment as a glazed bowl.
Do not add vinegar, descaler, gel, powder, or a tablet to a tank that already contains another cleaning product. Seek manufacturer or professional guidance for recurring sediment, leaks, or changed flushing performance.
Can limescale cause a weak toilet flush?
Mineral buildup around rim outlets or inside water channels may be associated with reduced flow. A blockage, incorrect water level, faulty valve, or other mechanical problem can produce similar symptoms.
Remove only accessible deposits using compatible methods. If flushing remains weak, do not probe hidden jets or assume that more acid is needed. Have the toilet assessed before deciding whether it requires descaling, repair, or another intervention.
The final decision rule is compact: identify a likely hard deposit by texture and location rather than color, confirm that the toilet permits the proposed treatment, never combine cleaners, give one compatible acidic product the allowed contact time, brush gently, and reassess before escalating. If the finish changes, the deposit is inaccessible, repeat treatment makes no progress, or flushing remains weak, stop experimenting and seek manufacturer or professional guidance.