 StainList
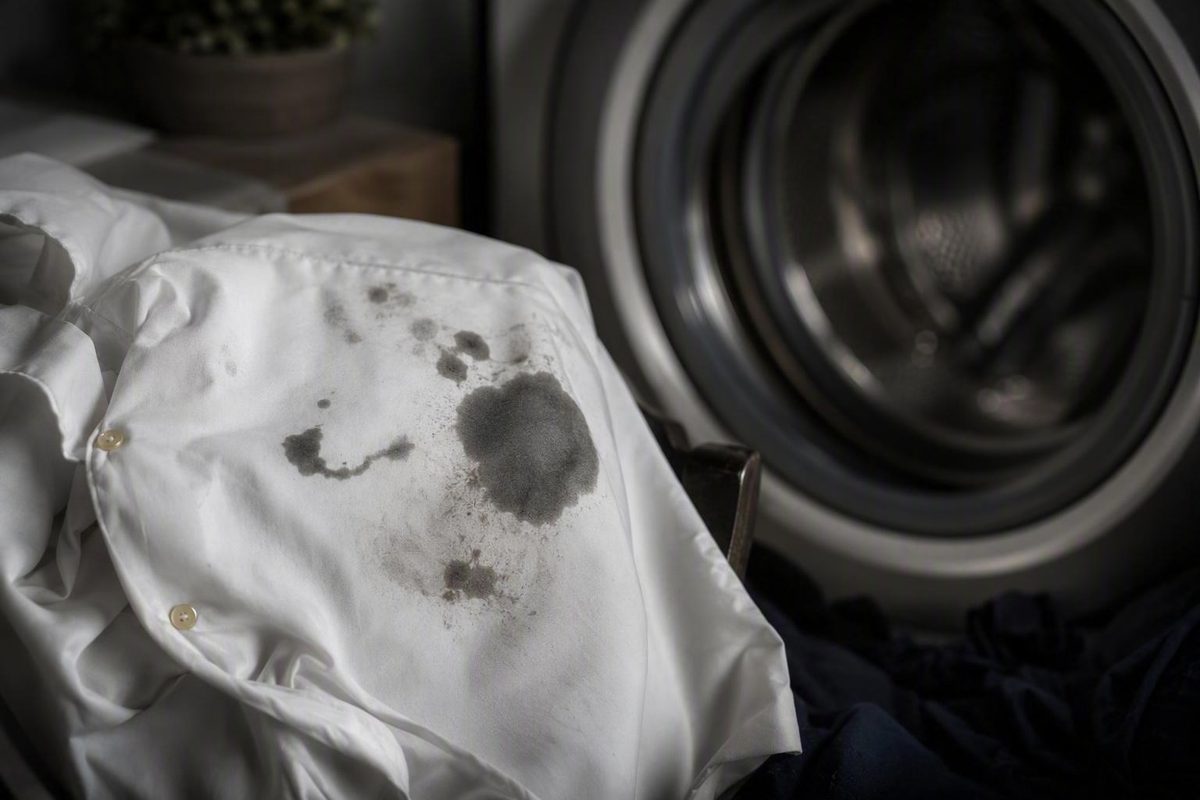
Finding oil spots on laundry after washing does not necessarily mean the washing machine is leaking. A dark, greasy-looking mark may be a food, cosmetic, or body-oil stain that went unnoticed before washing. Detergent residue, fabric softener, hard-water deposits, rust, and accumulated washer grime can produce similar-looking marks.
The best response is diagnostic rather than aggressive: keep the garment away from dryer heat, document the mark, inspect the rest of the load, and change one laundry variable at a time. Treat the fabric conservatively while you investigate the washer, dryer, laundry products, and water supply.
First response: keep the garment out of the dryer
Set the affected garment aside as soon as you notice the mark. Inspect it under bright, neutral light before applying stain remover, detergent, powder, or another household product.
Do not identify the substance as oil solely because it looks dark or greasy. Post-wash marks may come from:
- Food, cooking oil, cosmetics, moisturizer, butter, or body oil already on the garment
- Detergent that did not dissolve or rinse away adequately
- Fabric softener that contacted fabric unevenly
- Soil or laundry-product deposits inside the washer
- Hard-water minerals
- Rust from an object, the appliance, water, or supply pipes
- A washer or dryer problem that requires inspection
Keep the garment out of the tumble dryer while any dark or greasy shadow remains. Dryer heat may make residual oil harder to remove. Maytag also identifies residual oil as a possible fire concern, although its consumer guidance does not establish a threshold for an ordinary household stain. The cautious choice is to air-dry until the mark has been removed or professionally evaluated, particularly when the amount or type of oil is unknown. Maytag recommends line drying and avoiding machine drying while residual oil remains.
Before choosing a water temperature, soak, brush, or wash cycle, read the garment’s care label.
Make a quick record before treatment:
- Photograph the mark in good light.
- Note its color, outline, shine, and texture.
- Check for a musty, petroleum-like, or otherwise unusual odor.
- Record where it appears on the garment.
- Look at both sides of the fabric.
- Inspect every other item from the same load.
- Note whether the mark was visible before washing.
- Record whether the garment has already gone through the dryer.
These observations are clues, not proof. A shiny patch does not confirm oil, and a mark near a hem or cuff does not identify a particular appliance component.
If treatment makes the spot lighter without eliminating it, consider the stain unresolved. Continue air-drying and treating cautiously rather than using the dryer as a test.
Is it oil, residue, rust, minerals, or washer grime?
Appearance can narrow the possibilities, but it cannot conclusively identify a substance. Use color and texture to decide what to inspect next—not to declare that a particular product, water condition, or mechanical part is responsible.
| Appearance | Possible explanation | Next check | Limits of the clue |
|---|---|---|---|
| Darker than the surrounding fabric; greasy, translucent, or shiny | Cooking oil, food grease, butter, moisturizer, cosmetics, body oil, or another oily substance | Blot with clean absorbent material; check whether the mark feels oily or transfers; review what contacted the garment before washing | Detergent, softener, and washer deposits can also create dark or shiny patches |
| White or blue streaks, flecks, or patches | Detergent or fabric-softener residue, especially after poor dissolving or rinsing | Check dosing, product type, dispenser condition, loading, and rinse selection | Color does not identify the exact product or rule out other causes |
| Gray or dull marks | Hard-water minerals interacting with detergent, redeposited soil, or general residue | Look for mineral scale, consider local water conditions, and inspect other loads | Grayness alone does not distinguish minerals from soil or product buildup |
| Orange or rusty-brown dots or streaks | A rusty object, appliance rust, iron-rich water, or corroded supply plumbing | Check pockets, drum openings, water appearance, and whether marks recur | One orange mark does not establish whether the source is the washer or water supply |
| Black or brown smears, flakes, or deposits | Accumulated detergent, fabric softener, soil, or other washer grime | Inspect and wipe the drum, dispenser, and accessible gasket | Dark material is not automatically oil, mold, or mechanical lubricant |
| Dark specks with a musty odor | Moisture-related deposits around an accessible front-loader gasket | Inspect gasket folds and other cleaning areas identified in the manual | Odor and specks are suggestive, not a conclusive identification |
| Strong petroleum or unusual chemical odor; heavy grease | Motor oil, machinery grease, or another form of contamination | Stop treating it as ordinary food oil and identify the exposure if possible | Household cooking-oil methods may not be suitable |
Speed Queen’s consumer guide similarly separates darker oily marks from white or blue laundry-product residue, gray mineral-related marks, orange or brown rust-related marks, and dark deposits associated with accumulated laundry products. These are troubleshooting categories, not definitive diagnoses. See Speed Queen’s guide to post-wash stains and possible causes.
A true oil stain often looks darker than the surrounding textile and may remain shiny after the fabric dries. Visual inspection still has limits: concentrated softener may look waxy, incompletely rinsed laundry product may leave a visible patch, and dark washer residue may smear across fabric.
White or blue marks make laundry-product residue worth investigating, particularly when the load was crowded, the product dose was high, or a dispenser did not empty properly. Do not automatically add more detergent to remove them. More product creates more material that must be rinsed away.
Gray marks justify examining water conditions as well as laundry practices. Hard-water minerals can interact with detergent and contribute to dull or gray deposits, but similar marks may result from redeposited soil or washer buildup.
For orange or rusty-brown marks, empty every pocket and inspect the machine for small metal objects before assuming there is a plumbing problem. If marks recur after loose objects have been ruled out, the appliance and water supply deserve attention.
Black or brown smears may be accumulated soil and laundry-product grime. In a front-loader, inspect the accessible folds of the door gasket for trapped material. Dark specks accompanied by a musty odor may point toward deposits around the gasket, but that combination does not conclusively identify the material.
Do not treat motor oil or unknown industrial contamination as interchangeable with cooking oil or body lotion. Motor oil may contain additional contaminants and can require professional treatment rather than an ordinary household stain-removal process. Tide distinguishes motor oil and other contaminated oils from ordinary cooking-oil stains.
Use the pattern of affected laundry to narrow the source
The number of affected garments and the timing of the marks can be more useful than color alone. Separate the problem into three patterns.
One isolated garment: Start with the garment’s history. An overlooked drop of cooking oil, salad dressing, butter, cosmetics, sunscreen, moisturizer, or body oil may become easier to see after washing. Check pockets and consider whether the item contacted food, a countertop, bicycle parts, skin-care products, or another contaminated surface.
An isolated mark does not rule out the washer, but it gives you less reason to assume a machine-wide problem. Treat the garment first and watch subsequent loads.
Several garments in the same load: Investigate what the items shared during that cycle. Possibilities include:
- Too much detergent for the product, load, or water conditions
- Fabric softener contacting clothing directly
- An overloaded drum
- A cycle that did not rinse the load adequately
- A contaminated item transferring grease or debris
- A dispenser deposit releasing during that cycle
Inspect where the marks appear, but do not treat matching locations as proof that a particular dispenser, seal, or drum component caused them.
Recurring marks across multiple loads: Move from isolated stain treatment to systematic troubleshooting. Inspect the accessible drum, dispensers, and gasket; review product dosing; reduce the load size; perform the washer’s approved maintenance procedure; and run controlled loads. If marks continue, investigate the dryer, appliance, and water supply instead of repeatedly exposing good garments.
For each pattern, ask two timing questions:
- Were the marks definitely absent before washing?
- Were they present when the clothing left the washer, or did they appear only after tumble drying?
When possible, inspect garments immediately after the wash. If the spots are already present, the washer, laundry products, water, and preexisting stains remain the main areas to investigate. If a controlled load leaves the washer clear but develops marks after tumble drying, the dryer stage deserves inspection.
A cautious way to isolate the stages is to clean and test the washer first, then air-dry the controlled load. Involve the dryer only after confirming that the air-dried load remains clear. This practical comparison will not identify a failed part, but it prevents both appliances from being included in every test.
Keep the test conditions simple. Do not simultaneously change detergent, softener, load size, cycle, water temperature, stain treatment, and dryer settings. If the next load comes out clean, you will not know which change mattered.
Record marks that repeatedly appear in similar places, but do not use their location as a component map. Garments move during washing and drying, so location can guide inspection without diagnosing a dispenser, gasket, drum, seal, or dryer surface.
Run controlled washer checks one variable at a time
Begin with the washer’s manual. Find the model-specific instructions for:
- Drum or tub cleaning
- Dispenser removal and cleaning
- Door-gasket care
- Filter or drain-pump access, if user access is permitted
- Approved maintenance cycles
- Compatible washer-cleaning products
- Correct detergent type and placement
- Load limits and rinse options
Do not substitute a universal vinegar, bleach, baking-soda, or commercial-cleaner recipe. Washer materials, automatic dispensing systems, and maintenance instructions differ. Use only the maintenance method and products approved for the model.
With the washer empty and switched off as directed by its manual, inspect accessible areas. Look inside the drum, detergent and softener compartments, and the folds of a front-loader gasket. Remove only parts identified as user-removable. Check for deposits, sticky material, trapped debris, loose objects, discoloration, or visible damage.
Wipe accessible drum and gasket surfaces with a clean white cloth. If gray, black, brown, or greasy material transfers, you have evidence that transferable residue is present. The wipe does not establish whether that material is detergent, softener, soil, moisture-related buildup, or mechanical grease. A white-cloth check and accessible gasket inspection are among the troubleshooting steps described by Van Vreede’s washer-stain guide.
Clean the washer using only its approved maintenance cycle, method, and products. An empty cleaning cycle may remove deposits, but it is not a guaranteed repair and cannot correct a damaged component.
Next, review product use:
- Use the detergent type intended for the machine.
- Follow both the detergent label and washer manual.
- Account for detergent concentration, load size, soil level, and water conditions.
- Put detergent and softener only in their intended locations.
- Do not use an arbitrary number of tablespoons as a universal dose.
- Temporarily omit fabric softener, scent boosters, and similar optional products.
- Reduce the load size.
- Choose a cycle and rinse setting suitable for the fabric and load.
Excess product, crowded loads, and inadequate rinsing are plausible contributors to residue-like marks. Temporarily omitting softener does not prove that it caused the original spots; it simply removes one variable.
After the approved cleaning procedure, run a small load of clean, colorfast towels without detergent, softener, scent products, or stain treatments. If the machine permits safe observation during normal use, note whether visible suds remain. Inspect the wet towels under good light, then air-dry them.
A detergent-free towel load was suggested in one unresolved JustAnswer customer exchange as a way to look for continuing suds associated with possible product buildup or overdosing. The washer was not inspected, no test result was reported, and no cause was confirmed, so the procedure should be treated only as a screening step. The JustAnswer exchange illustrates both the test and its limitations.
Interpret the result cautiously:
- Suds appear: Residual laundry product is plausible, but the test does not identify the product or measure the extent of buildup.
- New spots appear: A continuing washer, water, or residue problem is plausible, but inspection may still be needed to identify it.
- The towels remain clear: That is encouraging, but it does not rule out an intermittent defect or a problem limited to certain products, cycles, loads, or temperatures.
If the product-free test is clear, reintroduce variables separately. For example, run a later load with correctly dosed detergent but no softener. If that remains clear, test softener separately only if you still intend to use it and both its label and the washer instructions permit it. Keep the load size and cycle consistent where practical.
Chemical safety
Do not mix washer cleaners or household cleaning chemicals. Verify product compatibility against both the cleaner label and the washer manual, and use only combinations explicitly authorized by those instructions. General cleaning articles may list several alternatives, but that does not make the products compatible with one another or suitable for every appliance.
Remove a suspected oil spot from washable fabric
Once a mark reasonably resembles ordinary food, cosmetic, or body oil—and the garment is washable—use a conservative sequence: check, blot, spot-test, pretreat, rinse, wash, inspect, and air-dry.
1. Read the care label
Confirm whether the garment is machine washable, hand-wash only, or dry-clean only. Note the permitted water temperature and drying restrictions. Do not apply a household oil-stain process to a dry-clean-only item.
2. Spot-test the proposed treatment
Apply a very small amount in an inconspicuous area, such as an inside seam. Rinse it and let the test area dry so you can check for color loss, rings, finish changes, stiffness, or distortion. Spot-testing is particularly important for dark colors, unstable dyes, coated fabrics, prints, and delicate textiles.
3. Blot any remaining surface oil
Place clean absorbent material beneath the spot and blot gently from both sides. Replace the material as it picks up oil. Do not scrub outward or grind the substance into the weave.
If the garment has already been washed, there may be no surface oil left to blot. Do not abrade the fabric merely to complete this step.
4. Pretreat sparingly
For washable cotton or a common synthetic fabric, apply a small amount of clear grease-cutting dish soap to the affected area. Dish soap is a supported pretreatment option for ordinary grease, but it is not universally suitable for every textile.
Work it into sturdy fabric gently with clean fingers or a soft brush. Use only enough pressure to distribute the treatment within the marked area. Skip brushing if the fabric is loosely knitted, delicate, coated, pile-finished, or prone to distortion.
Use a short dwell time as the conservative starting point. Tide’s consumer instructions use about 10 minutes for dish-soap pretreatment on dried oil stains before rinsing and further treatment. This is a source-specific example, not an optimal duration for every oil or fabric. Older or previously dried stains may require repetition or a care-label-compatible soak.
5. Rinse out the dish soap
Rinse the treated area thoroughly before putting the garment in the washing machine. Dish soap is intended here as a limited spot treatment, not as automatic-washer detergent. Never pour it directly into the washer as a substitute for laundry detergent.
6. Wash according to the care label
Use an appropriate laundry detergent and a permitted cycle. Published consumer guidance differs on whether initial treatment should be cooler or use the warmest fabric-safe temperature. Because there is no universal temperature for every combination of oil, dye, and textile, let the garment’s care label govern.
Avoid overloading the machine. The treated area needs room for wash water and rinsing.
7. Inspect before applying heat
Check the area while the garment is wet, recognizing that wet fabric can conceal differences in tone. Air-dry it and inspect again under bright light.
If a greasy shadow remains, repeat the treatment. Do not tumble-dry merely because the mark has become less noticeable.
For a broader reference organized by stain age and surface, see Stain List’s grease and oil stain guide. It is a contextual companion, not independent proof that one method will work on every fabric.
Adjust the treatment for stain age and fabric type
Stain age, previous heat exposure, and textile construction all affect how cautiously you should proceed.
Fresh or newly discovered marks: For a washable, colorfast cotton or synthetic garment, blot any surface oil, spot-test, apply a brief and gentle pretreatment, rinse thoroughly, wash according to the care label, and air-dry for inspection. Do not assume success until the fabric has dried and the mark is no longer visible.
Previously washed marks: A spot that survived one wash may need repeated pretreatment or a longer soak if the care label permits it. Rinse between treatments instead of indefinitely layering dish soap, detergent, powders, and stain removers. Complete removal is not guaranteed.
Marks that have passed through the dryer: Set expectations lower because heat exposure may make residual oil harder to remove. Repeat the sequence—pretreat, rinse, soak if permitted, wash, and air-dry—without applying further dryer heat. Maytag’s consumer guidance advises pretreatment and soaking for old stains, followed by washing and repetition when necessary, while continuing to follow the care label.
For cotton and common synthetics, possible options include a small amount of clear dish soap, a fabric-compatible commercial stain treatment, or liquid enzyme detergent. Choose one treatment at a time, spot-test it, and follow both the product instructions and garment label.
For wool, silk, rayon, knits, unstable dyes, technical coatings, waterproof finishes, embellished garments, and other delicate materials, avoid vigorous brushing, long unverified soaks, and generic hot-water advice. Agitation, water, detergent, and prolonged soaking can affect these materials differently. Use a mild process specifically permitted by the label or consult a professional cleaner.
Maytag separates cotton and synthetic treatment from its guidance for wool, knits, and delicate fabrics, and directs readers to follow the care label for treatment and temperature. It also lists cooking oil, cosmetics, moisturizers, body oil, and butter among common oil-based stains.
Take a dry-clean-only, valuable, antique, fragile, specialty, or emotionally important garment to a professional. Tell the cleaner:
- What you think caused the mark
- Whether it appeared before or after washing
- Which products you already applied
- Whether it has been tumble-dried
- Whether similar marks appeared on other garments
Do not treat motor oil or unknown industrial grease as interchangeable with cooking oil. Stop home treatment if the garment changes color, develops a pale ring, loses its finish, becomes stiff, stretches, shrinks, pills, or shows fiber damage.
Prevent oily-looking spots from returning
Prevention involves both garment inspection and washer control. The aim is to keep unnoticed grease, excess laundry products, poor rinsing, and appliance deposits from becoming recurring problems.
Pretreat known grease before washing. Check cooking clothes, children’s garments, workwear, pillowcases, and items exposed to cosmetics or moisturizer. Mark the stain location if it may be difficult to find once wet.
Inspect garments before transferring them to the dryer. If a mark remains, air-dry and retreat it. This pause also preserves evidence about whether the spot appeared in the washer or during drying.
Use the detergent type and dose directed for the washer and product. More detergent is not automatically better. Product concentration varies, and the appropriate amount depends on the load, soil, machine, and water conditions.
Avoid overloading. A tightly packed load may not move or rinse adequately. Follow the machine’s loading instructions rather than judging capacity solely by whether another item can be pushed into the drum.
Use fabric softener only as directed. Add it through the intended dispenser, and do not pour it directly onto clothing unless the product and washer instructions specifically call for that method. If residue is suspected, pause softener and scent products during controlled troubleshooting rather than declaring them the confirmed cause.
Clean the washer as its manual directs. Follow the model-specific schedule and method for the drum, dispenser, and accessible gasket. Remove trapped objects promptly. Do not assume that adding more cleaner or running repeated hot cycles is safer or more effective.
Limit household remedies. Dish soap has a narrow role as a sparing garment pretreatment followed by thorough rinsing. It is not washer detergent. Repeated applications of dish soap, baking soda, powders, and soaking solutions can introduce additional residue and complicate diagnosis.
Investigate persistent mineral or rust-colored marks. If orange, brown, or gray deposits continue after loose metal objects and product use have been checked, look beyond stain remover. Water conditions, supply piping, and the appliance may require evaluation.
Keep a short troubleshooting log. For intermittent problems, record:
- Date
- Cycle and temperature
- Load size and fabric types
- Detergent type and amount
- Softener or scent products
- Whether the washer had recently been cleaned
- Which garments were affected
- Whether marks appeared before or after drying
Know when cleaning is no longer enough
Garment treatment and washer cleaning have limits. Escalate when continued household testing risks damaging more clothing or obscuring the source.
Contact a professional cleaner for dry-clean-only, valuable, fragile, antique, specialty, coated, or persistently stained garments. Professional care is also preferable when the contaminant is unknown or involves motor oil or industrial grease.
Arrange model-specific appliance service if new oily or dark marks continue after you have:
- Confirmed that the marks were absent before washing.
- Corrected detergent type and dosing.
- Removed softener and scent products from test loads.
- Reduced the load size.
- Cleaned the washer according to its manual.
- Run a controlled product-free towel load.
- Air-dried the test load to isolate the washer from the dryer.
Escalate sooner if you see a leak, transferable grease returns quickly after cleaning, an accessible seal appears damaged, or the machine makes an unusual noise. Leave internal diagnosis and repair to model-appropriate service unless the manual identifies a specific procedure as user service.
Commercial troubleshooting articles may mention seals, bearings, drums, belts, or hoses as possible sources of grease. These are reasons to request inspection, not evidence that any one component has failed. A cleaning-company overview, for example, lists product residue and appliance components among the possibilities but does not provide a test that confirms a specific failure. Sparkly Maid’s discussion illustrates why recurring spots require inspection rather than visual diagnosis.
Call a plumber or appropriate water-supply professional when orange, rusty, or mineral-like marks persist across loads and cannot be explained by objects left in the washer. Note whether discoloration also appears in sinks, toilets, or other water-using fixtures, and whether it affects hot water, cold water, or both.
Do not regard an empty maintenance cycle as a guaranteed repair. It may remove accessible buildup, but it cannot prove that an intermittent appliance defect or water issue is gone.
If controlled loads continue to acquire new marks, pause normal laundry use. Repeatedly washing good clothing in a suspected machine turns troubleshooting into preventable garment damage.
Why do oil spots appear only after clothes have been washed?
Some stains were present but difficult to see before washing. Washing can also introduce or redistribute detergent residue, softener, minerals, rust, or deposits from the machine.
Determine whether the spot is present when the item leaves the washer or appears only after tumble drying. Then compare the affected garment with the rest of the load and with later controlled loads.
Can too much detergent or fabric softener leave greasy-looking marks?
Yes. Excess or poorly rinsed laundry products are plausible causes of oily-looking or waxy marks, particularly when a load is crowded, the detergent is unsuitable for the machine, or softener contacts clothing directly. Appearance alone cannot confirm which product caused a particular spot.
Follow the detergent label and washer manual, temporarily omit optional products, reduce the load size, and test one variable at a time. Do not apply a universal detergent quantity to every machine and product.
Can I use dish soap on oil spots before rewashing the garment?
On washable, colorfast cotton or a common synthetic garment, a small amount of clear grease-cutting dish soap is a supported pretreatment option. Check the care label, spot-test first, apply it sparingly, work gently, and rinse it out thoroughly before machine washing.
Do not pour dish soap into the washer or assume it is suitable for silk, wool, unstable dyes, coated fabrics, or other delicate materials.
How do I treat a spot after the garment has already gone through the dryer?
Expect the mark to be harder to remove. Spot-test, pretreat gently, rinse, soak only if the care label permits, wash again, and air-dry for inspection. Repeat only while the fabric remains sound and the mark continues to improve.
Do not apply more dryer heat while the spot remains visible. Complete removal of a heat-exposed stain cannot be guaranteed.
Do recurring oily spots mean the washing machine is leaking oil?
No. Recurring spots justify investigating the washer, but they do not prove an oil leak. Product residue, overloading, inadequate rinsing, accumulated grime, minerals, rust, water conditions, and an appliance defect are all possibilities.
Protect the garment from dryer heat, determine whether the problem is isolated or recurring, treat washable fabric conservatively, and test the laundry process one variable at a time. If clean test loads continue to develop spots after manual-approved washer cleaning and corrected product use, stop assuming the cause and arrange appropriate appliance or water-supply inspection.