 StainList
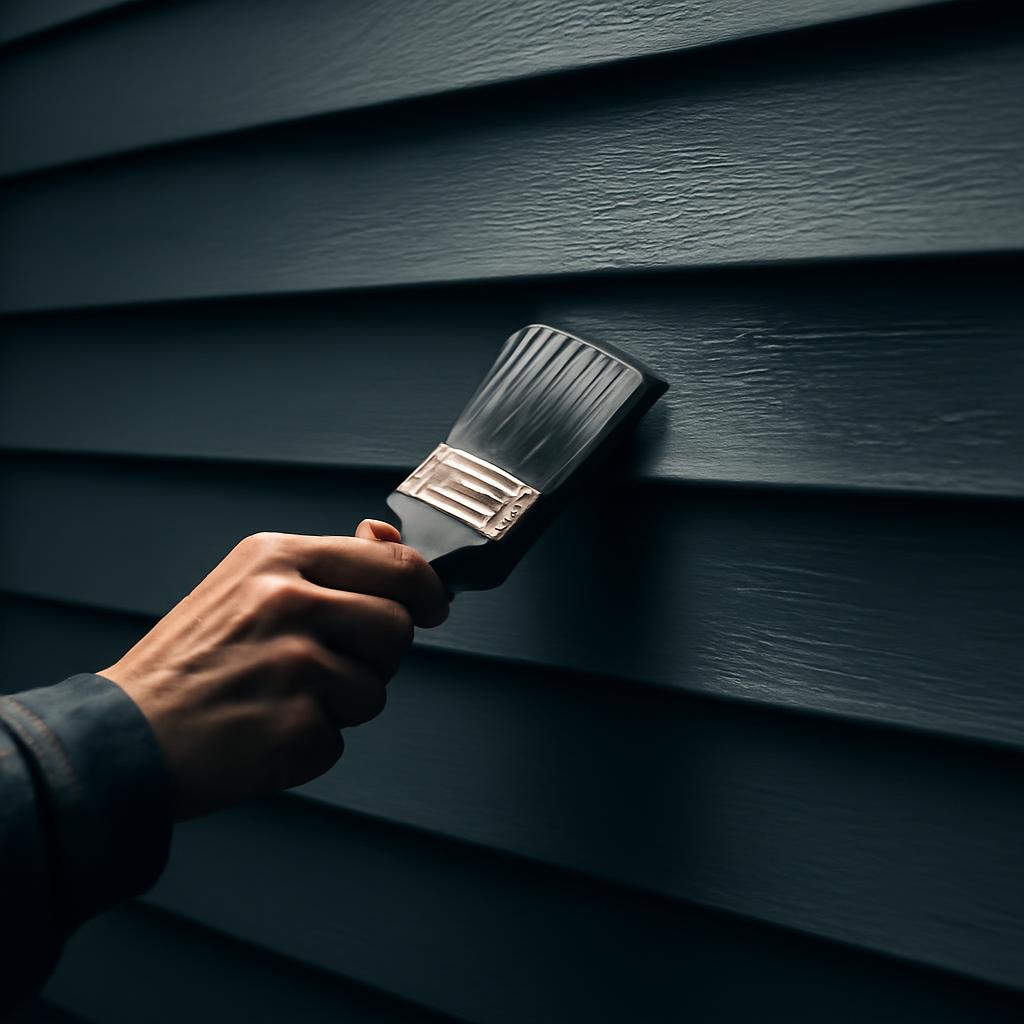
Yes—vinyl cladding can be painted, but only when the cladding is still in good enough condition to justify it. Across manufacturer, retailer, and contractor guidance, the consistent answer is conditional: painting works when the vinyl is structurally sound, thoroughly cleaned, dry, and coated with a vinyl-safe exterior paint that can flex with temperature changes. If the cladding is warped, brittle, loose, cracked, or otherwise failing, paint is usually a cosmetic stopgap rather than a real fix. (Sherwin-Williams)
That distinction matters because most homeowners are not really asking whether vinyl is paintable in theory. They are asking whether their faded, chalky, dated-looking exterior is worth painting instead of replacing. If the problem is mostly appearance, repainting can be a practical middle ground. If the problem is movement, damage, moisture-related distortion, or age-related brittleness, painting does not solve the substrate underneath. (Student Works)
One caution before getting into the how-to: publicly available guidance on this topic is heavy on paint manufacturers, retailers, and painting contractors. That makes the prep and product advice useful, but it also means cost, lifespan, and replacement thresholds should be treated as estimates and judgment calls—not guarantees. (Sherwin-Williams)
Related: how to get soot out of clothes.
Is Painting Vinyl Cladding Possible?
Painting vinyl cladding is possible when the material is still sound and the prep is done properly. Sherwin-Williams explicitly says vinyl siding can be painted, and guidance aimed specifically at vinyl cladding from Pro Works, Student Works, and Anderson’s Painting reaches the same basic conclusion. (Student Works)
Why it works better now than it used to comes down largely to paint chemistry. Modern acrylic exterior coatings are repeatedly described as flexible enough to move with exterior materials as temperatures change. That matters on vinyl because the surface expands and contracts more than many homeowners expect. A paint film that cures too hard is more likely to crack, lose adhesion, or show stress along laps and seams. (Swift Painting)
That is why the strongest product consensus centers on exterior 100% acrylic latex or similar vinyl-safe flexible coatings, not just any leftover exterior paint. Sherwin-Williams, Anderson’s Painting, and Home Depot Canada all steer readers toward acrylic systems for adhesion and flexibility on vinyl. (Home Depot Canada)
But “possible” is not the same as “always advisable.” Even pro-painting guides that favor repainting draw a line at visibly damaged siding. Warped, severely cracked, loose, or brittle panels should be repaired or replaced first, because paint will not flatten buckled material or restore flexibility to aging vinyl. (Swift Painting)
So the honest answer is simple: yes, you can paint vinyl cladding if the cladding is still a good paint substrate. If it is not, the right project is repair or replacement first.
When to Avoid Painting Vinyl Cladding
The clearest time to avoid painting is when the cladding is physically failing. Warped, buckled, cracked, loose, or brittle panels are poor candidates because paint cannot correct distortion, reverse UV embrittlement, or fix installation problems. Anderson’s Painting notes that buckling or panels pulling away can point to deeper moisture or installation issues, and Swift Painting similarly says cracked, loose, or severely warped siding should be repaired before coating.
Age is a warning sign, but not a universal rule by itself. Some contractor guidance is stricter than others. Puetz Construction says siding over 20 years old is often a better replacement candidate, especially if it is brittle, while Anderson’s Painting frames repainting as best suited to structurally sound siding that is generally under 20 years old.
The second major reason to avoid painting is an unsafe color jump. Darker colors absorb more heat, and multiple sources warn that going darker than the original color can warp or buckle vinyl if the paint system is not specifically designed for that change. Sherwin-Williams says darker-than-original colors can cause warping and other defects, and Student Works, Anderson’s Painting, and Puetz Construction echo the same risk.
Warranty is the third big checkpoint. Sherwin-Williams advises homeowners to check with the siding manufacturer before painting because painting may void a remaining warranty, and Bunnings Workshop gives similar advice when homeowners are considering darker colors or product-specific limits. Since warranty language varies by brand and product line, this is a check worth making before you buy paint. (Bunnings Workshop)
A practical do-not-paint list looks like this:
- the panels are buckled, cracked, loose, or visibly pulling away from the wall
- the vinyl feels brittle enough to crack or shatter easily when handled
- you want to move from a very light color to a standard dark coating without a vinyl-safe system
- your manufacturer says painting conflicts with warranty terms you still care about
If several of those apply at once, repainting is much harder to justify as the “budget” choice.
Step-by-Step Preparation for Painting
Preparation is the part that most strongly separates a durable repaint from an early failure. Across the available guidance, the prep sequence is remarkably consistent: wash thoroughly, let the cladding dry, repair defects, dull slick spots where needed, protect surrounding surfaces, and test before committing to the whole wall. (Harding’s)
Start with washing. Dirt, mildew, pollen, chalking, and oxidation all interfere with adhesion. Pro Works recommends either pressure washing or cleaning with mild detergent and a soft brush, while Home Depot Canada also advises a soft-bristle brush or pressure washer. The key caveat from Home Depot Canada is important: do not force water behind the vinyl panels.
Low pressure and technique matter more than brute force. Harding’s warns that too much pressure can damage vinyl, and Home Depot Canada repeats the warning about driving water behind the panels. If the house is older or the siding already feels somewhat brittle, that caution becomes even more important. (Harding’s)
Chalk and oxidation deserve special attention. ImageWorks is unusually direct on this point, arguing that peeling on vinyl is tied overwhelmingly to poor prep, especially incomplete oxidation removal. That aligns with older painter advice in the PropertyInvesting discussion, which warned that aged vinyl often turns powdery and that painting over that residue means the coating is bonding to powder rather than to the vinyl. The second source is much weaker, but it reinforces the same practical risk. (ImageWorks)
After washing, let the cladding dry fully. Several sources place the drying window at roughly 24 to 48 hours before painting. That is not an arbitrary pause; paint over damp siding is more likely to have adhesion and curing problems later. (Harding’s)
Then repair the surface. Pro Works recommends filling cracks and holes with exterior-grade caulk and sanding rough areas, while Harding’s and Puetz Construction both emphasize that paint does not hide unrepaired flaws well. Fresh paint usually makes cracks, dents, and uneven joints look more obvious, not less. (Harding’s)
Light sanding is situational, not always mandatory. If the vinyl is glossy, if you have repaired areas, or if you are dealing with especially slick bare sections, light sanding can improve bite. Bunnings Workshop specifically recommends lightly sanding to remove sheen before priming bare vinyl, and both Harding’s and Pro Works mention sanding rough or slick spots as part of prep.
Before painting, protect everything around the walls. Sherwin-Williams advises taping around windows, shutters, and outlets; Home Depot Canada recommends masking doors and trim and covering nearby items; Pro Works makes the same point for surrounding surfaces. If shrubs or branches rub the siding, cut them back first so they do not drag through fresh paint later.
One prep step that deserves more attention than it usually gets is a test patch. Puetz Construction recommends testing a small area for both adhesion and color.
A simple prep checklist looks like this:
- Wash off dirt, mildew, chalk, and oxidation.
- Keep water out from behind the panels.
- Let the siding dry for 24 to 48 hours.
- Repair cracks, holes, or loose details.
- Sand glossy or rough areas if needed.
- Mask trim, windows, outlets, landscaping, and adjacent surfaces.
- Test a small section for adhesion and color before full application.
Best Paints and Primers for Vinyl Cladding
If you get the prep right but choose the wrong coating, the project can still fail. The clearest consensus in the evidence base is that vinyl cladding should be painted with a high-quality exterior acrylic system formulated to handle movement. Anderson’s Painting recommends 100% acrylic exterior paint for vinyl cladding, Home Depot Canada says a 100% acrylic base offers the best adhesion, and Sherwin-Williams recommends an exterior acrylic latex system for vinyl siding.
You will also see slightly different labeling in different guides. Harding’s promotes acrylic urethane paint for vinyl siding, while Bob Vila recommends latex urethane paint containing acrylic or urethane resins. Those names are not identical, but the performance idea is similar: use an exterior-rated, flexible, adhesive coating meant for moving substrates, not a generic paint selected only by color or price. (Bob Vila)
Primer is more conditional. Sherwin-Williams says sound siding does not necessarily need primer. Home Depot Canada recommends primer on pitted or worn surfaces. Pro Works suggests a bonding primer when needed, especially for major color changes, and Bunnings Workshop recommends primer for bare vinyl after lightly sanding. The most defensible synthesis is: primer is not automatically required everywhere, but it is often a smart choice on bare, glossy, repaired, worn, or drastically recolored areas.
When you do prime, stick with acrylic-compatible bonding primers intended for slick surfaces. Anderson’s Painting specifically warns against oil-based primers for vinyl and recommends acrylic-style bonding products instead.
Oil-based topcoats are the clearest no-go. Harding’s says oil-based paints make vinyl rigid and more likely to crack, and Puetz Construction gives the same warning because the siding moves as temperatures change.
Brand examples can be helpful, but they should be treated as examples, not universal prescriptions. Sherwin-Williams highlights its VinylSafe system; Pro Works mentions Sherwin-Williams, Benjamin Moore, and Behr; ImageWorks also names Sherwin-Williams, Pittsburgh Paints, Behr, and Benjamin Moore; Bunnings discusses Dulux products in the Australian market. The real selection test is not the logo—it is whether the product is exterior-rated, flexible, and approved for vinyl.
In practical terms, a safe product stack is:
- a high-quality exterior 100% acrylic latex or comparable vinyl-safe flexible topcoat
- a bonding primer only where the surface condition calls for it
- no oil-based primer or topcoat on vinyl
Safe Color Choices to Prevent Warping
Color choice on vinyl is not only about appearance. It is also about heat load. Darker coatings absorb more solar heat, and multiple sources warn that the extra heat can push vinyl toward warping or buckling. That is why the safest advice is to stay at the same lightness level as the original finish, or lighter, unless the paint system is specifically designed for darker use on vinyl.
Sherwin-Williams addresses that problem with its VinylSafe color line. The company says those colors are formulated to resist warping and buckling, including darker shades that would otherwise be riskier. That does not mean any dark color from any brand is automatically safe. It means some manufacturers offer vinyl-specific systems that can widen your options if you follow their product rules.
If your cladding manufacturer gives color restrictions or paint recommendations, follow those first. Bunnings Workshop specifically recommends checking with the cladding manufacturer before going darker, because acceptable limits can vary by product.
In the Bunnings discussion, a team member suggested a higher-LRV grey such as Dulux Dieskau Grey as a safer option than a deep charcoal. That should not be read as a universal magic color; it is just a useful example of the broader principle that moderate mid-tones are usually less risky than pushing light vinyl all the way to near-black.
A sensible color ladder is:
- same shade family as the existing cladding
- slightly lighter or similarly light neutral
- a medium tone approved by the paint maker or siding manufacturer
- a darker tone only if the system is explicitly vinyl-safe and compatible with your cladding
If durability matters more than drama, lighter and moderate colors remain the lower-risk choice.
DIY vs Professional Painting: Costs, Time, Results
Painting vinyl cladding is usually cheaper than replacing it, but the numbers in public guides vary widely enough that they should be treated as market-specific estimates, not universal pricing. On the DIY side, Harding’s estimates about $500 to $1,200 in materials for an average home, including paint, primer, masking supplies, and optional sprayer rental. Bob Vila, by contrast, gives a much higher illustrative figure of about $4,000 to paint a 2,000-square-foot home. Those are not direct contradictions so much as reminders that size, paint quantity, equipment, and scope can move the budget a lot.
Professional pricing is similarly broad. Harding’s reports about $2 to $5 per square foot, with many homes landing around $3,000 to $7,000 in its Canadian markets, while ImageWorks gives an average-home range of about $4,000 to $12,000 depending on size and access. Because both are contractor sources, the safest reading is that professional painting can range from the low thousands into five figures depending on market, complexity, and access.
Replacement is generally reported as much more expensive when the existing siding is still usable. Pro Works says full replacement commonly starts above $15,000, and ImageWorks says painting often costs about 30% to 40% of replacement. Those figures are best used as directional comparisons, not as fixed planning numbers.
Time commitment matters too. Harding’s estimates DIY work at roughly 3 to 10+ days depending on size and complexity, while pro crews may finish in about 2 to 4 days. Student Works says many projects take 1 to 3 days, which is easier to believe for straightforward professional jobs than for a first-time homeowner learning as they go.
DIY usually makes the most sense when:
- the house is single-story or easy to access
-
the cladding is already in good condition and needs mostly cosmetic refresh
-
you are comfortable with masking, ladder work, weather timing, and paint-sprayer use
Professional help makes more sense when:
- the home is multi-story or access is awkward
- you need scaffolding or extensive ladder work
- you want sprayed application on a large textured exterior
- you want somebody else carrying execution risk and, in some cases, a workmanship warranty
Harding’s says some professional painters offer 2- to 5-year warranties. That is useful, but it should not be confused with a guaranteed service life for the paint itself. Climate, surface prep, sun exposure, paint quality, and maintenance still matter.
The bottom line on DIY versus pro is less about a single price number than about risk. If the walls are easy to reach and the cladding is in clearly good condition, DIY can be reasonable. If the house is tall, complex, or already questionable, professional help is often the safer economy.
How to Apply Paint for Professional Results
For large exterior vinyl surfaces, spraying is the preferred method in most of the guidance. Home Depot Canada says a paint sprayer gives better coverage in large areas, laps, and grooves, and ImageWorks strongly favors spray application for a like-new look.
That does not mean a brush or roller has no place. Sherwin-Williams says vinyl can be painted with a sprayer, roller, or brush, and Anderson’s Painting recommends spraying for evenness but back-brushing for adhesion.
Paint from the top down. Home Depot Canada and ImageWorks both recommend a top-to-bottom sequence so you can catch drips and keep overlaps controlled. Thin coats are safer than trying to force full coverage in one heavy pass.
Weather is a major part of application quality. Harding’s says to avoid painting below 10°C, above 29°C, above 85% humidity, or when rain is expected within 24 hours. Puetz Construction gives a similar ideal temperature band of 50°F to 85°F. Bob Vila and Pro Works also caution against hot direct sun, high humidity, or poor drying conditions. (Pro Works)
Coat count depends on the surface. Sherwin-Williams says two coats are appropriate on new bare siding and one coat may be enough on previously painted siding if coverage is solid, while Pro Works recommends two thin coats in many situations.
One especially vinyl-specific tip comes from ImageWorks: paint when the siding is in its expanded state rather than at its coolest contracted state. The idea is to reduce the chance of unpainted edges showing later at seams when the material moves. That is a useful practical tip, though it is contractor advice rather than a universal published standard.
A solid application toolkit is basic but not optional:
- paint sprayer for broad coverage
- roller or brush for details and touch-up
- ladder or scaffolding suited to the house height
- painter’s tape, drop cloths, and masking supplies
- safety gear
The basic rhythm is: spray light coats, work top-down, stay within moderate weather, and do not rush dry time.
Common Mistakes and How to Avoid Them
The most common failure point is poor cleaning, especially failure to remove oxidation and chalk. ImageWorks goes so far as to say peeling on vinyl is nearly always tied to surface prep, especially oxidation removal. Anderson’s Painting and Harding’s both list dirty siding as a leading reason paint jobs fail. If the coating is really adhering to powder, mildew, or residue instead of the vinyl itself, even premium paint has a weak foundation.
The second common mistake is painting in bad weather. Too cold, too hot, too humid, or too close to rain all increase the chance of adhesion and curing trouble. Direct sun adds another problem by overheating the surface as you work. Harding’s gives the clearest set of red flags: below 10°C, above 29°C, above 85% humidity, or rain within 24 hours.
The third is using the wrong paint. Standard interior paint, cheap non-vinyl-specific exterior paint, and oil-based systems recur throughout the failure warnings. Vinyl needs a coating that can tolerate movement and bond to a slick plastic surface. If the product is not clearly suitable for exterior use and vinyl or similarly slick substrates, it is the wrong product to test on your house.
Fourth: choosing an aggressive dark color without checking whether it is vinyl-safe. That is how a cosmetic update turns into heat-related warping or buckling. If you want to go darker, use a system specifically approved for vinyl and confirm that the cladding manufacturer does not prohibit it.
Fifth: poor application technique. Brushing a whole large façade is more likely to leave visible marks on long runs and textured profiles, while heavy coats are more likely to look uneven and cure poorly. ImageWorks strongly prefers spray application for this reason, and Home Depot Canada recommends sprayers for better coverage in laps and grooves.
Sixth: skipping repairs because you hope paint will hide defects. Pro Works and Puetz Construction both warn against this. Once the new finish goes on, cracks, dents, and loose panels often become easier to see.
Finally, do not underestimate access and safety. A multi-story vinyl painting job is also a ladder-and-scaffolding job. Harding’s recommends professional help for complex or high work, and Home Depot Canada’s tool list makes clear that this is not just a bucket-and-brush task.
If you want the short version of what usually goes wrong, it is this: homeowners rush cleaning, underestimate chalk, pick the wrong paint, paint in the wrong weather, or push the color too dark.
Do I need primer for vinyl cladding?
Not always. Sherwin-Williams says sound vinyl siding may not need primer, while Home Depot Canada, Pro Works, and Bunnings Workshop all recommend primer when the surface is worn, glossy, bare, repaired, or undergoing a major color change. The safest middle ground is to skip full priming only when the cladding is clean, intact, and already offers a good surface for a vinyl-safe topcoat; otherwise, use a bonding primer where conditions justify it. Avoid oil-based primers on vinyl.
How long does paint last on vinyl cladding?
Treat exact lifespan numbers as estimates, not promises. Contractor guidance commonly puts painted vinyl in roughly the 5- to 10-year range in many real-world cases, while Anderson’s Painting gives a higher 10- to 15-year estimate for a professional job. Sherwin-Williams is more cautious and emphasizes that paint life depends on prep quality, climate, sun exposure, application, product quality, and maintenance. The safest expectation is that longevity varies a lot, and better prep usually matters more than optimistic range claims.
Can I paint vinyl cladding dark colors?
Sometimes, but not safely by default. Standard guidance is to stay the same shade or lighter than the original because darker colors absorb more heat and can warp vinyl. If you want to go darker, use a vinyl-safe color system such as Sherwin-Williams VinylSafe and check with the cladding manufacturer first. If you cannot get clear guidance, a moderate higher-LRV mid-tone is a safer choice than deep charcoal or black.
What’s the difference between vinyl cladding and siding for painting?
Mostly terminology and regional use, not a completely different painting process. Student Works and Pro Works describe vinyl cladding as a term used more often in the UK and Australia for an exterior layer installed over walls for weather protection and insulation, while vinyl siding is the more common North American term for interlocking exterior panels. For painting purposes, the practical advice is largely the same: inspect condition, clean thoroughly, use a flexible vinyl-safe paint, and choose a heat-safe color.
Is painting vinyl cladding cheaper than replacement?
Usually yes, often by a wide margin when the existing cladding is still structurally sound. Harding’s reports professional painting at about $2 to $5 per square foot and many homes at roughly $3,000 to $7,000, while Pro Works contrasts painting at about $4,000 to $6,500 with replacement above $15,000. ImageWorks also says painting often costs about 30% to 40% of replacement. Those figures are contractor-reported estimates, but they all point in the same direction: painting is usually the cheaper option for cosmetically tired but otherwise sound vinyl. If the cladding is failing, though, repainting can become false economy.
Painting vinyl cladding can be a smart refresh if the surface is still sound, the prep is meticulous, and the color choice is conservative enough to avoid heat problems. What it cannot do is rescue failing panels or erase poor workmanship. Inspect first, confirm any manufacturer restrictions, and treat product, cost, and lifespan claims with appropriate caution. That is the difference between a reasonable repaint and an expensive repaint-then-replace cycle.