 StainList
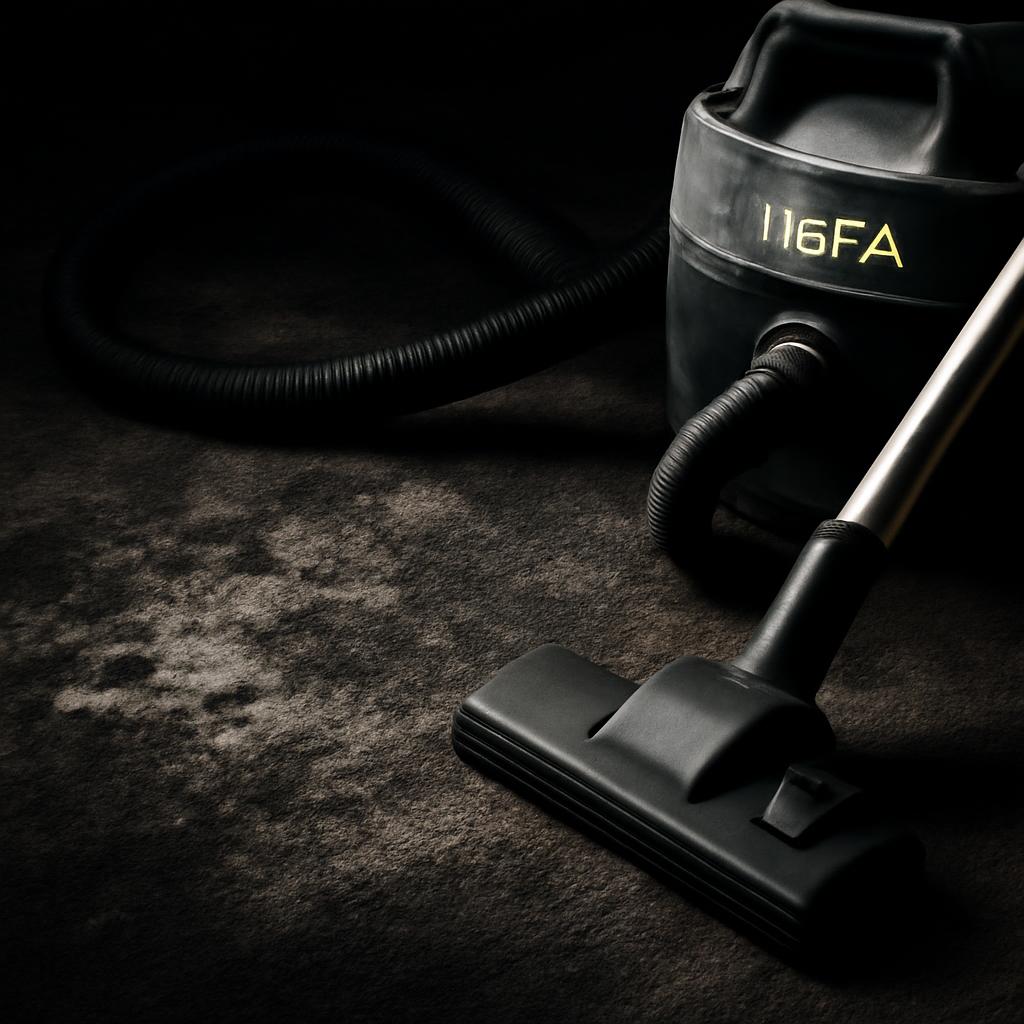
A HEPA vacuum for mold removal is not a cure for mold. In a home stain-cleaning context, it is better understood as a containment tool for dry surface residue.
That distinction matters most after a stain cleanup went too wet. Carpet may look dry on top while the pad underneath stays damp. Upholstery can feel only slightly moist at the fabric face while the foam below stays wet far longer. Stain List’s upholstery guidance warns that the foam under upholstery is slow to dry and can grow mold if saturated, which is why low-moisture stain treatment matters so much on padded furniture Stain List’s red wine stain guide.
If that moisture event later leaves behind dry settled spores or dusty residue on the surface, the wrong vacuum can make a bad situation worse by picking up fine particles and exhausting some of them back into the room. Multiple mold-cleanup guides in this evidence set say regular non-HEPA vacuums can recirculate spores, while sealed HEPA vacuums are intended to trap fine particles instead of blowing them back out Mold Help For You’s HEPA vacuum guide.
But the limits are just as important as the benefits. The same source set repeatedly says HEPA vacuuming does not kill mold, does not remove embedded growth from porous materials, and does not solve the moisture problem that allowed mold to develop.
So the practical homeowner frame is narrow:
- If stain cleaning over-wet carpet or upholstery, address the moisture first.
- If the material is still damp, a vacuum is not the next step.
- If the material is now dry and you are dealing only with leftover surface contamination, a sealed HEPA vacuum may reduce the chance of spreading that residue during cleanup.
This article stays within that limited use case: dry, post-stain surface cleanup in a home, not full mold remediation.
Why Regular Vacuums Spread Mold During Cleaning
The problem with an ordinary household vacuum is not that it cannot pick debris up. The problem is that it may pick particles up and then leak or exhaust some back into the air.
That point is consistent across the mold-focused guides in this evidence set. Mold Help For You says non-HEPA vacuums can let spores pass through ordinary filtration and exit through the exhaust Mold Help For You’s HEPA vacuum guide. Mold Action Plan makes the same argument and adds an important qualifier: filtration alone is not enough if the machine is not sealed, because bypass leaks can defeat the filter. Maple Air likewise says regular household vacuums are not safe for mold-related cleanup because they can recirculate spores back into the air.
That matters because spores behave more like fine dust than like visible crumbs. One commercial mold guide in the evidence pack describes common indoor mold spores as roughly 1 to 20 microns, while the HEPA benchmark cited across this source set is 99.97% capture at 0.3 microns. The article does not need that comparison to promise perfect safety; it is enough to explain why finer filtration is relevant when the material you are disturbing is microscopic.
Some secondary mold-buying content goes further and warns that non-HEPA vacuuming can raise airborne spore counts by 100 to 1000 times during cleanup. Because that figure is presented through a commercial guide rather than primary research here, it is best treated only as an attributed warning, not as a dependable rule for every home. The broader direction, however, is well supported across sources: ordinary vacuum exhaust can redistribute contamination.
This is also why remediation-oriented descriptions place HEPA vacuuming in the cleanup sequence. Mold Inspection Sciences describes complete HEPA vacuuming as a first step in final cleaning because specialized HEPA units are intended to keep microscopic spores from being redistributed while surfaces are being cleaned Mold Inspection Sciences’ explanation of final containment cleaning. That is a different goal from routine housekeeping. It is contamination control.
Just as important, the same evidence set draws a hard line around what not to vacuum. Maple Air says HEPA vacuuming should be limited to small, dry areas and only after most visible mold has been removed, and it specifically warns never to vacuum wet or actively growing mold.
For the post-stain homeowner scenario, that means:
-
If the carpet top is dry and you are removing loose surface residue, a HEPA vacuum may help.
-
If you still have fuzzy visible growth, active moisture, or contamination that appears to extend into porous material, this is beyond simple surface pickup Indiana Mold Remediation’s DIY mold cleaning guide.
What Defines a True HEPA Vacuum for Mold Work
When people search for a hepa vacuum for mold removal, they often focus on the filter label first. That makes sense, but for this use case the more important idea is a sealed HEPA system, not just a HEPA component somewhere inside the machine.
Across this evidence set, the most consistent performance language is a filter rated to capture 99.97% of particles at 0.3 microns HEPA Vacuum Requirements for Mold Remediation. Some third-party guides also use terms such as “True HEPA,” and some mention “H13,” but this article does not treat those labels as interchangeable certification systems. Labeling language varies by source and market. For a homeowner reading a product page, the clearest practical benchmark in this evidence set is the written capture claim plus evidence that the machine is sealed.
Why the sealing matters: a vacuum can contain a high-efficiency filter and still leak contaminated air around the bag dock, hose connection, housing seam, or gasket. Mold Action Plan says the filter alone is not enough if the machine is not fully sealed. Branch Basics makes the same consumer-facing point, warning that many vacuums marketed as HEPA are not certified sealed and may leak at connections Branch Basics’ article on sealed HEPA vacuums.
That is also why looser phrases such as “HEPA-type,” “HEPA-style,” or “HEPA-like” deserve caution. Third-party guides in this pack say those labels may not meet the same performance benchmark as a true HEPA claim. The safest takeaway for a homeowner is simple: do not assume the word “HEPA” by itself tells you enough.
Bag design matters too. Multiple sources prefer bagged machines over bagless ones for mold-related cleanup because emptying a dust cup can release a small cloud of the same fine material you were trying to contain. For ordinary dirt, that may just be messy. For dry spore residue after a moisture event, it undermines the whole containment goal.
A useful system also usually includes multi-stage filtration. Mastercraft’s contractor guide describes a sequence such as pre-filter, collection bag, then final HEPA filter so larger debris is intercepted before it loads the HEPA stage. Mold Help For You likewise recommends pre-filters because they extend HEPA life.
For this article’s limited homeowner use case, the most defensible checklist is short:
- Look for a clearly stated HEPA performance claim such as 99.97% at 0.3 microns.
- Prefer a sealed system, not just a HEPA exhaust filter Branch Basics’ article on sealed HEPA vacuums.
- Prefer bagged over bagless for easier contained disposal.
- Treat pre-filters and multi-stage filtration as practical advantages, not marketing extras.
In other words, for mold-adjacent cleanup you are buying the whole containment path, not just a filter name.
Key Features for Effective Mold Spore Vacuuming
After filtration and sealing, the next question is whether the machine is suited to the kind of dry cleanup a homeowner actually has: carpet tops, upholstery faces, stairs, edges, closet corners, and the dusty residue left after a moisture mistake.
One group of third-party buying guides focuses on airflow and suction. Mold Action Plan suggests rough figures around 100+ CFM and 80+ inches of water lift for mold cleanup, while US Cleaning Tools suggests about 110+ CFM for many residential jobs and more for larger commercial work US Cleaning Tools’ guide to mold remediation vacuums. Because those numbers come from seller-adjacent content rather than independent mold-emission testing in this pack, they should be read as rules of thumb, not as safety thresholds or pass-fail standards.
Still, the concepts are useful:
- CFM helps explain how much air the vacuum can move.
- Water lift helps explain pulling ability through hose, tool, and carpet nap.
- For fine dry contamination on carpet or upholstery, you generally want enough of both that the vacuum is actually lifting material rather than just skimming over the surface US Cleaning Tools’ guide to mold remediation vacuums.
For homeowners, however, raw suction is only part of the story. Ease of control matters just as much, because dry surface cleanup works best when it is slow and deliberate. Consumer and remediation guides in this evidence set favor vacuums that are easier to carry through a house, with manageable weight, long cords, and practical detail tools Spycor Environmental’s HEPA vacuum guide.
For this specific stain-aftermath scenario, the most useful features are usually:
- a carpet head or brush option that can work the top of the pile,
- a crevice tool for baseboards, corners, seams, and stair edges,
- a soft brush or upholstery tool for dry fabric surfaces, Indiana Mold Remediation’s DIY mold cleaning guide.
Dry-only versus wet/dry is another real distinction. Mastercraft’s guide separates dry HEPA vacuums, aimed at fine particulates and post-remediation pickup, from wet/dry HEPA units, used on jobs that also involve liquid recovery or wet debris. Mold Action Plan presents wet/dry capability as optional rather than universal and notes that some value-oriented wet/dry units are not as fully sealed as more remediation-focused machines.
That translates into a simple homeowner rule:
- If the job is dry surface spore pickup, a dry sealed HEPA vacuum is usually the cleaner and simpler match.
- If you also need liquid pickup, wet/dry capability can be useful, but it does not make wet mold safe to vacuum, and the machine may require a different internal setup to perform as intended.
In short, for dry post-stain cleanup, the best feature set is the one that makes slow, sealed, controlled pickup easy.
Recommended HEPA Vacuums for Home Mold Cleanup
This is the point where caution matters most.
The evidence pack includes named vacuum models in commercial guides, affiliate roundups, and brand-published articles. Those sources can be useful for understanding the kinds of machines people talk about for mold-adjacent cleanup, but this set does not include independent mold-emissions testing across those products, and it does not justify a homeowner-facing shortlist or endorsement. For that reason, this article does not rank, score, or recommend specific models for you to buy.
What the source set does support is a more modest conclusion about categories:
- Remediation-oriented examples tend to be bagged, sealed, dry canister or backpack machines designed around containment and detail work.
- Consumer mold blogs also mention upright household HEPA vacuums, which may be more familiar for whole-room carpet cleaning, but those mentions are still blog-level examples, not proof of remediation performance.
- Wet/dry units appear in the market too, but some third-party guides note sealing limitations and setup caveats compared with more remediation-focused dry units.
For a homeowner dealing with stain-cleaning aftermath, that means the right question is not “Which model wins?” It is:
- Is the contamination dry and limited?
- Is the machine sealed and genuinely HEPA-rated?
- Is it bagged or otherwise easy to empty without making a dust plume?
- Does it have the tools needed for carpet tops, seams, stairs, and upholstery?
- Would renting a HEPA vacuum for a one-time cleanup make more sense than buying one? Branch Basics specifically notes renting as a budget option.
There is one more caution worth keeping from the original source set: robot vacuums and generic bagless “HEPA-type” machines are not presented here as first-choice tools for mold-related cleanup, and Branch Basics says it knows of no robot models with certified sealed HEPA systems.
So under this heading, the most responsible recommendation is not a product list. It is a limit: use general selection criteria, keep the scope narrow, and avoid treating commercial roundup content as proof that any vacuum “removes mold.”
Step-by-Step HEPA Vacuuming Technique for Dry Surfaces
Technique matters as much as hardware. A good sealed HEPA machine used too fast, on the wrong surface, or at the wrong stage can still leave contamination behind or spread it around.
What follows is best read as a general dry-surface cleanup sequence, not a substitute for professional remediation.
1. Confirm that the material is dry and that vacuuming is even appropriate. Maple Air says HEPA vacuuming should be limited to dry, inactive mold and only after most visible mold has been removed. If carpet backing, carpet pad, drywall, or upholstery foam still feels damp, stop there. In the post-stain scenario, moisture correction comes before vacuuming.
2. Use protective gear before disturbing residue. Restoration & Remediation Magazine’s description of the “HEPA Sandwich” method says to wear PPE including gloves, goggles, and a respirator before HEPA vacuuming. Even for a small home job, that is the cautious way to approach fine contaminated dust.
3. Start with slow, overlapping passes on carpet and fabric surfaces. Indiana Mold Remediation recommends vacuuming carpet slowly in one direction, then turning and vacuuming across it in a cross-hatch pattern. The point is not speed. The point is dwell time and coverage.
For upholstery, use the gentlest suitable upholstery or soft brush tool on the dry surface only. The goal is surface pickup of dry residue, not digging into damp padding.
4. Use detail tools on the places where dust settles. Spores and fine debris often collect in low-airflow edges: baseboards, corners, stair edges, wall-floor joints, closet tracks, cushion seams, and cracks. Indiana Mold Remediation recommends brush tools on walls and ceilings, and the HEPA Sandwich article specifically calls out crevice tools for corners, edges, outlets, and cavity details. If you vacuum only the middle of the floor, you miss where settled residue often accumulates.
5. Vacuum before wiping. Mold Inspection Sciences describes HEPA vacuuming as the first step in final cleanup, followed by wet wiping. The logic is simple: remove the loose particles before you touch the surface with a cloth.
For homeowners, that means: - vacuum the dry loose material first, - then wipe only surfaces that can safely be wiped, - and avoid turning a moisture problem into another moisture problem.
6. Use the “HEPA Sandwich” only where light damp wiping is appropriate. The HEPA Sandwich sequence is vacuum, damp wipe, vacuum again. On durable hard surfaces, trim, and other wipeable areas, that can make sense: the first vacuum removes loose particles, the wipe lifts residue, and the second vacuum collects what the wiping loosened.
On carpet and upholstery after an over-wet stain cleanup, be much more conservative. If the material has already been soaked once, the cleanup priority is containment without re-saturating it. A lightly dampened cloth on a suitable hard surface is different from adding more water to fabric-backed or padded material.
7. Expect to make more than one pass. Fine contamination often takes repetition. The HEPA Sandwich method itself is built on repetition, and Mold Inspection Sciences notes that some contractors repeat vacuuming and wiping cycles for thoroughness. On carpet, slow cross-hatching already helps create multiple directions of pickup.
8. Seal the collected waste immediately. Maple Air says to remove and seal the bag or filter carefully after vacuuming so trapped spores do not escape back into the home. This is one reason bagged systems are easier to manage for this kind of cleanup than bagless bins.
The whole technique reduces to one sentence: dry surface only, protective gear on, vacuum slowly and thoroughly, wipe only where safe, and seal the waste as soon as the job is done.
Limitations: When HEPA Vacuuming Isn’t Enough
A HEPA vacuum is useful for one narrow task: reducing dry surface contamination without recirculating it as much as an ordinary vacuum might. It is not a full mold solution.
That is a different question from whether alcohol kills mold on a surface. This article is only about safer pickup of dry residue after a moisture event.
That limitation is repeated across the source set. Maple Air says HEPA vacuuming can help contain and clean up spores, but it does not remove the mold itself, does not kill mold, and does not prevent the problem from returning if moisture remains. Mold Help For You similarly says HEPA vacuuming can reduce contamination in carpet but cannot remove every spore.
The main limits are practical.
First, vacuuming reaches only what is accessible at the surface. If contamination is resting on top of carpet fibers, on hard flooring, or on the face of dry upholstery, vacuuming may help. If mold has grown into carpet backing, into pad, into upholstery foam, or into drywall paper, the vacuum is addressing the symptom at the surface, not the material problem underneath. That is why Maple Air is blunt about carpet: a HEPA vacuum may help with surface spores, but deeply embedded carpet contamination often makes replacement the safer choice.
Second, a vacuum does nothing to solve the moisture source. This is the biggest stain-cleaning lesson in the whole article. If the original problem came from repeated rinsing, over-application of cleaner, soaked carpet backing, or saturated upholstery foam, the key failure was moisture control. Stain List’s upholstery guidance warns that saturated foam is slow to dry and can grow mold if it gets too wet Stain List’s red wine stain guide. A HEPA vacuum used later may help collect dry residue, but it does not undo the damp conditions that allowed mold growth in the first place.
Third, HEPA vacuuming is not a complete answer for every mold-related byproduct. Mold Help For You cautions that HEPA filtration is not a complete answer for VOCs or mycotoxin concerns. Because that claim appears in a consumer guide rather than primary technical literature here, the cautious reading is limited: capturing spores is not the same claim as solving every indoor-air issue associated with mold.
Fourth, professional remediation does not stop at vacuuming. Mold Inspection Sciences describes HEPA vacuuming alongside wet wiping and air scrubbing, sometimes repeated. Indiana Mold Remediation also emphasizes that the goal is reduction and return toward normal conditions, not sterile perfection.
For homeowners, the most important escalation boundaries are these:
- the area is not small,
- the material is still wet,
- visible growth remains active,
- the contamination appears embedded in porous material,
- the moisture source is ongoing or unclear,
- or the affected item is valuable enough that trial-and-error cleaning is a bad gamble.
When one of those conditions is present, a HEPA vacuum is no longer the solution. It is, at best, a small part of a larger cleanup process.
Maintenance and Safe Use After Mold Vacuuming
The containment value of a HEPA vacuum can be lost during maintenance. A careful cleanup pass followed by sloppy bag handling defeats the point.
The safest assumption is that the bag, pre-filter area, hose opening, and tools are now contaminated. Maple Air recommends carefully removing and sealing the bag or filter after use so trapped spores do not escape back into the house. That is the clearest post-job rule in this evidence set: containment continues after the motor is off.
Multi-stage systems help here because they let cheaper pre-filters and bags intercept larger debris before the final HEPA stage becomes heavily loaded.
Exact filter intervals are not something this evidence pack supports as a universal rule. Spycor notes that replacement timing varies by model and use level Spycor Environmental’s HEPA vacuum guide. The reliable advice is simpler: follow the manufacturer’s instructions, inspect filters after any heavy contaminated cleanup, and replace them sooner if loading is obvious.
A sensible post-use routine looks like this:
- seal and dispose of used bags promptly,
- inspect pre-filters for visible buildup,
- replace filters according to the machine instructions or sooner after heavy contaminated use.
Renting is also reasonable for a one-off job. Branch Basics specifically mentions renting a HEPA vacuum as a budget option. If you rent, the same selection rules still apply: you want a sealed HEPA machine, the correct bag and filter setup, and a configuration suited to dry surface cleanup, not a generic shop vacuum with a loosely described filter.
For homeowners, maintenance is really just the final stage of containment.
Can household HEPA vacuums handle small mold cleanup after stains?
Sometimes, yes—but only in a narrow situation. Indiana Mold Remediation says many modern HEPA vacuums or HEPA-equipped shop vacs can be adequate for DIY decontamination cleaning, while Maple Air says HEPA vacuuming should be limited to small, dry areas and not used on wet or active growth. Put together, that supports limited use for dry settled surface residue after a minor moisture mistake—not widespread growth, soaked materials, or contamination that appears embedded in carpet pad or upholstery foam.
Bagged or bagless HEPA for mold spore removal?
Bagged is the safer choice in this evidence set. Mold Help For You and Mold Action Plan both prefer bagged designs because emptying a bagless dust cup can re-release fine contaminated dust. For mold-adjacent cleanup, disposal control matters as much as pickup.
Is wet/dry HEPA vacuum needed for all mold scenarios?
No. Mastercraft’s guide separates dry HEPA vacuums for fine particulates and post-remediation cleanup from wet/dry HEPA units for moisture-involved jobs. The market also distinguishes dry and wet/dry remediation vacuums as different product categories Mastercraft USA’s mold remediation vacuum collection. For most homeowners cleaning dry settled spores after a stain mishap, dry-only HEPA pickup is the primary need. Wet/dry capability is optional and does not make wet mold safe to vacuum.
When to call professionals instead of DIY HEPA vacuuming?
Call a professional when the mold is wet, active, widespread, or embedded in porous material, or when the affected item is valuable and hard to replace. Maple Air says professional remediation is still the safest option for larger infestations and porous materials, and Mold Inspection Sciences shows how HEPA vacuuming usually sits inside a broader process of containment, wiping, and air cleaning.
How does upholstery stain cleaning lead to mold needing HEPA vacuum?
Because the visible fabric is only the top layer. Stain List’s upholstery guidance warns that the foam underneath is slow to dry and can grow mold if saturated. If a stain treatment over-wets the cushion, hidden moisture can persist below the surface. That is the narrow point where a HEPA vacuum may help: collecting dry surface contamination without recirculating it. It does not fix soaked foam or replace moisture control.
A HEPA vacuum is best understood as the safer tool for dry contaminated dust, not as a mold cure. After an over-wet stain cleanup on carpet or upholstery, it may reduce the chance of spreading settled surface spores through the room. It cannot fix soaked padding, kill active mold, or replace drying, disposal, or professional remediation when the problem has moved past the surface.