 StainList
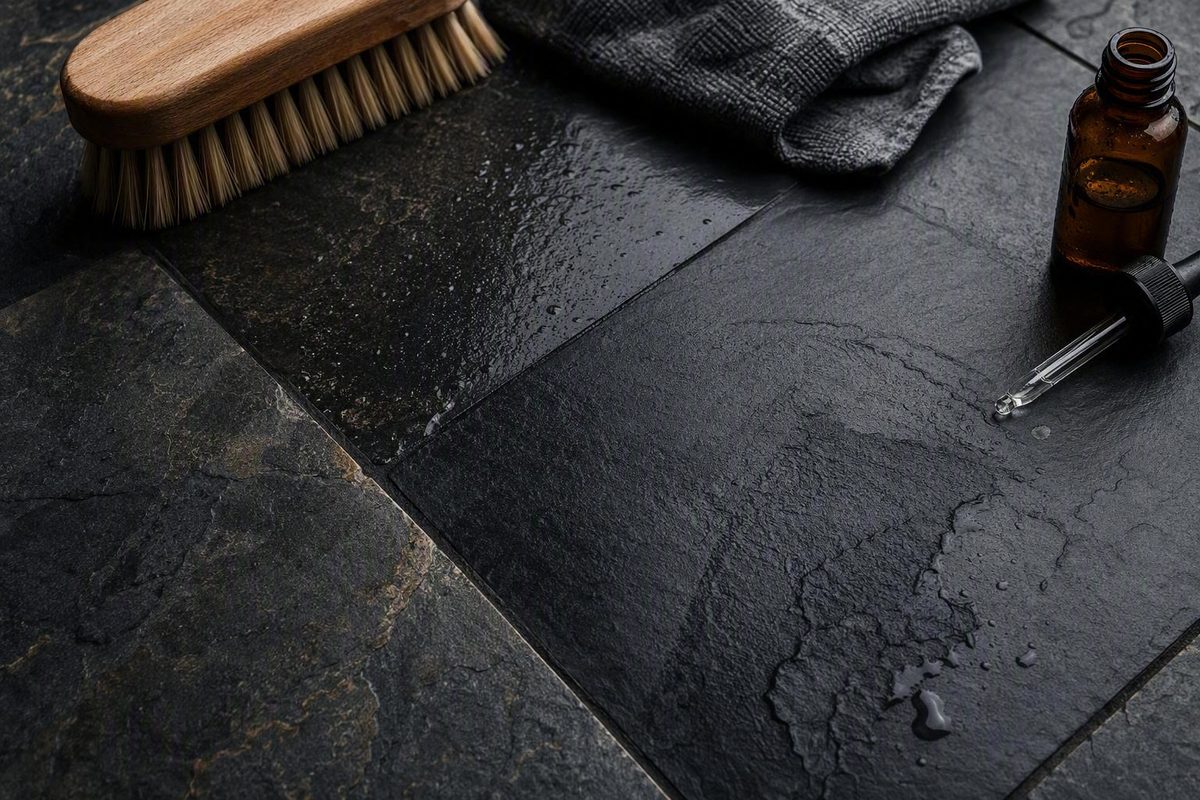
Slate cleaning and sealing should begin with diagnosis, not a bottle of sealer. A dull surface may be dirty, coated with cleaner residue, scratched, or covered by a worn film. White haze may be dried cleaner, grout residue, mineral deposits, efflorescence, or excess cured sealer. Applying a new product before identifying the problem can preserve stains, exaggerate uneven color, or create another coating that eventually must be stripped.
The cautious sequence is:
- Inspect the slate and identify its texture and any existing treatment.
- Remove loose grit.
- Test-clean with a compatible natural-stone cleaner.
- Rinse thoroughly.
- Resolve stains, haze, grout problems, and moisture symptoms.
- Let the installation dry according to the selected product’s requirements.
- Test any proposed treatment through its full cure.
- Decide whether sealing is necessary and which finish suits the setting.
The available guidance is largely from slate retailers, manufacturers, and restoration providers rather than a single independent slate-care standard. Treat the process below as a conservative decision framework. The selected cleaner, stripper, or sealer label and technical documentation must control product-specific details.
First decide whether the slate needs cleaning, resealing, stripping, repair, or replacement
Start by recording what you have:
- Location: floor, shower, countertop, fireplace, patio, walkway, or entryway
- Texture: rough natural cleft, tumbled, honed, or another smooth finish
- Exposure: interior dry area, wet area, exterior weather, or freezing conditions
- Use: traffic, pets, tracked grit, cooking oil, standing water, or deicing salts
- History: known cleaner, sealer, enhancer, wax, polish, or coating
- Desired result: untreated and matte, deeper color, low sheen, or visible gloss
- Cleaning response: whether an ordinary stone-safe test clean changes the defect
Texture affects both cleaning and diagnosis. Natural-cleft slate has depressions and layered edges that can retain grit and soil. Honed or smoother slate releases debris more readily but may reveal cleaner film, water spots, fine scratches, and uneven sheen.
Route the project by condition:
- Routine soil with a sound, even finish: clean first.
- Clean, dry slate that absorbs water readily: investigate whether resealing is appropriate.
- Peeling, scuffed, sticky, or visibly worn surface film: identify the coating and consider stripping.
- Deep scratches or extensive dullness that remains after cleaning: assess restoration options.
- Loose tile, movement cracks, lifting layers, or severe flaking: repair or replacement may be necessary.
Dullness alone does not identify the remedy. It may come from embedded soil, cleaner residue, worn penetrating treatment, an aging topical coating, or physical surface damage. Sealer will not remove dirt or scratches.
Efflorescence, recurring dark patches, coating failure, and lifting layers require particular caution. Efflorescence is mineral salt deposited as moisture moves through an installation. Minor flaking may sometimes be treatable, while severe lifting or separation may require repair or tile replacement, according to Classic Marble Restoration’s slate-care guidance.
Do not try to identify an unknown coating from sheen or a water-drop test alone. Beading may indicate some resistance to water, but it cannot distinguish wax, acrylic, polyurethane, enhancer, or penetrating treatment. If compatibility is uncertain, stop before overcoating and consult the previous installer, the known product manufacturer, or a contractor experienced with slate and coating identification.
| Visible sign | Likely category | Safe next check | Do not attempt blindly |
|---|---|---|---|
| Loose soil in clefts or grout | Routine contamination | Vacuum, then test-clean | Apply sealer over the dirt |
| Dull but not peeling | Soil, residue, wear, or surface damage | Clean, rinse, dry, and compare sections | Assume dullness proves sealer failure |
| Water rapidly darkens clean, dry slate | Limited repellency or absorptive stone | Compare several representative areas | Infer the existing coating chemistry |
| Peeling, scuffing, or traffic lanes | Worn topical coating | Identify the coating and test a small area | Add another incompatible coat |
| White haze | Cleaner film, grout residue, minerals, efflorescence, or excess sealer | Determine when it appeared and whether moisture recurs | Choose an acid or solvent by guesswork |
| Recurring dark patches | Moisture, contamination, or uneven absorption | Investigate water sources and drying conditions | Seal over active dampness |
| Deep scratches or widespread dullness | Physical surface damage | Obtain a slate-specific restoration assessment | Expect sealer to remove damage |
| Flaking or separating layers | Spalling or delamination | Check stability and moisture conditions | Coat loose material in place |
| Loose or cracked tiles | Installation or movement problem | Assess tile, grout, and substrate | Treat sealing as structural repair |
Clean slate without grinding grit into the surface or leaving a film
Gather simple, nonaggressive supplies:
- Soft-bristled broom or vacuum with a hard-surface attachment
- Microfiber or other soft mop
- Separate buckets for cleaning solution and rinse water
- Soft brush appropriate for the slate’s texture and finish
- Clean, absorbent towels
- Label-approved pH-neutral natural-stone cleaner
A brush suitable for deep natural clefts may scratch or change a smoother finish. Match the tool to the actual surface rather than relying on a general “slate-safe” description.
1. Remove loose grit
Sweep or vacuum before introducing liquid. Work along tile edges, grout joints, clefts, and transitions where particles collect. This matters especially on rough slate because liquid and mop movement can redistribute debris held in depressions.
2. Test and prepare the cleaner
Test the cleaner in an inconspicuous location. Let the area dry, then check for discoloration, sheen change, residue, or a changed surface feel.
Prepare the cleaner exactly as its label directs. Do not improvise a stronger concentration. A stronger mixture may be harder to rinse and more likely to leave residue.
3. Work in manageable sections
Apply controlled moisture with a damp—not saturated—mop or cloth. Small sections help prevent cleaner from drying on the surface and make changes in color or sheen easier to detect.
Adapt the brush, pad, pressure, and agitation to the finish. A method appropriate for rustic cleft slate should not be assumed safe for honed or smoother material.
4. Agitate gently where appropriate
Use a suitable soft brush on dirty grout and textured depressions only if the test area tolerates it. Do not bear down on loose or flaking layers.
Change dirty solution and rinse tools frequently. Otherwise, cleaning can become soil redistribution.
5. Rinse away cleaner residue
Use clean water and controlled moisture to remove the cleaning solution. Residual cleaner can dry as a film, reduce visual clarity, and attract fresh soil. The Tile Shop’s routine-care process likewise calls for dry debris removal, label-directed natural-stone cleaner, damp mopping, frequent tool rinsing, a separate clean-water rinse, and complete drying (slate floor cleaning guide).
6. Dry before judging the result
Remove surface water with clean towels where practical and provide airflow. Wait until the slate, grout, and crevices are dry before deciding whether dark areas, haze, or dullness remain. Wet slate often looks temporarily richer and can disguise uneven cleaning.
Avoid vinegar, lemon juice, harsh chemicals, abrasive pads, uncontrolled soaking, and unapproved steam cleaning. Retailer and manufacturer guidance warns against acids, abrasives, excessive moisture, and steam because they may affect slate or an existing treatment. Use steam only if the slate, grout, treatment, and equipment manufacturers approve the complete system.
The Tile Shop suggests cleaning at least weekly and more often under heavy traffic or around active pets, but that is a retailer-specific example rather than a universal timetable. Set frequency according to tracked grit, pets, traffic, cooking exposure, weather, and the performance of entry mats.
Resolve stains, dirty grout, haze, and moisture symptoms before sealing
Applied over oil, soil, cleaner film, grout haze, or dampness, it may preserve the visible defect or produce uneven color and absorption.
MSI includes commercial poultices among its approaches to oil stains, but its household recipes should not be assumed compatible with every slate or coating (MSI’s slate cleaning and stain-care guide). Follow a validated product procedure and test first.
General grease-and-oil stain guidance can help explain why oil requires a different approach from water-soluble soil, but its fabric and general hard-surface methods are not slate-specific. Do not transfer household solvent or detergent recipes to slate unless the slate-treatment manufacturer approves them.
For dirty grout, begin with the same compatible pH-neutral stone cleaner:
- Dry-remove grit.
- Apply the cleaner according to its label.
- Agitate gently with a suitable soft brush.
- Rinse completely.
- Let the grout and slate dry.
- Inspect the cured appearance before sealing.
If grout remains discolored, determine whether the cause is removable contamination, damaged grout, or permanent variation. Do not seal until its appearance is acceptable.
White haze is a symptom, not a diagnosis
Possible causes include:
- Dried cleaner: often associated with incomplete rinsing
- Grout residue: often dating from installation or regrouting
- Excess cured sealer: appearing after product remained on the surface
- Hard-water deposits: corresponding with repeated splash and evaporation patterns
- Efflorescence: salts associated with moisture movement through the assembly
These conditions require different responses. An acidic deposit remover may be incompatible with the slate, grout, or coating; a solvent intended for one sealer chemistry may damage another. Identify the likely source and obtain product-specific compatibility and safety instructions before selecting a remover.
Recurring salts or damp-looking patches can point to a moisture pathway. Possible sources include exterior exposure, plumbing, failed wet-area details, rising moisture, drainage problems, or slow drying. Surface sealing alone may not correct the source.
Stripping is also different from deep cleaning. It intentionally removes a surface coating and may require chemistry-specific testing, controlled dwell, extraction, label-required neutralization, and appropriate waste handling. Widespread peeling, tackiness, uneven gloss, or an unknown coating favors a professional test area.
Stop work before sealing if you find:
- Active or recurring moisture
- Widespread layer separation or delamination
- Loose tiles
- A coating of unknown or potentially solvent-sensitive chemistry
- Severe uneven sheen that cleaning does not resolve
- A stain treatment that changes color, texture, or sheen in the test area
- Continued salt deposits after cleaning
- Flaking that exposes unstable layers
For showers, basements, exterior assemblies, or recurrently damp installations, follow the selected sealer’s documented moisture requirements and arrange appropriate professional moisture investigation where necessary.
Determine whether the slate actually needs sealer
Not every slate installation must be sealed. The decision depends on the tile’s absorption, existing treatment, location, traffic, exposure, maintenance goals, and desired appearance. Some owners prefer an untreated look and accept the associated cleaning tradeoffs.
A cautious water-drop test can screen for relative surface absorption:
- Clean and rinse the slate.
- Let it dry in accordance with the proposed product’s requirements.
- Choose an inconspicuous area.
- Place a few drops of clean water on the surface.
- Observe whether they bead, spread, or darken the slate.
- Wipe the area dry and note how the appearance recovers.
Rapid darkening or absorption may suggest limited water repellency. Beading suggests some resistance. Neither result identifies the existing treatment, proves that a new product will bond or penetrate correctly, confirms adequate protection, or detects moisture below the surface.
Compare several locations instead of relying on one tile. Include a traffic lane, a sheltered edge, an area beside grout, and any visibly worn section.
Repeating the same test after the selected sealer has fully cured can provide a relative before-and-after comparison. It does not override the manufacturer’s test method, performance claims, or application instructions.
Resealing should be condition-based. Consider:
- Water behavior after cleaning and suitable drying
- Visible wear or traffic patterns
- Whether routine cleaning has become more difficult
- Wet, cooking, or exterior exposure
- Differences across representative areas
- The known product’s maintenance and reapplication instructions
Published schedules such as annual treatment or every one to three years are commercial recommendations for particular circumstances, not rules for every installation. MSI, for example, describes one-to-three-year resealing as typical for many residential installations while also tying the need to traffic and product instructions.
Most importantly, do not seal simply because slate looks dull. Clean, rinse, dry, and diagnose the cause first.
Choose between penetrating, enhancing, and topical finishes
“Slate sealer” describes several visibly and functionally different product categories. Decide whether you want minimal appearance change, deeper color, or a surface film.
| Product category | Visible surface film? | Expected appearance | Color change | How wear may appear | Maintenance implications | Questions to resolve |
|---|---|---|---|---|---|---|
| Clear penetrating or impregnating sealer | Usually no obvious film | Natural or low-change finish | Intended to be minimal after cure | Reduced repellency may be less visible than coating wear | Reapply only when condition and instructions support it; remove excess during application | Is it approved for this slate, grout, location, and previous treatment? |
| Enhancing sealer | Product-dependent; often selected for penetration rather than a heavy film | Richer or color-deepened appearance; sheen varies | Intentional and potentially substantial | Uneven absorption may create tonal differences | Future color matching may be difficult; test the fully cured result | How much color and sheen remain after cure? Is it compatible with the old treatment? |
| Topical coating | Yes | Matte, satin, low-luster, wet-look, or glossy, depending on product | Often changes apparent color | Scratches, scuffs, peeling, and traffic lanes may become visible | May require coating-specific renewal or stripping | Is it approved for traffic, wet areas, exteriors, and the intended use? |
A clear penetrating or impregnating sealer is the usual category to test when the goal is lower absorption with little visible change and no glossy film. “Clear” does not guarantee no change: texture, porosity, residue, application, and previous treatments can affect the result.
Do not assume every enhancer has the same solvent base, sheen, or performance.
A topical coating remains at the surface and may produce a matte, satin, low-luster, wet-look, or glossy finish. Because it forms a wear layer, it may develop scratches, scuffs, peeling edges, or traffic lanes and can require coating-specific stripping before renewal. Commercial slate-care guidance distinguishes penetrating, enhancing, and topical treatments and the different appearances they can produce (overview of slate sealing options).
Do not choose solely from broad labels such as “oil-based” or “water-based.” The label and technical data must establish:
- Compatibility with the slate and grout
- Required preparation
- Compatibility with previous treatments
- Interior, exterior, wet-area, or food-surface suitability
- Application temperature and weather limits
- Ventilation and protective equipment
- Number of coats and recoat procedure
- Excess-removal method
- Cure and return-to-service timing
Temporary wetting is not the same as enhancement
Slate commonly looks darker while wet. A clear penetrating product may darken it during application and then lighten as it cures. An enhancer is selected specifically to leave a richer cured appearance. MSI illustrates this distinction among clear impregnating products, enhancing sealers, and glossy topical films and recommends testing enhancement on spare tile (MSI’s slate sealer appearance guide).
Test on spare tile if available; otherwise, use an inconspicuous but representative area. After the manufacturer’s full cure period, record:
- Color in daylight and artificial light
- Sheen from multiple viewing angles
- Surface feel
- Any residue
- Water behavior relative to untreated areas
- Differences between slate and grout
- Any unwanted change in texture
Use only a product whose technical documentation explicitly approves the substrate and intended setting. Without setting-specific documentation, do not infer suitability for continuous wet exposure, food-contact use, heat exposure, exterior weather, or freezing conditions.
Follow a controlled cleaning-and-sealing workflow
Use this sequence:
- Inspect and document. Photograph the surface under consistent lighting and record defects.
- Identify or investigate the existing treatment. Check invoices, containers, installer records, and manufacturer information.
- Dry-remove grit. Vacuum or sweep clefts, edges, and grout.
- Clean with a compatible product. Test first and follow the label.
- Rinse or extract residue. Do not leave cleaner behind.
- Address stains and grout. Resolve appearance problems before sealing.
- Let the installation dry as required. Consider grout, clefts, joints, wet exposure, and the substrate—not only the visible tile face.
- Test the selected sealer. Judge the patch only after full cure.
- Apply in small sections. Maintain wet edges only as directed.
- Remove unabsorbed excess within the working window. Do not let penetrating product form an unintended surface film.
- Allow the stated cure. Restrict each type of use according to the product instructions.
- Inspect under consistent lighting. Compare color, sheen, residue, and water behavior with the documented test.
MSI’s commercial guide prefers about 24 hours of drying after cleaning, but this is an example rather than a universal minimum; humidity, temperature, construction, exposure, and the selected sealer can change the requirement.
Follow the chosen product documentation for application tools, coverage, coat count, dwell, recoat intervals, ventilation, protective equipment, cleanup, and excess removal.
There is no universal wiping deadline; use the product’s stated working window.
Return-to-service requirements are also product-specific. One commercial provider advises waiting at least 24 hours before walking after its penetrating-sealer process, but that figure does not govern unrelated products or conditions.
During the project:
- Keep people and pets outside the work zone as directed by the product label.
- Provide all label-required ventilation.
- Use the specified protective equipment.
- Protect walls, wood, metal, glass, cabinets, and adjacent flooring.
- Prevent drips and pooling at thresholds and changes in elevation.
- Control dust and debris between cleaning and sealing.
- Retain the product name, technical sheet, batch or lot information, and labeled leftover material if its storage instructions permit.
Maintain sealed slate and troubleshoot changes without adding unnecessary coats
Routine care should protect both the slate and the treatment:
- Remove tracked grit frequently.
- Use effective entry mats and clean beneath them.
- Use a pH-neutral natural-stone cleaner approved for the treatment.
- Apply controlled moisture rather than flooding.
- Rinse away cleaner residue.
- Dry the surface fully.
- Address spills before they spread into clefts or grout.
- Repeat the same water-absorption screening in comparable locations and record changes.
Avoid waxes and “shine-restoring” products unless they are documented parts of a compatible coating system. Commercial slate-care guidance warns that unplanned wax products can create buildup and complicate future maintenance or stripping.
| Symptom | Possible causes | Next step |
|---|---|---|
| White haze | Cleaner film, hard-water deposits, grout residue, efflorescence, or cured excess sealer | Establish when it appeared; test routine cleaning and rinsing; identify the treatment before choosing a remover |
| Sticky or tacky areas | Excess product, incompatible coating, incomplete cure, or contamination | Restrict use and consult the product manufacturer; do not add another coat |
| Dark patches | Residual moisture, oil, uneven absorption, pooled enhancer, or natural variation | Allow further drying, review exposure, and compare with the cured test patch |
| Water spots | Mineral residue, cleaner film, or changed repellency | Test a compatible routine clean and assess the water source |
| Uneven sheen | Mixed coatings, incomplete cleaning, pooled topical product, or uneven wear | Inspect in consistent light and identify the coating before correction |
| Renewed absorption | Worn treatment, missed areas, highly absorptive slate, or product mismatch | Compare several clean, dry test areas and review the product instructions |
| Recurring stains | Continuing source, ineffective stain treatment, failed coating, or absorptive grout | Remove the source and diagnose the stain before resealing |
| Flaking | Natural cleavage, moisture-related deterioration, traffic damage, or delamination | Stop aggressive cleaning and assess tile stability |
Do not automatically use mineral spirits or another solvent when haze appears. The appropriate remedy depends on the chemistry of the cured product and the sensitivity of nearby materials. Obtain compatibility, ventilation, protective-equipment, and handling instructions from the product manufacturer.
Uneven darkening or gloss may reflect unequal absorption, incomplete cleaning, pooled product, mixed tile conditions, or an incompatible old coating. Adding another coat may worsen the contrast. Consult the manufacturer or an experienced slate-care contractor first.
Topical finishes reveal wear differently from penetrating treatments. A topical film may scratch, scuff, peel, or develop traffic lanes. That difference affects whether maintenance involves compatible recoating, stripping, or condition-based resealing.
Keep a simple maintenance log:
| Record | Details |
|---|---|
| Cleaning product | Brand and exact product name |
| Dilution | Label-directed ratio actually used |
| Test result | Color, sheen, residue, and surface feel after drying |
| Sealer | Exact name and product category |
| Application | Date, batch, coat count, tools, and treated sections |
| Cure instructions | Recoat, foot traffic, washing, wet use, and full cure |
| Observations | Absorption, haze, stains, flaking, dampness, or wear |
Know when to hire a slate-care professional and how to compare quotes
DIY cleaning and sealing is most reasonable when the slate is stable, the existing treatment is known or absent, the problem responds to routine cleaning, moisture is not recurring, and a fully cured test patch produces an acceptable result.
Seek professional assessment for:
- Unknown, incompatible, or failing coatings
- Extensive embedded soil
- Widespread staining
- Active efflorescence or persistent dampness
- Severe flaking or layer separation
- Loose tiles or movement cracks
- Major scratches or extensive surface damage
- A valuable installation where test failure would be costly
- A large exterior, shower, or other technically demanding setting
Restoration may be substantially different. Depending on the slate and finish, it can include coating removal, grinding, honing, polishing, or repairs. One provider separates basic cleaning from partial or full restoration and adds diamond grinding, honing, or polishing for more serious damage (CSI-Absolute Clean’s slate service process). Because commercial service pages may adapt methods used across several natural stones, require confirmation that every proposed mechanical step is suitable for the actual slate. Not every cleft, textured, or layered slate can or should be polished.
When screening contractors, ask for:
- Relevant slate project examples—not only marble or general tile work
- Proof of insurance appropriate to the project
- Exact cleaner, stripper, coating, and sealer systems
- Technical and safety documentation for those products
- A willingness to perform and document a fully cured test patch
- A written method for identifying the existing coating
- A plan for investigating recurring moisture or efflorescence
- Waste-handling and containment procedures for stripping work
- Written responsibility for adjacent-material protection
- Clear damage exclusions and limitations
Request a written quote stating:
- Measured treatment area
- Slate texture, finish, and location
- Current coating identification or investigation plan
- Test-patch location, method, cure, and acceptance criteria
- Cleaning, stain, and grout scope
- Stripping or repair allowances
- Exact cleaner, stripper, and sealer names
- Intended final color and sheen
- Whether the treatment is penetrating, enhancing, or topical
- Number of planned visits
- Ventilation, odor, access, and containment requirements
- Cure periods and downtime by type of use
- Ongoing maintenance instructions
- Written exclusions and warranty limits
Cost depends on area, texture, access, soil load, stain treatment, old-coating removal, repairs, finish choice, and downtime. Those variables make an unsupported national price range less useful than an itemized local quote.
Ask contractors to distinguish stain reduction from guaranteed removal and cleaning from structural repair. Photograph the slate before the test, after the test patch cures, and after completion under comparable lighting. This documents the agreed color and sheen.
Treat “like new,” “superior,” and claims that professional care is always necessary as marketing unless the contractor defines the expected result in project-specific written terms. A credible proposal should state what may remain, what may change, and what falls outside the scope.
How can I tell whether slate needs resealing?
Clean and rinse the slate, let it dry according to the proposed product’s requirements, and compare water behavior in several representative areas. Rapid spreading, darkening, or absorption may indicate limited repellency; beading suggests some resistance.
The test cannot identify the existing coating, prove compatibility, establish hidden substrate dryness, or confirm that protection is adequate. Do not reseal merely because the surface looks dull.
Will sealing slate change its color or make it glossy?
It depends on the product. An enhancing sealer deliberately deepens color and may change sheen. A topical coating can create matte, satin, low-luster, wet-look, or glossy effects.
Test the exact product on spare tile or an inconspicuous area and judge it after the full stated cure, not while it is wet.
How long should slate dry before sealing and cure afterward?
There is no universal period.
Cure times are also product-specific. Foot traffic, furniture, washing, shower use, food contact, exterior exposure, and full cure may each require different waiting periods.
Can vinegar, bleach, steam, or abrasive scrubbers be used on slate?
Do not assume they are safe. The Tile Shop advises against vinegar, lemon juice, harsh chemicals, and abrasive cleaning tools, while MSI also warns against acidic cleaners, abrasives, and steam mops in its slate-care guidance.
Start with dry grit removal, a tested pH-neutral natural-stone cleaner, finish-appropriate soft tools, controlled moisture, thorough rinsing, and complete drying. Use another method only when the slate, grout, existing-treatment, and equipment or product manufacturers approve it.
Should I clean and seal slate myself or hire a professional?
DIY work may be appropriate for a stable surface with routine soil, no recurring moisture, a known or absent finish, and successful cleaner and sealer tests. Follow the exact product instructions and work in small sections.
Hire an experienced slate-care contractor when the coating is unknown or peeling, stains are widespread, salts or dampness recur, tiles are loose, layers are separating, scratches require mechanical restoration, or an appearance change would be costly to reverse.
The final decision sequence is simple: clean and rinse before judging the surface; investigate stains and moisture instead of covering them; test absorption and appearance in a small area; select a treatment for the actual slate and setting; and follow the chosen product’s technical instructions. If the installation has an unknown coating, active moisture, widespread haze, delamination, or major damage, obtain a slate-specific assessment rather than adding another coat of sealer.