 StainList
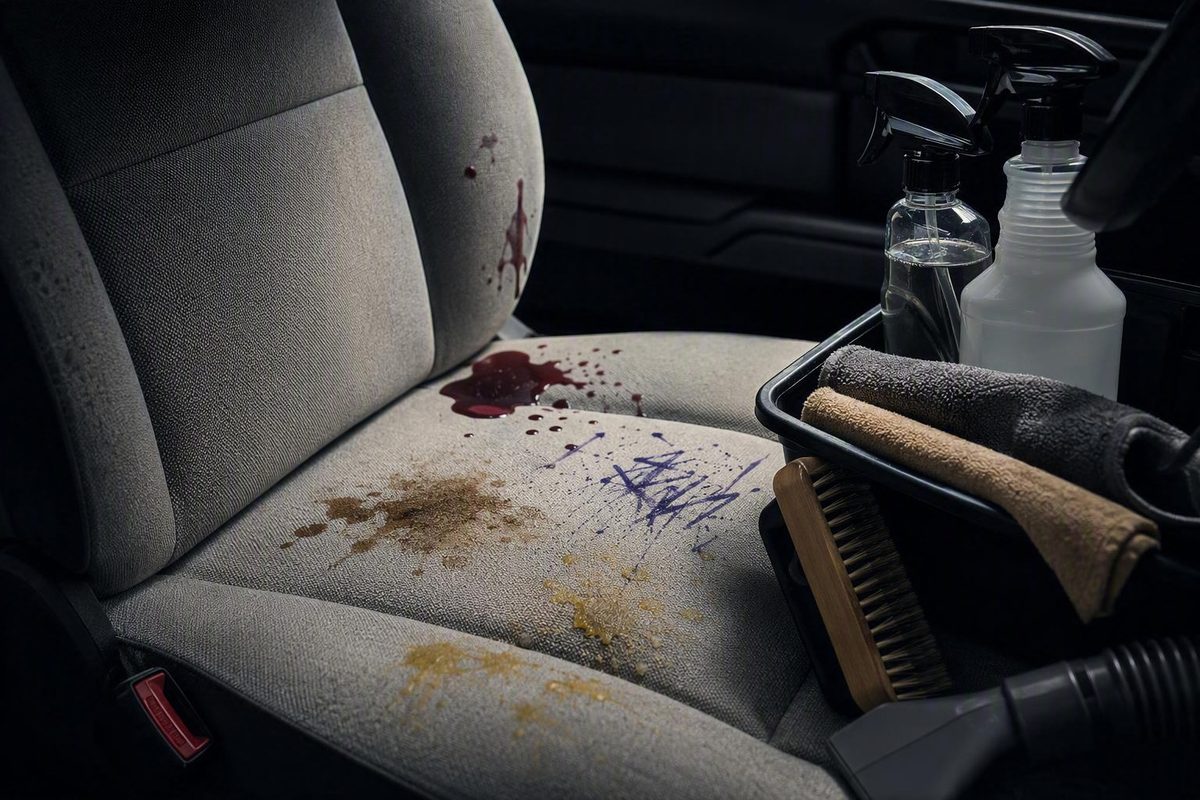
Knowing how to remove stains from car seats is less about finding one powerful recipe than making the right decisions in the right order. Before applying anything, identify the upholstery, consider what caused the stain, check how old it is, and look for signs that liquid has entered seams or padding.
For ordinary stains on standard automotive cloth, vinyl, or coated leather, use this cautious workflow:
- Vacuum dry debris.
- Patch-test a compatible cleaner.
- Apply as little cleaner as necessary.
- Agitate gently.
- Blot away soil and residue.
- Recover excess moisture.
- Let the surface and accessible upholstery dry before judging the result.
Vehicle-manufacturer instructions take priority over general cleaning advice. Specialty upholstery, child restraints, potentially hazardous biological contamination, and soaked cushions fall outside this routine DIY process.
What to Do Immediately After a Spill
If a spill has just happened, act promptly—but only after parking safely.
Emergency checklist:
- Park the vehicle safely before attempting cleanup.
- Lift away loose food or other solids with a spoon, card, or clean towel. Do not grind them into the upholstery.
- Place a clean white or reliably colorfast microfiber towel over the liquid and press firmly.
- Replace the towel as it becomes wet.
- When practical, work from the outside edge toward the center.
- Do not pour water or cleaner onto upholstery you have not identified.
- Leave specialty upholstery and child restraints untreated until you have checked their instructions.
Blotting is preferable to rubbing because rubbing can spread the affected area and push contamination farther between the fibers. Removing solids should likewise be a lifting action rather than aggressive scraping. Commercial automotive guidance commonly recommends blotting fresh spills and working inward from the edge, although this is general practice rather than a guarantee of complete removal (Jax Kar Wash’s car-seat stain guidance).
As you blot, note where the liquid has traveled. A small surface spill is different from a drink that has disappeared into stitching, perforations, or the gap between panels. Pressing towels onto the surface can recover liquid; repeatedly adding cleaner may increase the amount of moisture entering the seat.
Do not automatically use the same treatment on cloth, vinyl, coated leather, suede-like upholstery, or a child safety seat. Similar-looking surfaces can have different care restrictions, and the supplied evidence does not establish one universally compatible cleaner.
Stop surface treatment and seek manufacturer or professional guidance when:
- A large area is saturated.
- Liquid has entered several seams or openings.
- The cushion feels wet beyond the visible mark.
- A biological or musty odor persists.
- The stain repeatedly returns after drying.
- The upholstery is delicate, damaged, valuable, or difficult to identify.
These signs do not prove how deeply contamination has traveled, but they make repeated surface treatment a poor way to assess the problem.
Identify the Seat Material Before Choosing a Cleaner
Do not identify upholstery by appearance alone. Start with the vehicle owner’s manual, upholstery documentation, a care label where present, or guidance from the vehicle manufacturer. A surface that looks like leather may be coated leather, synthetic leather, vinyl, or part of a mixed-material seat.
This guide is limited to conservative DIY treatment of ordinary stains on:
- Standard automotive cloth
- Common fabric blends
- Automotive vinyl
- Coated automotive leather
Other materials require more specific instructions.
Cloth and fabric blends
Cloth is porous and can absorb liquid below its visible surface. It may tolerate a compatible automotive fabric cleaner, but it should not be drenched. The practical aim is to dampen the affected fibers, loosen contamination, and recover soil and cleaner without unnecessarily wetting the cushion.
Some seats combine fabric centers with vinyl or coated-leather bolsters. Treat each panel according to its identified material instead of spraying the entire seat with one product.
Coated leather
Use a product labeled for automotive leather and follow both the vehicle and product instructions.
Do not assume that fabric shampoo, multipurpose cleaner, solvent, peroxide, alcohol, or a homemade oil mixture is appropriate. Published leather-care recommendations conflict, and the available evidence does not establish broad compatibility with automotive dyes and finishes.
Perforated leather and ventilated upholstery
Perforated leather requires restrained application. Put a compatible cleaner on the microfiber towel or soft brush instead of spraying liberally across the seat. This provides more control and helps keep liquid out of the holes. Dealership guidance similarly recommends applying cleaner to the brush rather than directly to perforated leather (Mercedes-Benz of Warwick’s seat-cleaning guide).
Keep liquid out of perforations, seams, switches, controls, and other openings as much as practical. The exact seat construction and permitted care methods vary, so the owner’s manual should determine what is allowed.
Vinyl
Use an automotive cleaner labeled for vinyl, apply it sparingly, remove the residue, and dry the surface rather than allowing cleaner to collect in seams.
Specialty upholstery
Obtain material-specific instructions before treating:
- Alcantara
- Microsuede or microsuede-like finishes
- Natural suede
- Aniline leather
- Uncoated or unfinished leather
- Ventilated upholstery with uncertain care restrictions
- Vintage, custom, or unusually valuable interiors
The available evidence does not establish a universal DIY procedure for these materials. A professional assessment cannot guarantee restoration, but it avoids guessing with progressively stronger cleaners.
Child safety seats are a separate category
A removable child restraint is not ordinary vehicle upholstery. Its manual governs whether the cover may be removed or washed, what may be applied to the padding, and how the harness may be cleaned. Commercial guidance also directs owners to check the child-restraint manufacturer’s care instructions before washing components (Arm & Hammer’s car-seat upholstery guidance).
Prepare the Seat and Patch-Test the Cleaner
Gather a small, conservative cleaning kit:
- Vacuum with a soft upholstery attachment
- White or reliably colorfast microfiber towels
- Soft-bristled upholstery brush
- Cleaner labeled for the identified automotive material
- Clean water for limited residue removal
- Optional wet-rated vacuum or upholstery extractor
- Fan or another source of gentle airflow
A white towel makes transferred dye and soil easier to see. Avoid stiff carpet brushes, abrasive pads, metal tools, and improvised scrapers.
Where appropriate, reposition or recline the seat so creases and seams are accessible. Remove nearby loose items and detachable floor mats, but do not force powered or manual seat components beyond their normal range.
Vacuum while the upholstery is dry. Cover the surrounding panel as well as the visible spot, paying attention to:
- Crumbs and grit
- Hair
- Stitching
- Seams
- Creases
- Gaps beside bolsters
- Accessible anchor slots and recesses
Vacuuming first keeps loose debris from becoming slurry when cleaner is introduced.
Use an ordinary dry vacuum only for dry debris. If damp cleaner or rinse water must be recovered, use equipment explicitly rated for wet pickup or extraction and follow its instructions. Automotive editorial guidance distinguishes dry vacuuming from liquid recovery with a purpose-built extractor (Car and Driver’s upholstery-cleaning overview).
How to perform a patch test
Choose a hidden area made from the same material, such as a lower seat edge.
- Read the cleaner label, including its dilution, dwell-time, and surface restrictions.
- Apply the smallest practical amount as directed.
- Agitate only if the instructions call for it.
- Blot away the cleaner.
- Allow the test area to dry.
- Inspect it in good light and feel it with clean fingers.
Stop if you find:
- Color on the towel
- Discoloration
- A water mark or sharp ring
- Tackiness
- Stiffness
- Texture change
- Gloss change
- Softening, peeling, or other finish damage
If the material changes, do not randomly dilute the cleaner or move to a harsher product. Consult the vehicle manufacturer or a qualified automotive-upholstery professional.
Always follow the labeled dilution. A stronger mixture is not automatically more effective and may leave more residue to remove.
The Conservative Seven-Step Stain-Removal Process
The following sequence is a synthesis of recurring commercial automotive guidance rather than an independently validated universal protocol. A similar process—vacuum, test, apply, agitate, blot, recover moisture, and dry—is described in manufacturer cleaning guidance for cloth upholstery (Chemical Guys’ stain-removal guide).
1. Inspect
Identify:
- The upholstery material
- The likely stain category
- The age of the mark
- The visible boundary
- Whether it is wet, sticky, oily, crusted, or discolored
- Whether liquid appears to have entered seams or padding
If the substance is unknown, treat it as unknown. Do not apply a targeted solvent merely because the mark resembles ink or grease.
2. Vacuum
Remove dry solids, crumbs, hair, grit, and partly dried mud before adding cleaner. Vacuum beyond the visible spot so surrounding debris is not dragged into the treatment area.
3. Patch-test
Test the labeled, material-compatible cleaner in a hidden area and let the test dry. A patch test cannot prove that every section of the seat will react identically, but it may reveal visible incompatibility before you treat the main panel.
4. Apply sparingly
Apply a small amount of cleaner. When greater control is needed, put it on the microfiber towel or brush rather than spraying the seat directly.
Use enough to dampen the affected fibers or cleaning cloth—not enough to flood the panel. Exercise particular restraint around leather, vinyl, perforations, seams, and panel edges.
5. Agitate gently
Use short, controlled movements with microfiber or a soft-bristled brush. The purpose is to help the compatible cleaner contact the contamination, not to scour the upholstery.
Avoid:
- Stiff bristles
- Aggressive circular scrubbing
- Repeated friction on one small spot
- Picking at coated surfaces
- Unnecessarily expanding the wet area
Cloth may tolerate light agitation between its fibers. Leather and vinyl generally call for lower pressure to avoid visible surface change.
6. Blot and remove residue
Press a clean towel onto the area and lift it away. Rotate to a clean section as soil transfers. Do not continue wiping with a saturated or dirty towel.
If the product requires residue removal, use a minimally damp clean towel. Standard cloth may also be treated with a wet-rated extractor when the vehicle, cleaner, and equipment instructions permit it. Recover moisture without repeatedly rinsing the cushion.
Residue removal matters because excess detergent may leave fabric stiff or sticky and contribute to visible resoiling.
7. Dry and reassess
Press dry towels into cloth to recover remaining moisture. Wipe leather and vinyl dry. Ventilate the vehicle in a secure location by opening doors or slightly opening windows, and use a fan for gentle airflow if available.
Avoid high heat as a general shortcut; commercial cloth-care guidance recommends airflow and cautions against high-heat drying (Chemical Guys’ drying guidance). Keep the seat unused while the accessible upholstery looks or feels damp.
Reassess only after the surface has dried. A wet panel may conceal a remaining stain or make clean fabric look darker. If another treatment is appropriate, repeat the cautious process rather than increasing concentration, pressure, dwell time, and moisture simultaneously.
Surface dryness does not prove that deeply wetted foam is dry. A soaked cushion is a reason to stop DIY treatment and seek guidance.
How to Treat Stains on Cloth Car Seats
For standard fabric upholstery, choose a cleaner labeled for automotive cloth or upholstery, provided the owner’s manual allows it and the product passes a patch test.
Apply the seven-step process to a small section at a time. Lightly dampen the fibers, agitate with microfiber or a soft upholstery brush, and alternate agitation with blotting so you can monitor what transfers to the towel.
If the fabric becomes substantially wetter beyond the treated fibers, stop adding cleaner. The goal is not to wash the cushion beneath the upholstery.
Avoid detergent buildup
More foam does not necessarily mean more cleaning. Detergent-heavy mixtures may require repeated rinsing, and each rinse adds moisture. Informal testing on household dining-chair upholstery—not automotive seats—found that high-detergent formulas required repeated rinsing and prolonged drying (Bren Did’s upholstery-cleaner comparison).
If fabric feels crunchy or sticky after drying, retained cleaner is one possible explanation. Use a minimally damp clean towel or a compatible wet-rated extractor to remove residue cautiously instead of adding more detergent.
Water rings and uneven marks
After patch-testing, dealership guidance suggests lightly cleaning the affected fabric panel more uniformly rather than treating only the center. This may reduce an abrupt edge, but it does not guarantee an even result.
Some apparent water stains may instead be accumulated soil, prior cleaner residue, mineral deposits, abrasion, or a color change. Stop if treatment alters the surrounding fabric.
Recurring stains and possible wicking
A spot that looks improved when wet but returns after drying may reflect contamination migrating from below the surface. This is a possibility, not a conclusive diagnosis.
One cautious second treatment may be reasonable on ordinary cloth, but repeated surface applications add moisture without necessarily reaching the source. If the mark continues to return, discuss material-compatible extraction or professional assessment rather than endlessly soaking the visible spot.
Steam and hot-water extraction are not universally suitable. Compatibility depends on the upholstery, backing, vehicle instructions, and equipment.
How to Treat Coated Leather, Perforated Leather, and Vinyl
The main changes for leather and vinyl are product selection, lower moisture, and less agitation. Begin by vacuuming loose debris with a soft attachment, especially around seams and creases.
Coated leather
Use a dedicated automotive leather cleaner rather than fabric shampoo or an unverified household mixture.
- Review the vehicle and cleaner instructions.
- Patch-test in a hidden location.
- Put a small amount on microfiber or a soft brush when direct spraying would be difficult to control.
- Work gently over the affected area.
- Wipe away grime and cleaner with clean microfiber.
- Use a barely damp towel only if the product directs you to remove residue that way.
- Dry with a clean towel.
This limited-moisture process is consistent with retail automotive guidance that calls for vacuuming, hidden-area testing, soft-brush application, residue removal, and towel-drying (AutoZone’s automotive leather-cleaning guide).
For material stuck to leather, hold a slightly moist, compatible cloth against it briefly to soften it. Do not pick with a fingernail, scrape with a card, or use an abrasive pad.
Leather conditioner is optional, not an automatic final step. Use it only when the vehicle manufacturer permits it and the product is compatible with the upholstery finish and cleaner.
Perforated leather
Apply cleaner to the cloth or soft brush rather than flooding the seat. Work in small sections, wipe promptly, and keep product out of perforations and seams as much as practical.
If liquid has already entered many perforations, or the seat has ventilated sections with uncertain restrictions, stop adding moisture and consult the vehicle guidance.
Vinyl
Choose a product labeled for automotive vinyl. Patch-test, apply sparingly, wipe away both soil and cleaner, and towel-dry.
Vinyl can be mistaken for leather, and one seat may contain both. Confirm each panel instead of treating the entire seat according to one section.
Treatments not suitable as universal leather advice
Do not treat the following as general-purpose leather cleaners:
- Vinegar-and-oil mixtures
- Rubbing alcohol
- Hydrogen peroxide
- Nail-polish remover or acetone
- Fabric shampoo
- General multipurpose upholstery cleaner
- Laundry detergent
- Unlabeled household solvents
Source recommendations conflict, and compatibility with automotive coatings and dyes is not established across vehicles.
Escalate stains on aniline leather, suede-like upholstery, damaged or peeling finishes, valuable interiors, and widespread dye transfer. Do not experiment with successively stronger chemicals on these surfaces.
Choose a Treatment by Stain Type
Material compatibility comes first. Stain type then helps determine which category of compatible cleaner to consider. Absorbent powders and fabric agitation are principally cloth-oriented; leather and vinyl should be treated according to their separate material sections.
| Stain category | Immediate action | Conditional cleaner or method | Avoid | Escalate when |
|---|---|---|---|---|
| Grease or oily food on cloth | Lift solids and blot surface oil | Apply dry baking soda or cornstarch for roughly 15–20 minutes, vacuum while dry, then use a compatible grease-focused automotive upholstery cleaner if needed (Jax Kar Wash’s grease guidance) | Rubbing, wetting first, or leaving powder damp in seams | Oil covers a large area, has entered padding, or remains after cautious treatment |
| Coffee, juice, soda, or another sugary drink | Blot promptly from the edge inward | Use a material-compatible automotive cleaner sparingly and remove cleaner and sugary residue | Flooding with water or using detergent-heavy mixtures | The area remains sticky, develops odor, or returns after drying |
| Small, known milk, urine, vomit, or similar organic residue | Remove solids and blot liquid while avoiding unnecessary contact | Use an enzyme cleaner only if its label permits the identified upholstery | Treating stain removal as validated disinfection, masking odor with fragrance, or soaking the cushion | The residue is substantial, unknown, deeply soaked, or potentially hazardous; odor persists |
| Mud | Lift clumps and allow heavy surface mud to dry partly | Vacuum loose dry soil, then spot-clean the remaining mark | Scrubbing wet mud deeper into cloth | Muddy liquid has saturated the cushion |
| Ink or dye | Blot without rubbing | Use only a color-safe product labeled for the material after patch-testing | Universal alcohol treatment, aggressive solvents, or circular rubbing | Upholstery dye transfers, the finish changes, or the interior is valuable |
| Unknown stain | Remove loose matter and blot moisture | Begin with the least aggressive cleaner labeled for the material | Guessing, layering products, or rapidly increasing strength | Color transfers, odor persists, or the material cannot be identified |
| Blood or unknown bodily fluid | Isolate the area and avoid unnecessary contact | No detailed DIY protocol is provided here | Improvised stain treatment or disinfection | Obtain appropriate professional or manufacturer guidance |
The dry-powder grease step is recurring practical guidance, not guaranteed removal. For broader background on why oil stains are treated differently from water-soluble stains, see Stain List’s general grease and oil overview; it is not a car-seat-specific validation.
Sugary drinks require attention to residue. Even if the color improves, sugar and cleaner left in the fibers may leave a sticky or visible area.
For a small, known organic spill, an enzyme cleaner may be considered only when its label permits the identified material. Substantial, unknown, deeply soaked, or otherwise potentially hazardous biological contamination is outside this DIY guide.
With mud, patience may reduce spreading. Let heavy surface deposits dry partly, vacuum loose soil, and then treat the remaining mark. Do not leave a deeply soaked cushion untreated merely to make its surface easier to vacuum.
Ink and dye require restraint. Alcohol is often suggested online, but the available sources warn that it may affect some fibers, dyes, and finishes. Stain List’s general guide to different ink types explains why inks do not all respond identically, but it does not establish that its methods are safe for automotive upholstery.
Likewise, beverage chemistry varies. Stain List’s general red-wine stain guide may help explain why prompt blotting matters, but its fabric instructions should not override a vehicle manual or be transferred automatically to fixed automotive upholstery.
No method can promise complete removal of old, heat-exposed, deeply embedded, or chemically altered stains. A remaining mark may no longer be removable soil.
Household Remedies: What the Evidence Does and Does Not Support
Baking soda, vinegar, dish soap, laundry detergent, hydrogen peroxide, and rubbing alcohol appear frequently in online cleaning advice. Recipes, concentrations, dwell times, and compatibility warnings vary substantially.
That matters because “car seat” may mean porous cloth, coated leather, vinyl, microsuede, or a child restraint. A mixture that appears satisfactory on one fabric may leave residue, lighten another, or change a coated surface.
Baking soda
Baking soda may be considered conditionally as a dry absorbent for fresh oil or odor on some cloth or vinyl surfaces, subject to the owner’s manual and a hidden-area test. Remove it thoroughly while it remains dry.
Do not describe it as a universal stain remover or odor cure. Published manufacturer guidance for baking-soda pastes ranges from brief contact to as long as 30 minutes, but it does not establish one optimal dwell time across automotive materials (Arm & Hammer’s baking-soda guidance).
Avoid forcing powder into perforations, seams, controls, or inaccessible openings. Do not make a wet paste unless the vehicle guidance permits the application and a patch test succeeds.
Vinegar and dish soap
Vinegar-and-dish-soap formulas vary in concentration, water temperature, and detergent quantity. Their compatibility is not established for every automotive fabric, and they should not be treated as substitutes for leather cleaner.
Dish soap may create enough residue to require repeated rinsing. If that happens, the homemade mixture has increased both the moisture load and the drying challenge.
Laundry detergent
Excess detergent may remain in the fibers, create stiffness, and contribute to visible resoiling.
A product labeled for automotive cloth is easier to evaluate because its intended surface and application instructions are stated on the label.
Hydrogen peroxide
Hydrogen peroxide can lighten dark or saturated fabric. A hidden-area test may reveal an immediate problem but cannot guarantee that the visible panel will remain unchanged. Do not treat peroxide as a general brightener for automotive upholstery.
Rubbing alcohol
Alcohol may dissolve some inks, but it can also affect certain fibers, dyes, and finishes. The risk depends on both the ink and upholstery. Do not substitute it for a compatible stain product merely because a general online recipe recommends it.
Leather and household products
Do not use household acids, cooking oils, peroxide, alcohol, nail-polish remover, or multipurpose cleaners as universal leather treatments. Published recommendations conflict even about vinegar and mild soap. That conflict is a reason to default to a labeled automotive leather cleaner and vehicle guidance.
Do not improvise combinations of cleaning chemicals. The supplied evidence does not establish the compatibility or effectiveness of layered homemade mixtures. Follow one product label at a time, remove residue as directed, and do not apply another treatment to a still-wet seat.
Household methods are conditional options with limited support, not proven equivalents to manufacturer-approved care.
Drying, Troubleshooting, and When to Call a Professional
Drying is part of the cleaning process. A mark cannot be evaluated reliably while the upholstery is wet, and excessive retained moisture may contribute to musty odor or mildew. Commercial automotive guidance consequently recommends limiting liquid and recovering as much moisture as practical.
To finish:
- Press dry microfiber towels firmly into cloth.
- Rotate to clean, dry sections.
- Use a wet-rated extractor only when compatible with the upholstery and operated according to its instructions.
- Wipe leather and vinyl dry instead of leaving cleaner on the surface.
- Ventilate the vehicle in a secure location.
- Direct a fan across the seat rather than placing a high-heat source against it.
Do not rely on a fixed drying time. Humidity, airflow, upholstery material, seat construction, and the amount of liquid introduced all affect drying. Keep the seat unused while the accessible upholstery looks or feels damp.
There is no reliable consumer test in the supplied evidence that proves deep seat foam is completely dry. If the cushion was soaked, apparent surface dryness should not be treated as proof that the interior is dry.
If the fabric feels crunchy or sticky
Cleaner residue is one possible explanation. Do not add more detergent.
Instead:
- Check whether the product instructions permit limited water removal.
- Use a minimally damp clean towel to loosen residue.
- Blot repeatedly with dry towels.
- Use a compatible wet-rated extractor if permitted.
- Allow the accessible upholstery to dry and reassess.
If residue removal would require repeatedly saturating the seat, professional extraction may be the more restrained option.
If the stain returns
A returning stain may have migrated upward from contamination in the backing or padding, but recurrence alone does not prove the cause.
Stop after a limited, cautious attempt if the mark continues to return. More cleaner may enlarge the wet area without resolving deeper contamination.
If a mark remains but no soil transfers
The visible area may represent:
- Fading
- Abrasion
- Dye transfer
- Chemical discoloration
- Surface-coating loss
- A sheen or texture change caused by prior scrubbing
These are possibilities rather than diagnoses. Do not automatically move to a harsher chemical.
When professional assessment is appropriate
Consult the vehicle manufacturer or a qualified automotive-upholstery professional for:
- Soaked padding
- Persistent biological or musty odor
- Visible mold
- Repeatedly returning stains
- Widespread staining
- Extensive dye transfer
- Aniline leather, suede, Alcantara, or other delicate upholstery
- Damaged or peeling coatings
- A failed patch test
- Valuable or custom interiors
- A stain that remains after conservative treatment
Professional assessment does not guarantee removal. Its value is in evaluating the material, extent of wetting, and likely treatment limits before more moisture or chemistry is introduced.
Child-restraint warning
Clean a child-restraint cover, padding, shell, and harness only as its manufacturer permits. Do not apply general vehicle-upholstery chemicals to harness webbing without explicit authorization, and do not improvise heat, extraction, or soaking procedures. The restraint manual takes priority over every general method in this article.
Preventing the next stain
Keep clean microfiber towels in the vehicle so spills can be blotted promptly. Vacuum regularly to keep grit and food out of seams. Address spills before they dry, and apply a protectant only when the vehicle manufacturer permits it and the upholstery is no longer damp.
The practical decision rule is simple: identify the upholstery, follow the vehicle manual, patch-test, use the least cleaner and moisture necessary, remove residue, and allow the seat to dry. If the material is specialty upholstery, the cushion is soaked, odor persists, the stain returns, or the surface changes during testing, stop escalating DIY treatment and consult the manufacturer or a qualified automotive-upholstery professional.
Can I use vinegar and dish soap to remove stains from car seats?
Only conditionally. Vinegar-and-dish-soap recipes are commonly suggested for fabric, but their concentrations vary and broad compatibility with automotive upholstery has not been established. They may also leave enough detergent to require repeated residue removal.
Check the owner’s manual first. For standard cloth, a cleaner labeled for automotive upholstery is the more easily evaluated choice. Do not use vinegar and dish soap as a universal treatment for leather, specialty upholstery, perforated surfaces, or child-restraint components.
How do I remove an old stain without leaving a water ring?
Vacuum first, then patch-test a compatible cleaner. Use minimal moisture and feather the application rather than repeatedly soaking only the center. On standard cloth, lightly treating the affected panel more uniformly may reduce a hard boundary, but the result is not guaranteed.
Blot or extract moisture evenly and provide airflow. If the mark returns after drying, stop repeated surface soaking and seek guidance about material-compatible extraction.
How long should car seats dry after stain removal?
There is no universally reliable number of hours. Drying depends on humidity, airflow, upholstery material, seat construction, and how much moisture entered the seat.
Towel-extract as much liquid as practical, ventilate the vehicle securely, and use a fan if available. Keep the seat unused while it looks or feels damp. If the cushion was soaked, surface dryness does not prove that deeper foam is dry.
Can I use a vacuum or extractor on a damp car seat?
Use an ordinary dry vacuum only for dry crumbs, dust, hair, and powder unless its manufacturer explicitly rates it for wet pickup.
A wet-dry vacuum or upholstery extractor may recover damp cleaner and rinse water when the equipment, upholstery, and vehicle instructions permit it. Do not assume that extraction, steam, or hot water is compatible with every cloth, leather, perforated, ventilated, or specialty seat.
When is a car-seat stain too deep for DIY cleaning?
Stop DIY treatment when the cushion is soaked, liquid has entered several seams, biological or musty odor persists, the stain repeatedly returns after drying, or visible mold is present. Delicate upholstery, widespread dye transfer, finish damage, and failed patch tests are additional reasons to stop.
A deep stain may require controlled extraction or another material-specific treatment, while a permanent color or finish change may not be removable. Continuing to add cleaner can make either problem harder to assess.